How to make Maple Caramels

Maple Cream Caramels

Maple Cream Caramels


These caramels have been on my ever expanding list of things I’d like to make for a while now.  I decided that since Halloween is just within our grasp, why not make these as a special Halloween treat.   One of my all time favorite Halloween treats are caramel apples. My mom always bought a package of caramels and on Halloween night we would melt them and make caramel apples.  If you have never made caramel before there can be some pitfalls.  You’ll need a thermometer that can read temps above 250F.  This caramel needs to be heated to 248F.  While cooking, it took a considerable amount of time for my caramel to go from 228F to 248F.  This happens quite often when making candies of this type.  The first time that I made caramel I thought that my thermometer was broken, but it was not. My thermometer just would not go past 230F.  I turned my thermometer off and on, recalibrated it, and yet when I placed it in my caramel it would not budge beyond 230F.  My caramel had reached a plateau. When making candy it takes a considerable amount of energy to burn off enough water to reach a higher temperature.  This plateau  typically occurs at temps between 230-240F.  Simply put, do not be surprised or thrown off if you put your thermometer in your caramel and the temperature stalls at 230F and does not rise for 10 minutes.  It’s completely normal, and once the water cooks out the temperature will rise.  Give it time.  If you don’t the caramel will not set–great if you just want to use this to coat apples, but bad if you want to have them set as a candy.

Pin It!

Pin It!


Here’s what you need:

Ingredients

1 cup of organic sugar

1 cup of  organic heavy cream

1/2 cup maple syrup

4 tablespoons of butter

1/2 teaspoon maple extract

1/4 cup of water

3 tablespoons of organic corn syrup

1/2 teaspoon of sea salt

Directions:

Line a 9 by 11-inch pan with parchment paper spray lightly with oil and set aside. Heat the cream, butter, salt, and maple extract in a sauce pan, once butter melts, remove from heat and set aside.

In a large saucepan add the remaining ingredients:

Bring to a boil over medium heat without stirring,

Processed with VSCOcam with c2 preset

Once the sugar completely dissolves, slowly add the cream mixture, be careful the mixture will boil violently:

Processed with VSCOcam with c2 preset

Reduce the heat to medium-low, and cook until the temperature reaches 248F.  Remember, going from 230F to 248F could take some time, but keep an eye on it, do not walk away.  The mixture will become less watery and more thick and candy-like as it nears 248F:

Processed with VSCOcam with c3 preset

When it reaches 248F it will be very thick:


Processed with VSCOcam with s3 preset

Processed with VSCOcam with c3 preset

Thick enough to coat a spatula:

Processed with VSCOcam with c3 preset

Pour it into the parchment lined pan and let cool for 2 hours.


Once cool cut into bite size pieces and enjoy!


Avocado and Cilantro Crema

Avocado and Cilantro Crema

Avocado and Cilantro Crema


We have a black bean tostada night once every 2 weeks.  It’s simple, and definitely a lazy girl dinner, because I open a can of black refined beans heat them then add them to a piping hot and crisp tortilla. I top the tortilla with cheese, sliced tomatoes, cilantro, and either a fresh guacamole or this Avocado Crema.  The result is a delicious and lazy dinner! Simple ingredients, but oh so good. My husband raves about this dinner every time we have it. The best thing about this is that you throw everything into a blender and a minute later the sauce is done. If you want to make this vegan, paleo or Whole 30 approved just omit the yogurt and replace with 1/4 cup of water.


Pin It!

Pin It!


Here’s what you need:

Ingredients

1 large ripe avocado

3 tablespoons of yogurt–can sub sour cream

1/4 cup of cilantro

juice of 1/2 lime==more if you like

1/2 teaspoon of garlic powder

1/2 teaspoon of onion powder

Sea salt to taste

Directions:  Add all the ingredients to a blender.

Processed with VSCOcam with k2 preset

Blend on high until smooth and lump free.

Processed with VSCOcam with k1 preset

Serve and enjoy!

Processed with VSCOcam with k1 preset

Peruvian Chicken

Processed with VSCOcam with s3 preset


I love California, as a matter of fact I’d be hard pressed to name a state within this union that I’d consider leaving California for.  One of the many great things about living here, besides the diversity here, is the weather.  On a great day, the temperature ranges between 78F and 82F.  Since we live by the beach, there is seldom a day without a cool ocean breeze.  Lately however, the temperatures have been 10-20F degrees above normal, and for the last two weeks temps have settled in around 89-98F—HOT!!!!!!  So hot that the last thing I want to do is to turn on the stove.  So we’ve adapted, I’ve been marinating meat in the morning for my husband to grill in the evening when things start to cool down a bit.  This marinade is super simple, and if you’ve ever had grilled Peruvian chicken you know how yummy and it can be.  The vinegar in this really gives this chicken a yummy tang and kick.  I’ve tried this with Rice vinegar and white wine, both are yummy, but plain white distilled vinegar is just as yummy.


Pin It!

Pin It!


Here’s what you need:

Ingredients

1 lb of boneless skinless organic chicken thighs

1 tablespoon cumin powder

1 tablespoon of smoked paprika

3 cloves of garlic grated

1 tablespoon of white wine vinegar–can sub with white vinegar or rice vinegar

1 tablespoon of olive oil–can sub with oil of your choice

sea salt to taste

Directions: Generously season the chicken with sea salt and set aside.  Add the cumin powder, paprika, garlic, oil, and vinegar to a pan or a bowl big enough to marinate you chicken in.

Mix well,

Then add chicken,

Processed with VSCOcam with c1 preset

Toss to coat the chicken in the marinade.

Processed with VSCOcam with s3 preset

Cover with foil, refrigerate until you’re ready to grill.  Cook chicken on a hot grill for 15-20 minutes, or in an oven set on 425F  15-20 minutes.  Serve and enjoy!  I served this with a delicious Avocado and cilantro crema,  I’ll post the recipe for that soon–sooo yummy!  This chicken also makes for great chicken taco’s!

Processed with VSCOcam with s3 preset

Processed with VSCOcam with s3 preset


How to Make Queso Fresco Cheese

How to maker Queso Cheese

How to make Queso Fresco Cheese

This week I’ve spent a lot of time in the kitchen making things that I had on my “list of things I want to make”–yes I actually have a list. This cheese has been on that list for quite some time.  It’s so unbelievably easy to make that now I am left to wonder why it took me so long to try it.  It’s also a great way to use milk that would not get used otherwise. This cheese was a great addition to  my Peruvian Chicken taco’s that recipe will be on the blog tomorrow.

Here’s what you need:

Ingredients

1 quart of whole organic milk

2 -3 Tablespoons of fresh lemon juice–can sub with vinegar

Sea salt to taste

Equipment:

cheesecloth

Sieve

Directions: Add the milk to a saucepan,

Heat the milk to 180F whisking to prevent the milk from scorching.

Once the milk reaches 180F remove from heat.

Add the lemon juice or vinegar 1 tablespoon at a time, stirring gently until the curds separate from the whey. This happens almost immediately.

Allow the curds to continue to separate, let the mixture sit in the pot uncovered for 15-20 minutes.


Processed with VSCOcam with f2 preset


Processed with VSCOcam with f2 preset

From here you can decide to just strain the mixture in a cheesecloth lined sieve, add salt to taste and be done–you’ll have a perfectly soft crumble cheese.

Processed with VSCOcam with s1 preset

Or you can strain, then squeeze out excess whey, add salt, form into a ball, and press into a firmer queso,

I placed my queso into a circular cookie/biscuit cutter, which I wrapped in my cheesecloth, and then placed a sealed water-filled 4-ounce mason jar on top for 5-10 minutes to squeeze out excess whey.  I placed these items over a sieve with a bowl underneath to collect the whey.

For a firmer paneer type cheese extend the time that the cheese is pressed from 10 to 20 minutes. Refrigerate if you don’t plan on using the cheese right away.  It will keep in the refrigerator for 3-5 days.


Processed with VSCOcam with h3 preset


Processed with VSCOcam with h3 preset

Korean Barbecue Chicken

Korean Barbecue Chicken

Korean Barbecue Chicken

Pin It!

Pin It!


I love Korean barbecue, what’s not to love?  Grilled meat, pickled and fermented veggies…mmmh it’s a veritable umami bomb on a plate.  The fermented veggies alone are enough to get me into the door of a Korean restaurant.  I love banchan, savory sprouts, kimchi, cucumber kimchi, and daikon radish make the heaviness of the barbecued meats lighter.  I remember my first experience eating Korean food.  The week of my wedding my best friend suggested that we go to a Korean bath spa together.  She said it would be a great mini break for me to table the stress of planning a wedding, and at the same time get my skin nice and polished for the wedding.  I happily agreed, we had gone to many a spa together throughout our friendship, so why not make another happy memory with my best friend before I sailed off into wedded bliss, I thought.  The day before our appointments my best friend called to say that something came up at work and she could not join me, but she insisted that I go alone because I needed to destress, so I did.  The spa was unlike any other spa I had ever been to. After checking in, I was led on a guided tour of the steam rooms, jade rooms, and showers.  Everyone within the walls, except for the technicians, was completely naked and Asian.  I stuck out like a sore thumb.   First of all, I wasn’t at all prepared to be completely naked in front of anyone other than a technician. At all the spa’s  that I had ever been to everyone wore something, be it a robe, or bathing suit, but not this spa.  I also was not prepared to leave without having had my body polish.  I had read the Yelp reviews and this place was the best!  I wanted to sparkle and shine at my wedding and the only thing standing in the way of that happening was me getting naked, so I did.  I was sitting in the sauna with three women, and they could sense my unease.  They were so kind, they chatted me up, and when I felt comfortable one of them asked me how I found out about the spa.  I told them and they laughed.  I’m guessing that the spa didn’t get very many non-Asian patrons, which is too bad, nakedness aside, it was a great spa. The spa lacked the more polished elegance of a Burke Williams, but what it lacked in elegance, it made up for it other areas, namely the food area.  After getting my scrub, and detoxing in the sauna, I walked over to the jade rooms, and just beyond that was a bar and the scent coming from the bar was intoxicating.  The bar/restaurant had a full menu of soups with fermented and pickled veggies, JACKPOT! I grabbed a folded robe from a pedestal near the entrance into the bar–you didn’t think they would make us eat naked did you?–and sat down to a deliciously healthy meal.  If only all spa’s included this kind of service.  That was my first experience eating Korean food, and since then I’ve fallen in love with it.  This recipe is my take on chicken Korean barbecue.  I have to say that this chicken is delicious!  Better than the chicken that I’ve had at most restaurants that I’ve been to.  This recipe requires Gochujang–a spicy fermented chili paste. You may need to venture into an Asian market for the Gochujang.  I purchased a jar at my local Whole Foods, they had several varieties of it, I chose a garlic Gochujang.


Here’s what you need:

Ingredients:

1lb of boneless skinless organic chicken thighs, cut each thigh into 3 or 4 pieces

1.5 tablespoons of Gochujang

2 teaspoons of sugar–can sub with maple sugar or syrup

1 teaspoon of garlic grated

3 green onions chopped finely both whites and green parts

1 teaspoon of grated ginger

2 teaspoons of sesame oil

1 teaspoon of olive or grapeseed oil

2 tablespoons of soy sauce

sea salt to taste

Directions: Season the chicken with sea salt and set aside.

To a large mixing bowl or medium size bake pan add the remaining ingredients,

combine and mix well,

then toss in the chicken, tossing to coat the chicken completely in the marinade.

Cover with foil and place in the refrigerator for at least an hour.

Remove the chicken from the refrigerator 30 minutes before cooking.  Grill the chicken on a hot grill, 5-7 minutes on each side, serve and enjoy!


Ginger Garlic Fried Rice

Ginger Garlic Fried Rice

              Ginger Garlic Fried Rice

Ahh…rice. The staple food for many cultures.  In fact, rice is so important to my good friend Gina’s parents that they will not even travel without bringing along their rice maker.  It’s the first thing her mom unpacks in the hotel room. My husband and my daughter are huge fans of rice.  Page is a particular fan of basmati, and I can’t say that I blame her.  A good basmati  is aromatic, light and airy, like eating a cloud.     I don’t cook rice that often, so even a small bag could last us months.  Whenever I do make rice, as much as my husband and daughter love it, we always have leftovers.  I hate to throw it away so I always try to find a way to use it.   Page loves fried rice–who doesn’t?  She is a particular fan of my Crab Fried Rice.  But we don’t always have crab in the house.  So I use what I have, usually a few vegetables, and an egg.  One of the fish restaurants we frequent makes a garlic rice that Page just devours. So I decided to do my own take on the garlic rice which she loves so much.

Pin It!

Pin It!


Here’s what you need:

Ingredients

2-3 cups of room temperature left over rice

1/2 teaspoon of tumeric

1 tablespoon of minced garlic

1 tablespoon of minced ginger

1 tablespoon of oil

sea salt or soy sauce to taste

Directions: Add the oil,  garlic,  tumeric and ginger to a saute pan and heat on medium heat until garlic and ginger slightly brown,

Processed with VSCOcam with s1 preset

add in the rice, toss until rice is heated.

Processed with VSCOcam with c1 preset

Transfer to a serving bowl, season with soy or sea salt, and a drizzle of sesame oil, garnish with cilantro, serve and enjoy. This is AMAZING with my Korean barbecue chicken, stay tuned for that recipe tomorrow!

Processed with VSCOcam with s5 preset

Berbere Spiced Lentil Stew (MISR WOT)

Berbere Spiced Lentil Stew

Berbere Spiced Lentil Stew


So I’ve decided that this will be my last post until the summer is over.  Mainly because we’ll be traveling for at least  three weeks in August, and today is Page’s last day in her summer program at school.  We have about a week of lounging around and playing in the back yard before she starts her Spanish immersion summer program.  I want to spend as much time as I can with her, without looking at my phone to do all that blogging requires of me.  I’ll be sure to update my Instagram account with all of my food adventures–as usual.  So if you aren’t following me on Instagram, click on the link to the right to do so.  Now to the recipe. Berbere Chicken was one of the first recipes that I shared on this blog.  It’s one of Page’s favorite chicken dishes–although lately it is getting some strong competition from Sous Vide Chicken Thighs with Thyme and Garlic. She still love this chicken nonetheless. After making the chicken the last time, I was so impressed with the flavors, I wanted to add it to something else, and then it occurred to me how awesome this seasoning would be on lentils, in a soup.  As I walked around my kitchen, grabbing ingredients and  formulating a recipe in my head, lentils, tomatoes–because my garden is overflowing with them, onion, garlic, lemon, and berbere spice, it occurred to me that I had these flavors before in a dish at an Ethiopian restaurant.  Sure enough there was a recipe for a stew by none other than Marcus Samuelson.  While I did not follow his recipe exactly, my own isn’t so far off.  I used some Organic Green French Lentils, which I sprouted.  His recipe and I guess the traditional recipe calls for red lentils. I added some of the preserved lemon salt  I made to my bowl as a finish.  If you haven’t made my preserved lemon salt yet, a little preserved lemon would be awesome with this.

Pin It!

Pin It!


Ingredients

1 cup of sprouted organic green lentils

1 large tomato chopped

1 small onion, chopped

4 cloves of garlic

2 tablespoons of oil –your choice I used butter

2 tablespoons of berbere spice

1 lemon cut into wedges

3 cups of water

Ingredients for Berbere Spice

Ingredients:
3 Tablespoons of Paprika I used a smoked
1 tablespoon of red pepper flakes
1 tablespoon of ground ginger
1 tablespoon of cumin seeds or ground cumin
1teaspoon of ground turmeric
1teaspoon of sea salt
1 teaspoon of fenugreek powder, or seeds
1 teaspoon of coriander
6 cardmom pods or 1 teaspoon of ground cardamom
1/2 teaspoon of ground cinnamon
1/2 teaspoon of allspice
1/2 teaspoon of black peppercorns
8 whole cloves

Directions for spice blend:
Place all the spices in a dry cast iron skillet and cook over medium high heat, stirring constantly until toasted about 3-5 minutes. Cool completely  place all ingredients in a spice grinder or blender until finely ground. Transfer to an air tight storage container for up to 3 months.

Directions: Heat the oil along with the onion, and garlic and cook until onion is translucent.

image

Add in the lentils and berbere spice.

image

Allow the mixture to cook for 2-3 minutes, then add in the tomato,


image

cook for another minute or two,


image

then add in the water.  Bring to a boil, then allow the lentils to simmer for 20-30minutes, or until lentils are tender.

image

You can serve at this point, by adding the stew to a bowl and squeezing a few lemon wedges over the soup.  I wanted a little more texture, so I blended a quarter of my lentils then added them back into the stew.

image

It made the soup thicker and creamier.  Delicious either way!

image

Grilled Zucchini and Avocado with White Wine Vinaigrette

Grilled Zucchini with Avocado and White Wine Viniagrette

Grilled Zucchini with Avocado and White Wine Vinaigrette

T’is the season–for zucchini that is.  It is at almost every stand in my farmers market, piled into beautiful towers at my local Whole Foods, and in glistening plastic packages in my local Trader Joe’s.  There is no escaping it–not that I’d want to. Zucchini is one of those vegetables that if you plant it–you will be rewarded with an enormous bounty–so it’s no wonder that it is everywhere right now. So what do you do with an enormous bounty of zucchini?  Cook it. Pickle it. Give it away–even in secret as some of my neighbors have, by leaving an anonymous  bag full of zucchini on my doorstep.  It’s a good thing that I happen to like zucchini.  This recipe happens to be something that came about as an accident.  I was planning on making my favorite saute of zucchini and mushrooms but my plans and Page’s needs sometimes collide and I had to make an adjustment.  In this case, I had some deliciously ripe avocado’s that Page insisted that I serve her for dinner.  I had already begun to slice the zucchini so I had to cook it. So I decided why not just combine the two and make a salad of sorts. Boy, am I glad I did. I used a white wine vinaigrette, but this is great with a lemon garlic vinaigrette too!


Pin It!

Pin It!


Ingredients:

2 medium zucchini, sliced

2 large avocados, sliced

1/4 cup of feta cheese (optional)

1 tablespoon of parsley, finely chopped

2 tablespoons of olive oil or grape seed

2 tablespoons of butter or ghee

sea salt and black pepper to taste

For Vinaigrette

3 tablespoons of white wine vinegar

1 tablespoon of olive oil

sea salt to taste

Directions: Mix the ingredients for the vinaigrette in a small bowl and set aside. Heat the oil and butter in a saute pan.

image

Once hot, add the zucchini slices to the pan and cook until brown–about 2-3 minutes on each side.

image

Transfer the zucchini to a plate, season with sea salt and black pepper.

image

Slice the avocado and arrange in a single layer on a plate.  Top the avocado with the grilled zucchini.  Sprinkle with feta if using, then sprinkle with parsley. Lastly top with vinaigrette, serve and enjoy!

image


Is The Hybrid Fruit You’re Eating GMO?

image


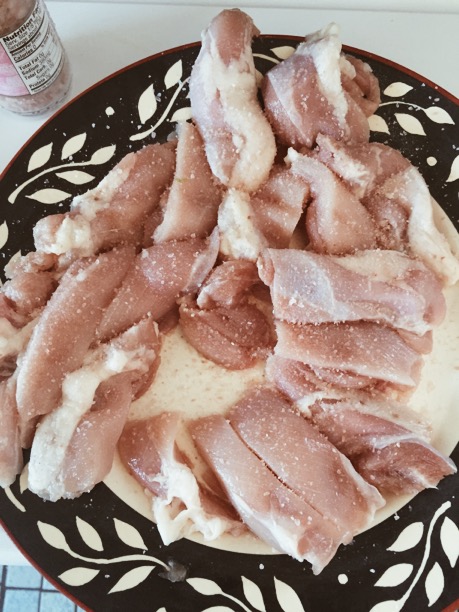
This past Sunday as I made my way through the crowded aisle of my favorite Farmer’s market, my eyes landed on a sign.  It said: Mango flavored nectarines $3.00/ lb.  Underneath the sign were about 30 or 40 ball-shaped yellowish-brown fruit with a pinkish tinge. The fruit looked like it had been badly sunburned. It was spotted with dark brown spots, which made the skin look tough and leathery, sort of like the skin on a mango. Definitely not the most beautiful nectarines that I’ve ever seen. However, the fruit was at one of my favorite organic fruit stands.  It’s often the last stand that I visit, so by the time that I get there, my canvas farmers market bags are full and my $40 produce budget is a few dollars shy of being depleted.   Just above the 30 or 40 nectarines was a clear plastic container that housed samples of what looked like short mango wedges–coral-orange, and brightly beautiful.  I took one and tasted it.   As the sweetness and acid from the mango flavored nectarine hit my taste buds, I moaned, a Mmm…escaping my lips. It was sweet like a mango, but crisp, with the slight bitterness of a nectarine–in short–AMAZING!  I guess my moan must have been louder than I thought, because a woman standing next to me, who had been eyeing a bin of seedless watermelons, turned around to ask me what it was that had elicited that response from me. I told her, as I stuffed another sample into my mouth, all while simultaneously loading a brown bag with as many of the nectarines as the $3.75 I had left from my $40 farmers market budget could afford me.  The lady leaned in and asked me in a low whisper–“are those GMO?”

It is a question that I have heard more than once.  It usually comes in the form of “how do they get the seeds out of watermelon without genetically modifying them?” If you’re reading this, then you’re probably wondering also. It’s also an argument that I’ve heard used as proof that GMO’s are safe–I’m eyeing you, Neil deGrasse Tyson and Bill Nye–I’m giving you both the side eye actually #unamused.  So I want to answer it here.   But in order to answer it, I must first pose the underlying question of what that lady was asking me, and what proponents of GMO foods imply when using it as an argument in favor of GMO foods.  The question being:  Is there a difference between the centuries-long use of hybridizing by farmers and  the modern use of biotechnology to create GMO produce and animals, and is it the same thing? The short answer is NO it’s not the same!  Now let me explain why.

GMO

Genetically modified foods cross the species barrier.  They are for lack of a better analogy, a frankenfood–which is actually a spot on analogy if you ask me! They are conceived in a lab and can be the amalgamation of DNA from the same species, or they can be an amalgamation of DNA from a completely different species–something that is totally not possible in nature.  One such example of such an amalgamation is that of the “fishy tomato.”   This was a case in which, the genes of an arctic flounder fish were combined with those of a tomato.  The hope was  that it would prevent the tomato from freezing–thus allowing tomatoes to grow in even the coldest weather.  Fortunately for us, these two species were not a love match, and the company that created it dropped it, and never sent it to be sold on the market. Some people say the reason they did not put it on the open market was because, people found out and protested.  Either way, I, for one, am glad that it never made it to the market.  Beyond linking the DNA of animals and plants, genetically engineered foods have also been created to withstand specific pesticides like Roundup, and to produce pesticides within their own tissues, to ward off pests.  The latter of the two has resulted in insects that are even more resistant, superbugs if you will, and instead of farmers needing to spray less because the pesticides were added to the DNA of the plant, farmers are spraying more than they ever have.  So those who consume these plants are effectively risking a–in my best Robert De Niro voice– double dose– of pesticides–not good for us or our pollinators! See this article on the plight of bees.

Hybrid fruits and vegetables

Tyson and Nye are right about one point,  farmers and breeders have been using artificial selection to manipulate our food supply for some time.  But the process by which they do that, and the food that they produce, is far from the foods produced through biotechnology. Unlike with GMO’s, farmer’s and breeders can only create within the confines of what is naturally possible.  They can only match species to species, in order to create a different variety of that species. As in the case of my mango nectarine.  Mango’s and nectarines are both stone fruits. As are pluots–which is a plum and apricot mix. The process is simple, farmers cross-pollinate two different plants/trees within the same species, and that creates a hybrid with the desired characteristics of the parent trees/plant. Other examples of hybrid produce include, different varieties and kale, broccoli, carrots,  seedless watermelons and grapes, citrus like tangelo’s, and grapefruit–the list could go on and on, however, unlike with GMO’s hybridization is not man-made–it is nature made, and as such it occurs in nature without the help of man. So all of the aforementioned produce could be made in nature over time. Through hybridization, man has sought only to guide the natural process that is cross-pollination.


GMO foods have ventured completely outside of the box of guiding, by splicing the DNA of animals with insects, or animals with plants, or plants with bacteria–we are no longer guiding, we are playing GOD. These GMO crops have had a disastrous effect on our environment and our ecosystem. For the first time in human history, we are faced with the possibility of living in a world without bees. Considering the fact that bees pollinate a large portion of our food supply, pause and consider, what living in a world without them could mean! The worst part of all of this–as if that weren’t bad enough–is that we have no idea where any of this will lead us, or if it’s safe. We need long term, third party testing to know for sure.  Maybe, just maybe we are at a tipping point?  One thing that we can always be sure of is that natural selection always wins out–hopefully it will continue to be on our side.

Sauteed Chard with Lemon, Garlic and Shallots

Sauteed Chard with Lemon, Garlic and Shallots

Sauteed Chard with Lemon, Garlic and Shallots

Chard is an under rated vegetable.  It’s one of those vegetables that doesn’t get it’s due.  Probably because it has to contend with other vegetables that hog the spotlight, like kale, broccoli, and cauliflower.  I think that if more people knew how easy it is to cook chard, and how delicious it is, it would be a star in their dinner line up.  This recipe for chard is one of my favorite chard recipes.  It’s super easy, quick, and oh so delicious!

Pin It!

Pin It!


Ingredients

1 bushel of chard about 4 cups chopped roughly

1 medium shallot sliced thinly

4 small cloves of garlic

1 tablespoon of fresh lemon juice, more if you’re so inclined

2 tablespoons of cooking oil

sea salt to taste

Directions:  Heat the oil along with the garlic and shallots over medium heat.

image


Cook the shallots and garlic until shallots turn translucent, about 1-2 minutes.

image

Add in the chopped chard, season with sea salt and saute until wilted.

image


image


Turn the fire off and add lemon juice, toss then serve.  Yup that easy! AND So, so , so delicious!!


image