Caesar Salad–The best recipe you’ll ever find


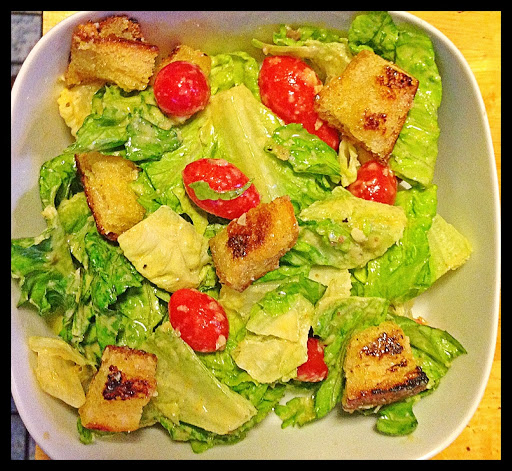
I LOVE Caesar salad. Besides Greek salad, Caesar salad is my go to salad of choice. I love everything about Caesar salad, the romaine, the croutons, the tangy dressing, Caesar salad is just yummy! Although Caesar salad has a creamy dressing, it never feels heavy. I don’t buy salad dressings, I always make my own. Although store bought is great in a time pinch, most store bought salad dressings have so many additives, that I tend to just skip buying them all together. I don’t want to even imagine what most store bought Caesar salad dressings have in them!  I have made Caesar salad dressing at home with with a shortcut like Vegenaise, which is a vegan alternative to mayo. I’ve never been a fan of mayo, so if I need anything that calls for mayo, I just use the vegan alternative. This particular recipe uses 2 raw egg yolks, so your essentially making your own mayonnaise.  Since we are using raw egg yolks, make sure you use pasteurized egg yolks. I wouldn’t want anyone to get sick. If you’re not a bread person skip the croutons, but these are so good you should definitely try them. Use your favorite artisan bread. I picked up a fresh loaf of sourdough at a local bakery, but a ciabatta or any other fresh bread will work.

Pin It!

Pin It!


Ingredients:

1 clove of garlic pasted

2 Tablespoons of lemon juice

1/2 teaspoon of worcestershire sauce

1 tablespoon of anchovy paste

2 large egg yolks

1/4 cup grape seed oil

5 teaspoons of olive oil

3/4 cup of freshly grated parmesan cheese

black pepper to taste

2-3 romaine hearts, roughly chopped (rinsed and dried)

For Croutons:

1/4 cup of extra virgin olive oil

1/2 teaspoon of garlic paste

5 cups of a fresh artisan bread of your choice

4 tablespoons of water

1/4 teaspoon of sea salt

2 tablespoons of finely grated parmesan cheese

Directions for Croutons: Combine garlic paste and 1 tablespoon of oil in a small bowl and set aside.  Place bread cubes in a large bowl.  Sprinkle with water and salt.  Toss, squeezing gently so that the bread absorbs the water.

    •  
    • Place remaining 4 tablespoons oil and soaked bread cubes in 12-inch nonstick skillet. Cook over medium-high heat, stirring frequently, until browned and crisp, 7 to 10 minutes. Remove skillet from heat, push croutons to sides of skillet to clear center, add garlic/oil mixture to clearing and cook with residual heat of pan, 10 seconds:
 
Sprinkle with Parmesan; toss until garlic and Parmesan are evenly distributed. Transfer croutons to bowl; set aside:
 
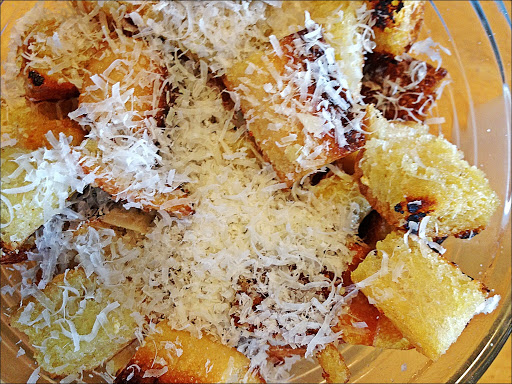
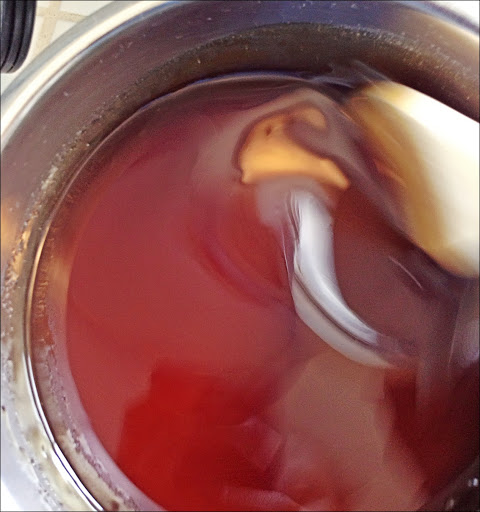
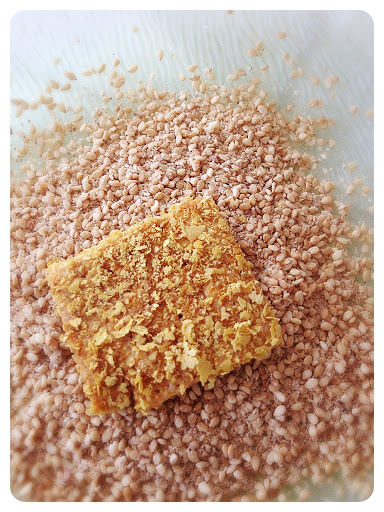
  1. FOR THE SALAD: Whisk garlic paste and 2 tablespoons lemon juice together in large bowl. Let stand 10 minutes, VERY IMPORTANT: DO NOT to skip this step, otherwise your salad dressing will be taste too garlicky.


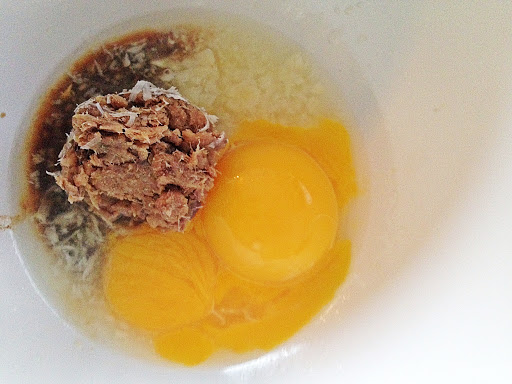
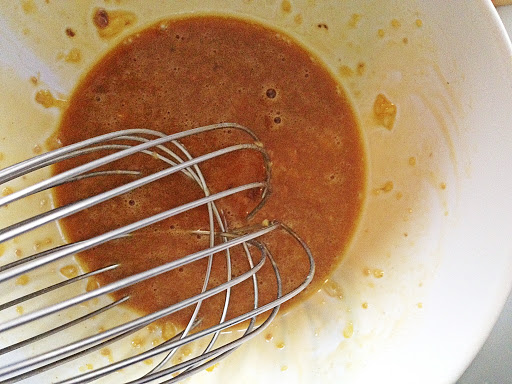
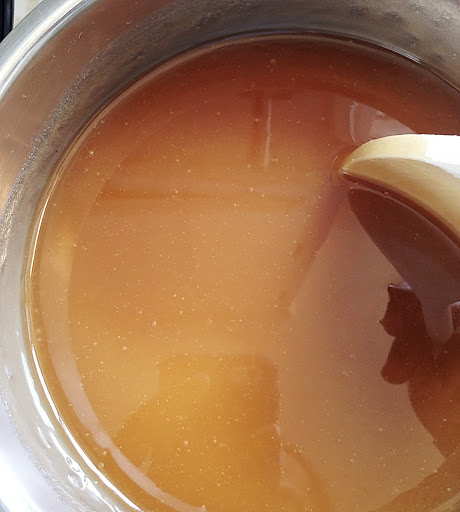
  2. Whisk Worcestershire sauce, anchovies, and egg yolks into garlic/lemon juice mixture. 


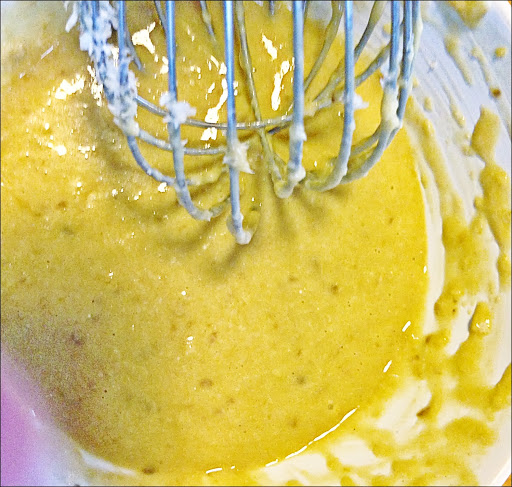
    While whisking, drizzle grape seed oil and extra virgin olive oil into bowl in slow, steady stream until fully emulsified.


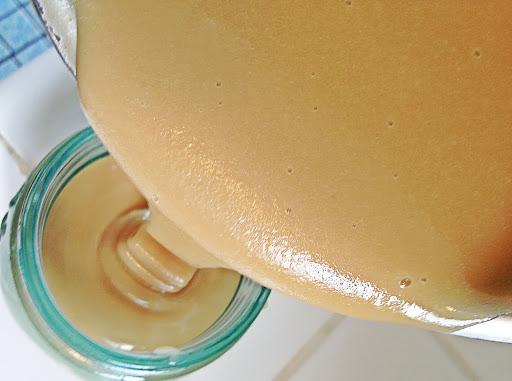
     Add 3/4 cup Parmesan and pepper to taste; whisk until incorporated:


  3. Add romaine to dressing and toss to coat. Add croutons and mix gently until evenly distributed. Taste and season with up to 1 additional tablespoon lemon juice:

     
    You can add chicken to this if you like, and it will be just as delicious!
     
    What’s your favorite salad?
     
    Follow and Like me on Facebook: http://www.lazygirldinners.com


Red, White, & Blueberry Crumble Tart


I love July fourth! It means getting together with family and friends to celebrate America’s independence with great food, drinks and at the end of the day beautiful fireworks.  This year is especially exciting for me because, it’s the first year that my daughter is old enough to watch and enjoy the fireworks. There is something so special about being able to view things like this through a child’s eyes. I thought I would revamp my Strawberry crumble tart with this healthier gluten free version, and add a little blue to make it more festive. Feel free to use any berry that you like for this, raspberries and blackberries would be an awesome alternative.  

Here’s what you need:
1/2 cup of almond meal 
1/2 cup of oats
4 tablespoons, or half a stick of cold butter, cut and cubed, 
a dash of cinnamon
1/2 cup of maple sugar, ( can also use coconut sugar, or brown sugar)
1pint of fresh strawberries (sliced)
1 pint of fresh blueberries 

Whipped cream: 
2 cups of heavy whipping cream
1/2 teaspoon of vanilla extract
5 tablespoons of maple syrup or agave

 Place the almond meal, oats, butter, sugar, and cinnamon into a food processor an pulse until it looks like this:
Place one tablespoon of the mixture into muffin tins:
Bake on 400 until golden brown about 10-15 minutes
Remove from oven and allow to cool. 
In a stand mixer add 2 cups of heavy whipping cream and 5 tablespoons of maple syrup, and 1/2 teaspoon of vanilla extract:
Whip until peaks form.  Layer the strawberries, blueberries and whip cream on top of the crumble and enjoy!

Happy Independence Day my fellow Americans!  What is your favorite food to eat on July 4th?

Follow and like me on Facebook : http://www.facebook.com/Lazygirlblog

Lamb chops with a spicy mustard sauce

Lamb is always a quick go to meal in our house. We love to grill lamb chops, or broil lion chops in the oven. Since I cook lamb chops so often, I have conjured up several types of sauces to go on the lamb chops to mix things up a bit. I’ll share many of them with you at some point, however, this spicy mustard sauce is one of my favorites. All in all this lamb chop dish takes 15 minutes, and that includes the time it takes to make the sauce! I use my tabletop convection oven to broil these loin chops. You can use your oven. If you use foil to line your sheet pan like I did, then clean up is just a trash toss away! Doesn’t get more lazy than that!:-)

Here’s what you need:
4-5 lamb loin chops
Sea salt to taste
Pepper to taste
Quick spray of olive oil so the loin chops don’t stick

Spicy mustard sauce
2 tablespoons of a Dijon mustard
1/4 tsp of fresh horseradish (optional if you like it really spicy use this, or use this if your Dijon is not spicy enough)
1 clove of garlic finely minced
3 teaspoons of white wine vinegar
3 tablespoon of olive oil
Sea salt to taste

Directions:
In a small bowl add all of the ingredients for the mustard sauce and mix until combined, then set aside.  Pre-heat your oven to 425 degrees. Season both sides of loin chops generously with sea salt and pepper. Line a baking sheet with foil, spray lightly with olive oil spray. Place lamb chops on the sheet:

 Bake for 10-15 minutes :

Serve with a nice dollop of the spicy mustard sauce and enjoy! What is your favorite spicy sauce?

Follow and like me on Facebook :  www.facebook.com/Lazygirldinners

North African Lamb Stew with Kale

Lamb Stew

Lamb Stew


I have such fond memories of my mothers home made stews. She doesn’t make stews anymore so memories are all I have unfortunately. I’m not really a person who makes  a lot of stews at home. Let’s face it stews, good ones anyway, take time, usually hours, 2-3 hours, for them to develop a decent amount of flavor. This particular stew came out of an uncontrollable desire of mine to have lamb meat that was tender, moist, and with a gravy that was lick the pot worthy. I think I met that desire and some with this lamb stew. All of the components of this stew go together so perfectly that I’m surprised that I never though to put them together before this.  I used a pressure cooker to make this stew. Let me just say that by using a pressure cooker not only was I able to develop the flavors that make up a good stew, but I was able to do it in an hour. The beauty of pressure cookers is that they allow you to maximize the flavor of all of the ingredients you use without loosing vital nutrients. If you don’t own a pressure cooker, go buy one. They’re awesome!

Here’s what you need:
2 lamb shanks (2lbs)
5 teaspoons of Cumin
4 teaspoons of Paprika

1 teaspoon of Coriander powder

4 cloves of garlic sliced
2 medium onions chopped
Juice of half a lemon or more if you like
5 tablespoons of olive oil
1 bushel of elephant kale julienned
1 10 oz can of garbanzo beans rinsed and drained
A handful of cilantro
1 28 oz can of San Marzano crushed tomatoes
3-4 cups of water

Equipment:
Pressure cooker

Note: If you want to make this on the stove without a pressure cooker it can be done.  Just add all of your ingredients to the pot exactly as below.  Bring the pot to a full boil, lower the heat and simmer for 2 hours or until the meat is tender and you can remove it from the bone.

Directions:
Over medium heat add oil, onions, lamb and garlic the pressure cooker.  Add in the coriander, cumin, and paprika, mix well, and let cook for 3 minutes

Add tomato sauce, and enough water to cover the lamb shanks, bring to a boil then close and seal your pressure cooker.

Cook for 45 minutes without disturbing, turn off the heat and follow the directions to depressurize your pressure cooker. Once your pressure cooker is safe to open, remove the cover and discard the fat lining and the bone on the lamb shanks. At this point that should be fairly easy to do, the meat literally falls off of the bone after being in the pressure cooker for 45 minutes.

Add in the kale and the garbanzo beans, cover and seal the pressure cooker again, and cook for another 15 minutes on medium heat.

After 15 minutes turn off the fire, depressurize your pressure cooker, and remove the cover, add in a handful of fresh cilantro, the lemon juice and serve as is, or over a bed of brown rice…yum!

What is your favorite stew?

Follow and like me on Facebook:   http://www.facebook.com/lazygirldinners

The 9 things no kitchen should be without!

If you are anything like I am, then you probably don’t have the time, nor the inclination/energy to spend one hour, let alone two, in the kitchen making dinner every night. I have a 18 month old , so I’m lucky most days if I’m allowed 10 minutes in the kitchen without her screaming bloody murder. I’ve learned to make shortcuts work for many of our meals.  The best way to do that in my experience is to start  with time saving kitchen gadgets and excellent pantry staples. Below is a list of things that I am grateful that I don’t have to cook without. They all save me what I adore most…time, which also amounts to less time spent in the kitchen.

My pantry must haves:

On any given day my pantry is always stocked with legumes of several varieties! Lentils, kidney beans, butter beans, garbanzo beans, black beans, and pinto beans. The are all absolute staples in my house. I use them for a variety of purposes. One day I may put the black beans in the food processor,  and  make black bean tostadas. Another day I may use the garbanzo beans to make fresh hummus to go with lamb kabob’s and veggie sticks. Yet another day I make take three kinds of beans and make a quick, yet delicious Chili. Canned Beans lend way to endless dinner possibilities, that don’t involve meat thawing, or endless hours in the kitchen.  I used to cook beans from scratch, soaking them over night, then rinsing them in the morning, and then cooking them for hours…not any more canned beans are the way to go people…free yourselves from slaving over a pot of beans!

Fresh is always best, but not always practical!  Case in point canned tomato sauce. Not just any canned tomato sauce works though. Like anything in life, when cooking, you have to start with a good base! A good quality can of tomato sauce could mean the difference between a good dish and the best dish you’ve ever tasted in your life! Trust me on this people! My brand of choice is San Marzano. This particular brand is full of flavor, anything that I’ve ever cooked using this sauce turns out amazing! Pick a sauce that you love and stock your pantry full of it. Tomato sauce has so many uses, a simple tomato and basil soup, a pasta sauce for spaghetti or lasagna, a red curry base…the uses are endless.

Parboiled brown rice…need I say more? A bag of this stuff will save you 30 minutes in the kitchen. This quick-cook rice cooks up in 15 minutes! Anyone who has ever cooked brown rice on the stove or in a rice cooker knows that it takes at least 30 to 45 minutes. Save yourself some time and get the pre boiled bag of rice. This is also a great pantry staple… Rice goes great with almost everything.

Pasta is a great pantry staple. Boil it then toss with some spinach, garlic, fresh basil, some chopped tomatoes, and dinner is served in less time than it takes most people to boil rice on the stove.
My last pantry staple is vegetable, chicken, or beef stock. Any one of these stocks will add enough flavor to your dish to blur the line between someone thinking you spent an hour cook a meal and 20 minutes. 
Lastly my life has been made easy with the invention of the magic bullet, food processor, pressure cooker,  and the convection oven! Having cooking gadgets that work, and provide efficiency in the kitchen, saves you time! If you thought the magic bullet was only for making smoothies, think again. I used the magic bullet all the time as a private chef to make sauces, soups, garlic and onion pastes…you name it I did it! If you don’t have one get one, they’re easy to use and even easier to clean! Food processors are equally as efficient in the kitchen, they go a step further than the magic bullet, because you can make quick dough’s in them.  The pressure cooker is an amazing invention. Talk about one pot perfection! You put every thing in one pot close the lid and leave it. What comes out at the end of your cook time is nothing short of AMAZING! Foods that would normally take hours on the stove, or in the oven, cook in less than one hour in the pressure cooker, but they taste like you spent all day cooking them. Not only that, but food cooked in a pressure cooker retains more nutrients. Finally my table top convection oven is my hero in the kitchen. I use it to make personal pizza’s, whole roast chicken, and a slew of other delicious things. In the summer it is especially helpful, because I don’t have to heat the entire house by turning on my stove.  It’s small, it cooks evenly  and more efficiently because its a convection oven.  
What pantry staple or kitchen gadget could you not live without?
Follow and like me on Facebook:   http://www.facebook.com/Lazygirldinners

The 12 menu items you might not want to eat at Chipotle

This past week Chipotle voluntarily listed on their website all the Genetically Modified Organisms that they serve at their restaurant. Of the 24 items on Chipotle’s menu 12 of them are GMO. I am torn about how I feel about this voluntary admittance of the use of GMO’s on Chipotles part. On the one hand, they are being honest and forthright. Chipotle, as far as I know, has been committed to providing customers with healthy, delicious food that is sourced locally, and that is organic and free range when possible. The admittance of the use of GMO ingredients by Chipotle is inline with the way the company has chosen to run its business, with a conscious effort to keep customers informed of how their meal got to the table. If only all fast food chains were as socially conscious! On the other hand, I am a bit put off that Chipotle is using GMO ingredients at all. Will this stop me from supporting Chipotle…probably not. My hope is that by releasing this list of GMO ingredients that Chipotle is on the road to eliminating GMO’s from their menu altogether. The truth is that we need more companies like Chipotle to set this kind of standard for us. Chipotle is doing what our government, and The Food and Drug Administration (FDA), has refused to do, which is to label these GMO ingredients. It’s not Chipotle’s fault that these GMO ingredients are in our food supply.  That fault lies with our elected officials and the FDA. Both have continually put Corporations like Monsanto before the health and safety of the American public. Currently 62 Countries have mandatory GMO labeling laws, however the United States and Canada do not. That means many of the foods you currently eat, (about 80% of the food supply in North America), are probably genetically engineered, and you probably have no idea which ones are. Well the good news is that if you eat at Chipotle you will. The below is a list of the 12 items on their menu that have been genetically engineered. You can choose to leave these items off of your plate the next time you eat at Chipotle, or better still ask Chipotle to stop serving these genetically modified menu items altogether.

The list of GMO foods on Chipotle’s Menu
Barbacoa 
Chicken
Steak
Chipotle Honey Vinaigrette 
Fajita vegetables ( bell peppers, onion)
Brown Rice
White Rice
Tortilla flour for Burritos
Tortilla’s for corn chips
Tortilla’s soft corn tacos
Tortilla taco size flour
Tortilla’s tacos


Follow and like my Facebook page: http://www.facebook.com/lazygirldinners


Grilled flank steak with Chimichurri sauce

Summer is here which means a lot of grilling at our house. Steaks tend to get boring and I’m alway looking for ways to jazz them up a bit. Enter Chimichurri sauce. It’s a Brazilian condiment, and when it’s made properly it can turn the most mundane dish into something truly spectacular! I love chimichurri on a nice peice of toasted crusty french bread. Chimichurri is also fabulous on grilled chicken, or baked fish. I’m also told that chimichurri is great on eggs, I don’t like eggs, but I bet I would with chimichurri on them. Chimichurri is so versatile I can’t imagine that there is a meat that it doesn’t go well with.

Here’s what you need:
1 lb of skirt steak
3 cloves of garlic pasted
Sea salt

Here’s what you need for the Chimichurri sauce:
2 cups of fresh parsley
1 cup of fresh cilantro
2 cloves of garlic
1/4 teaspoon of red chili pepper flakes
1/4 cup of red wine vinegar
1//2 cup of olive oil
1 teaspoon of lemon juice
Sea salt to taste

Directions: rub the pasted garlic on both sides of the skirt steak, season with sea salt, black pepper and grill for 3-5 minutes on each side.

Place all of the ingredients for the Chimichurri in a blender and blend until smooth. Serve on top of grilled steak.

Now how easy was that? Chimichurri is so delicious and it makes everything taste better. What are you going to have with this sauce?

Follow, and Like me on Facebook: http://www.facebook.com/lazygirldinners

Pure Maple Cream

Maple Cream / Maple Butter

It’s nearing Father’s Day and one of my gifts for my husband is to finally fulfill his desire to have maple cream, also known as maple butter, on his toast. He loves maple cream, and always speaks of the time he spent in Vermont very fondly. Whenever he speaks of Vermont, there always comes a point in the conversation in which he talks about maple cream, and every single time that he speaks of maple cream, his eyes gleam. It’s almost like witnessing him sitting in a cafe tasting the maple cream for the very first time. Before today, I  have never had maple cream. So up to this point I didn’t really get this infatuation he had with maple cream. On an ingredient scale, maple cream is easy to make, it only requires one ingredient, maple syrup. However, making maple cream requires some effort, it is definitely not a lazy girl activity. This however is a special occasion, and my husband deserves all the effort, and some, that I put into making this maple cream for him. He is an amazing father, extremely hands on, and he ADORES our daughter. I wish that every child could be loved by their dad as much as my husband loves our daughter. She is definitely lucky to have him as her dad. Making this maple cream is the least I could do for him. To be fair, I actually thought that it would be much harder to make this maple cream than it actually was. Just stir at a steady pace and you should be fine. This requires about 30-40 minutes of constant stirring, so just prepare yourself.

Here’s what you need:
3 cups of Grade A Maple Syrup

Equipment
A wet/dry thermometer or candy thermometer

Directions:
Prepare an ice bath by placing a medium size sauce pan into a large bowl of ice:

In another sauce pan add 3 Cups of maple syrup:


Over medium heat allow the syrup to boil undisturbed until the temperature reaches 235 degrees Fahrenheit, I went over a degree because I was trying to take a picture for the blog;-)

Boil for 1 more minute just to make sure that the liquid has indeed reached that temperature, then turn off the heat, and pour the hot syrup into the clean sauce pan in the ice bath. Allow it to cool until the temperature reaches 100 degrees.

Remove the pot  from the ice bath and begin stirring:

As you stir the color will begin to change and the liquid will begin to thicken it turned this color after about 15 minutes of stirring:

Once the maple syrup looses its glossy sheen and it starts to look like tahini, or has the texture of peanut butter stop stirring. It took about 40 minutes. Pour into a clean storage container:

Spread this mixture on biscuits, toast, pancakes, waffles, or whatever your heart desires, and enjoy!

What are your fondest memories of your dad?
Follow and like me on Facebook: http://www.facebook.com/lazygirldinners

Tofu fried chicken–It tastes just like Chicken!!!

Tofu Fried Chicken

I am a southern girl through and through. My family is from Louisiana, and a Sunday dinner that did not involve fried chicken was not a Sunday dinner at our house. When I decided several years ago that I would switch to a more healthy diet, I eliminated fried chicken from my diet all together. The problem with that was that I really missed it! Enter this recipe for Tofu fried chicken. The saying, “it tastes just like chicken,” is spot on here! Not only does this tofu fried chicken taste just like chicken, but it smells just like fried chicken when you are cooking it too! Vegetarians, Vegan’s, and carnivores alike will love this! Your kiddies will love this tofu fried chicken too! Use cookie cutters to cut out fun shapes, and these become the perfect healthy alternative to fried chicken nuggets. I say fried chicken, but the truth is that this is a very shallow fry. You really only need enough oil to coat the bottom of your pan. After a lot of trial and error with this recipe, I learned that the best results come by freezing the tofu. The texture of the tofu becomes more meat like, and it is a lot easier to expel all of the excess water in the tofu after it has been frozen and defrosted. The more water the tofu has in it, the harder it is to get a crispy crust on the “fried chicken.” It is possible, but it takes much longer than I want to be in the kitchen. Freezing the tofu and defrosting it on the day you want to cook it saves you about 20 minutes of cooking time with this dish.  I slice the tofu before i freeze it, which makes it easier to press out the excess water. I also use nutritional yeast, which you can find at Whole Foods, a health food store, at this Link on Amazon, or at your local vitamin shop since it is a nutritional supplement. I also use Garlic Gomasio, which is simply sesame seeds, garlic powder, and sea salt in one bottle. If you have these ingredients separately then just use 2 teaspoons of sesame seeds, 1 teaspoon of garlic powder, and 1/4 teaspoon of sea salt, and you’ll have a home made Gomasio.

Pin It!

Pin It!


Ingredients:
1/4 cup of Garlic  Gomasio and 2 additional teaspoons set aside
1/4 cup of nutritional yeast add more if you need to
3-4 Tablespoons of a low sodium soy sauce
1 lbs of extra firm tofu (sliced, frozen in a ziplock bag and then defrosted)
4-5 Tablespoons of grape seed oil or another high temperature oil (canola, safflower) for frying.

Directions for expelling excess water from the tofu:
After the tofu is defrosted, drain the liquid from the bag. Then place each slice of tofu between paper towels and press out all of the remaining water. Be careful not to press too hard, the tofu breaks easily.

Directions:
Set up a work station, with a plate for each of the ingredients(except the oil). After you have removed the excess water from the tofu. Dredge the tofu slices through each plate, beginning with the soy sauce, then the nutritional yeast, and finally the Gomasio.

Be careful not to let the tofu soak in the soy sauce. You just want to coat both sides of the tofu with the soy sauce, don’t leave it to soak otherwise you’ll have one salty piece of fake chicken. Repeat this process until you’ve coated all the tofu.

In a skillet heat your oil. Add in the 2 teaspoons of Gomasio. once the seeds begin to pop add in your tofu. IMPORTANT: make sure that your oil is hot before you put your tofu in, otherwise you’ll have a grease laden piece of fake chicken.

Cook until both sides are brown and crispy, should only take 3-4 minutes. Place onto paper towels to remove excess oil, serve and enjoy!

Do you have any Tofu recipes? What’s your favorite tofu recipe?
Follow and like us on Facebook: http://www.facebook.com/lazygirldinners

Lamb Patties with a Garlic and Mint Yogurt Sauce

Ground lamb patties are what I call quick fixings in my house. They take 20 minutes from start to finish. I love the fresh herbs in this recipe, particularly the fresh mint. It goes so well with the lamb. Nutritionist Justice De La Torre gave me the recipe for these lamb patties, and they have become a staple in our house.  I hope these lamb patties will become a staple in your house as well. The best part about these lamb patties is that people who try them just assume they’re beef. These lamb patties are a great way to introduce lamb to your little ones.

Here’s what you need:
1 lbs of ground lamb
1/2 cup of fresh mint leaves, chopped
1/2 cup of flat leaf parsley, chopped
1/2 teaspoon of ground cinnamon
1/4 cup of finely chopped onion
Sea salt to taste
Mint and garlic yogurt sauce:
1 cup of plain Greek yogurt
Juice of 1/2 lemon
1/4 fresh mint chopped
2 cloves do fresh garlic pasted

Directions for yogurt sauce:
Place all ingredients in a bowl and mix well. Refrigerate until you’re ready to use it.

Directions for lamb patties:
Place all ingredients in a medium bowl and mix well.

  Form patties, and place in skillet on medium heat.

Cook for 4 minutes on each side, remove, serve with yogurt sauce and enjoy!
 What’s your favorite lamb dish?
Follow and Like me on Facebook: http://www.facebook.com/lazygirldinners