Caramel Popcorn with Almonds and Coconut Flakes

Caramel Popcorn
Coconut Caramel Popcorn

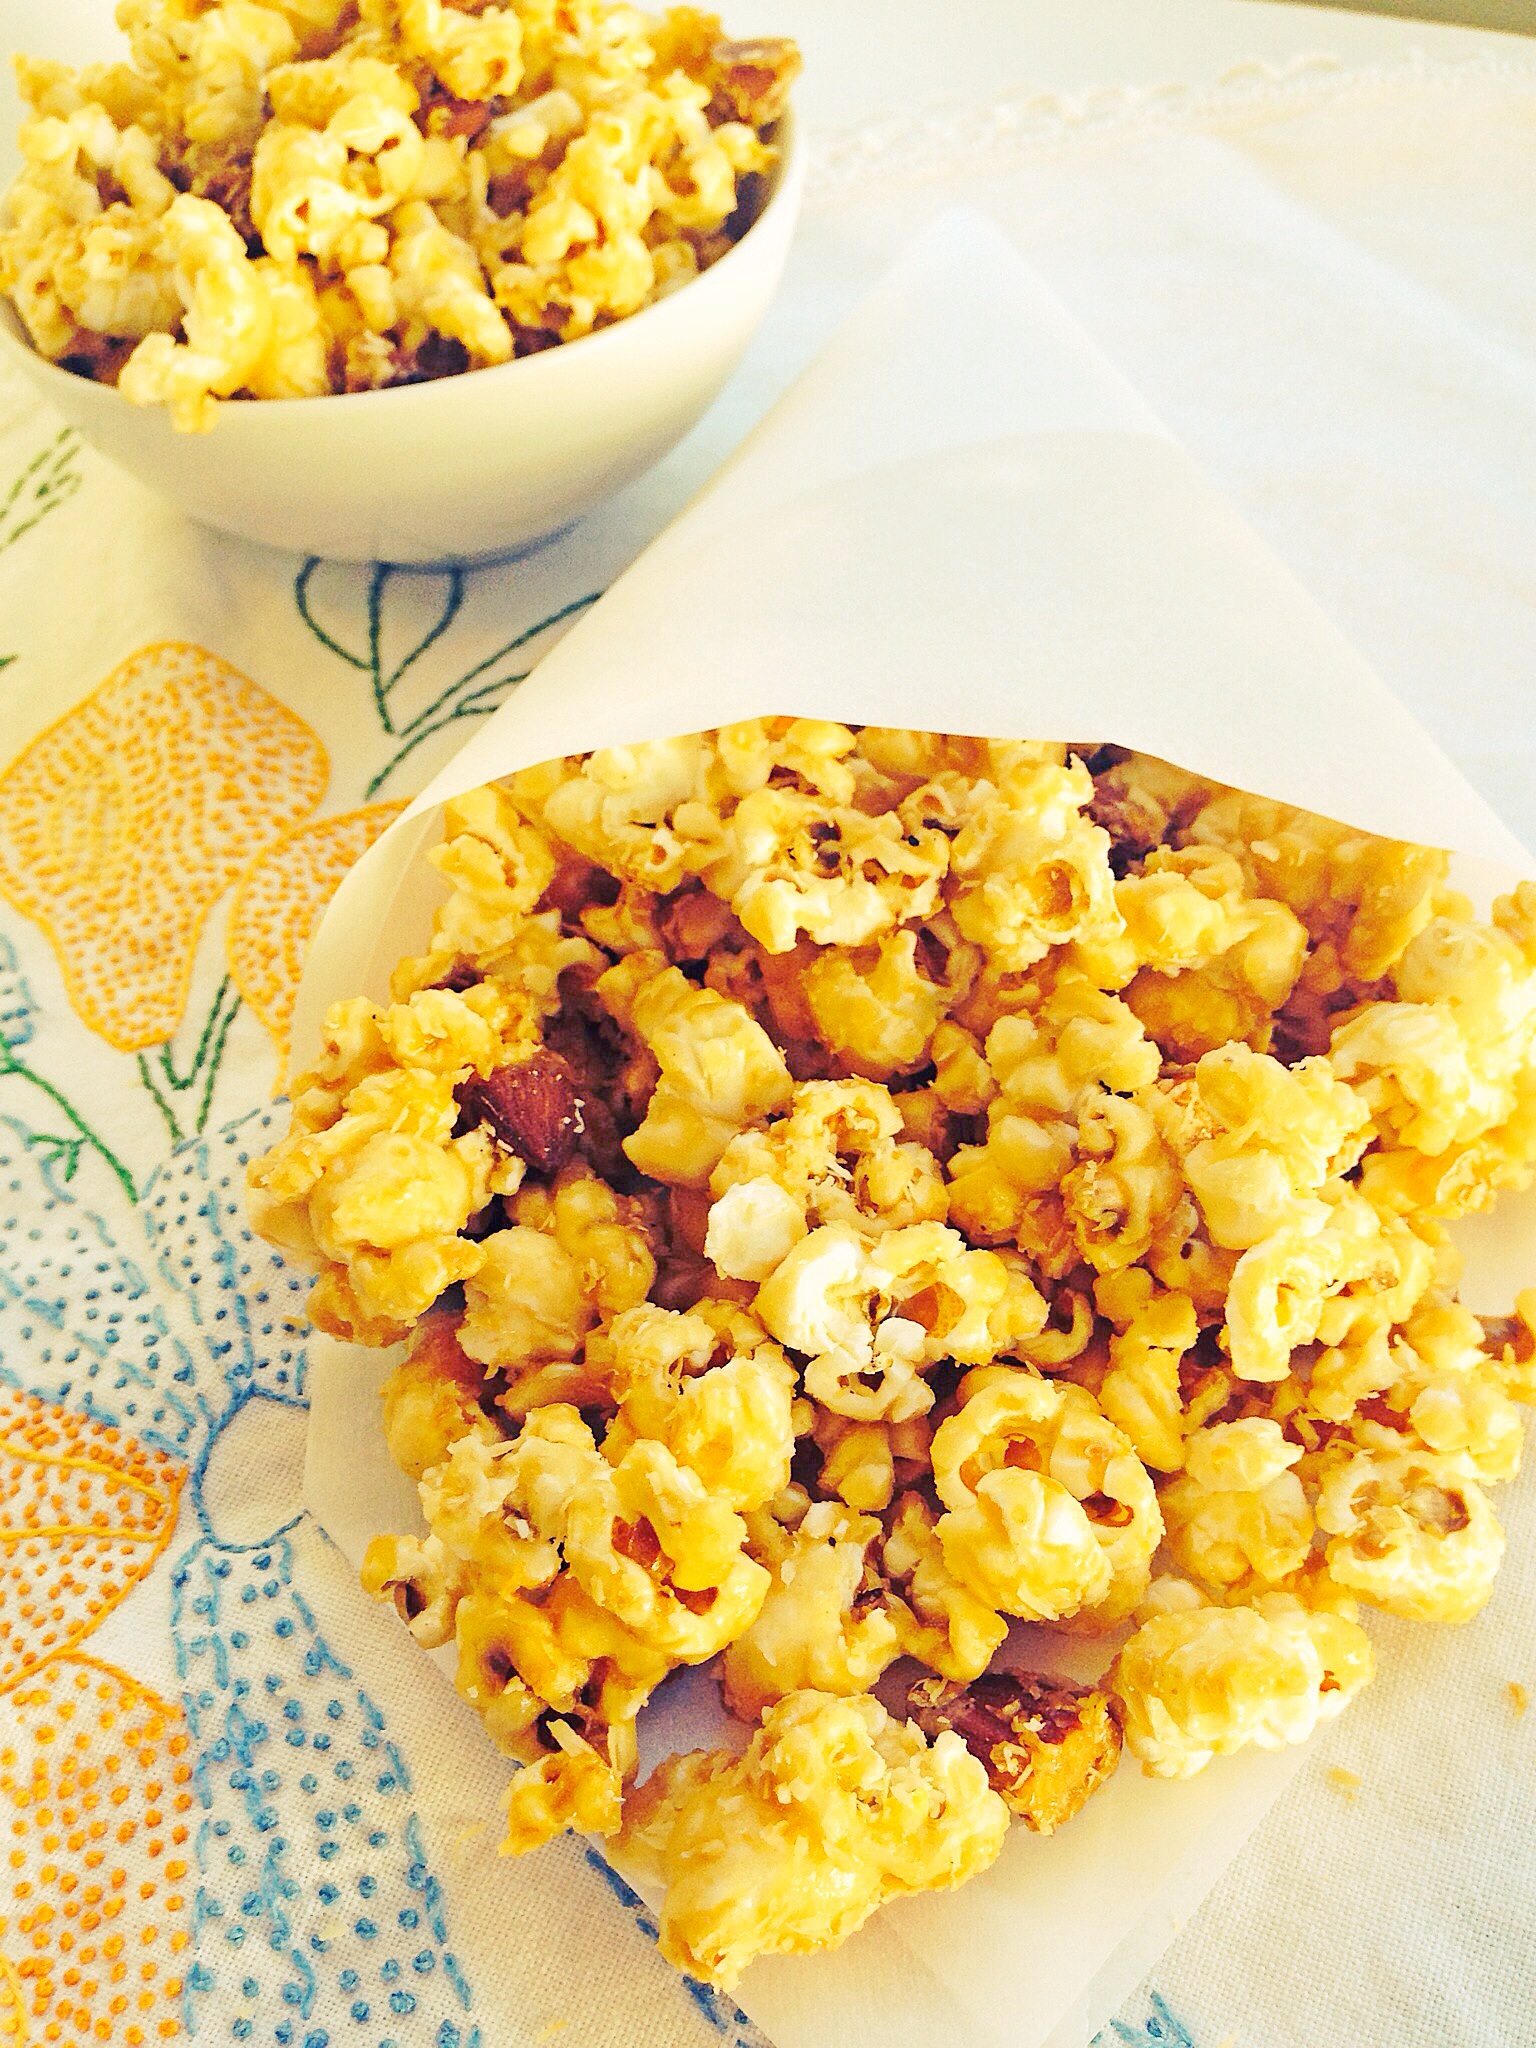
You didn’t think that I would let Halloween pass without a giving you a recipe for a delectable goodie did you. Okay I almost did. It’s been a busy week for me and I haven’t had much time to devote toward taking pictures for the blog. But, I rallied, and summoned the rest of my energy to make this popcorn for you guys. I’m selfless what can I say:-). If you’re looking for something chewy and soft, similar to a popcorn ball, then this is not the recipe for you. This recipe is more like the popcorn you’d find in those large tins people give you at Christmas, only this is 1000 times better.

Cook time: 30 minutes
Servings: 6 cups

Ingredients:
1/4 cup of Organic non GMO popcorn
3 Tablespoons of Coconut oil
1/4 cup plus 2 Tablespoons of Almonds
1 cup of Organic Sugar
4 Tablespoons of grassfed butter
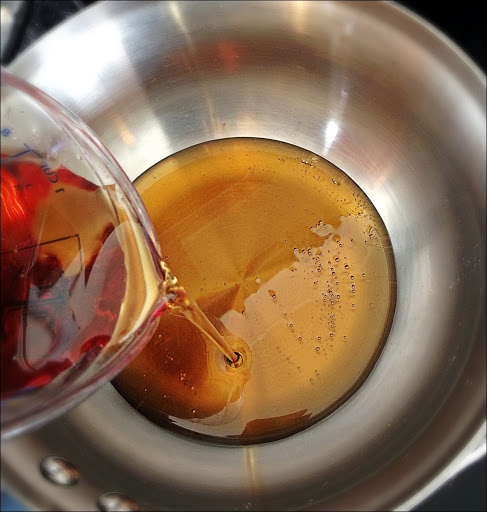
3 Tablespoons of Organic Corn Syrup
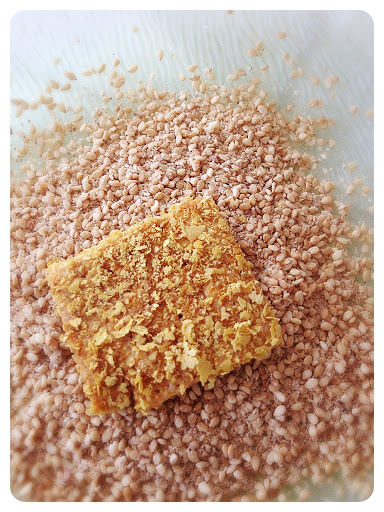
1 teaspoon of Sea salt
1/4 cup of water
1/4 cup of coconut flakes (optional)

Spray a large baking sheet with coconut oil. Preheat the oven to 300 degrees F.
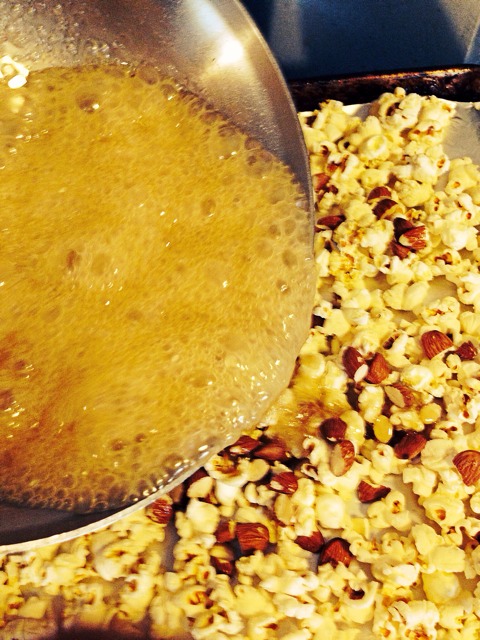
Add popcorn kernels and 3 Tbsp. coconut oil to a large, heavy-bottomed pot. Cover and cook over medium-low heat, shaking frequently. You will start hearing the corn pop after a few minutes—keep cooking until there’s a gap of about 5 seconds or more between pops. Immediately remove the pan from heat and pour the popcorn onto the prepared baking sheet. Add the almonds and set aside.

In a medium saucepan, combine the sugar, butter, corn syrup, and water. Place over medium heat and cook, without stirring, until the mixture is a light caramel color, about 10 minutes. Add the salt and stir to combine. Pour the caramel over the popcorn and almonds.


Place the baking sheet in the oven and cook until the caramel becomes thin and shiny, about 10 minutes.

Remove the baking sheet from the oven and working quickly use a rubber spatula, to fold and coat the popcorn and Almond mixture with caramel. Don’t worry if you can’t coat it all in this first toss, if the caramel starts to harden return the bake sheet to the oven. Repeat this process as many times as necessary to completely coat the popcorn and Almonds with caramel or until the caramel has turned a dark amber color. I did this 5 times checking on the popcorn and tossing it, in 5 minute intervals. On my 4th turn I added the coconut flakes. I just sprinkled them in and gave good toss.

Once you remove the popcorn, let it cool for 2-3 minutes, then break the popcorn into bite-size pieces. Cool completely before transferring to a storage container. It will last two weeks stored in an air-tight container.


Follow and like me on Facebook: http://www.facebook.com/lazygirldinners 

Almond Milk–How to make Almond Milk

Raw Almond Milk

I have made a lot of nut milks, in my life, so I would be untrue to you if I didn’t share at least one of  my recipes for them with you. We don’t drink cows milk in my house, so nut milks have been a great alternative for us. I have tried my hand at making almost every milk alternative out there, from soy milk to hemp milk, I’ve tried it all. The truth is that once you make one, you can just substitute the seeds or the nuts, and you can make them all. The only exception to that rule is soy milk. For soy milk things get a bit more complicated, because it has to be heated to a certain temperature, for it to be safe for consumption. Luckily for us all someone invented the soy milk maker. I have one and I love it! The one I have also allows me to make raw nut milks. Personally I prefer to use it only for making soy milk. My blender does a better job at making the nut milks. For this recipe, you’ll need a either a nut milk bag, which you can purchase here,or at Whole Foods, or cheese cloth. I’ve used both, and they both work well, but it becomes a bit expensive if you make nut milks a lot, to keep buying cheese cloth. The nut milk bags are reusable and more user friendly for this purpose.

Ingredients:
2 cups of raw almonds, soaked in a bowl of water overnight, then drained and rinsed
4 cups of water
1/2 teaspoon of vanilla extract (optional)
sweetener of choice (maple syrup, agave, 4 dates) (optional) to your taste.

Equipment:
1 cheese cloth folded  into 4 layers
Blender, or food processor

Directions:
Add raw almonds to a bowl and add enough water to cover them,  then refrigerate overnight.

 Drain and rinse the soaked Almonds and add them to the blender, along with the water, vanilla extract and sweetener if you’re using them.

Cover the blender and blend on high for 2-4 minutes, depending on how high powered your blender is it could take more or less time. Blend until a milk forms and the almonds resemble a fine grain paste.

 Place your nut milk bag, or  folded cheese cloth over a large bowl, and pour the blended mixture into the bag or cheese cloth to strain it, squeezing until all the liquid is out and what is left behind is fairly dry almond pulp.

Place the milk in an air tight container like a mason jar, and refrigerate for up to 5 days. You can add cocoa powder and have chocolate almond milk, or leave it plain. Whatever you choose to do, this milk is delicious. You can use the left over almond pulp too! If you spread it out on a cookie sheet and place it in the oven on 175- 200F to dry it out, what you get is homemade almond meal. You can bake muffins, make pancakes, and a number of other delicious baked goods with it.

What is your favorite milk alternative? Have you ever made it at home?

Follow and like me on Facebook: http://www.facebook.com/lazygirldinners

Turkey chili

Turkey Chili

Turkey Chili

Chili is another one of my favorite winter weather comfort foods. On a cold blistery day, nothing is as warming as a hot bowl of chili. As a private chef my chili was a favorite amongst my clients. I made so many variations of this recipe and everyone is fantastic. If you want to use something other than ground turkey in this go right ahead. I’ve done this with ground chicken, beef, venison, and even textured vegetable protein(TVP) for my vegetarian friends, all variations work for this. If you are using TVP 1 cup will do in this recipe. I add it in at the point where I add the meat in the recipe. I’m not a big fan of TVP because I would rather use something not so processed. But I will say that I have served TVP chili to unsuspecting friends and family and they didn’t realize that it was not meat! It actually tastes like ground meat.

Prep Time: 5 minutes
Cook Time: 25 minutes
Total time: 30 minutes

Ingredients:
1 15 ounce can of organic kidney beans, drained and rinsed
1 15 ounce can of organic pinto beans, drained and rinsed
3 cloves of garlic, minced
1 15 ounce can of organic tomato sauce
1 pound of ground turkey
1 cup of water
3 tablespoons of olive oil
4 tablespoons of ground cumin
Sea salt to taste
Black pepper to taste

Directions:
Heat the oil in a pan, add onion and garlic and cook until onions are translucent. Add in cumin, and cook for 2 minutes. Add in ground meat, season with sea salt and black pepper. Cook until meat is brown. Add in tomato sauce, water, and beans. Stir well, cover and cook for 10-15 minutes, it’s done when the mixture thickens a bit. Serve with a dollop of sour cream, and enjoy.

No cream Creamed Corn

Creamed Corn

One of my favorite things in the world is creamed corn. I remember at 5 years-old requesting it as a meal. My mom always bought the canned Del Monte brand, back then you could buy 4 cans for $1. While other kids were begging for cookies and their favorite brand of cereal, I was begging my mom for cans of creamed corn. I of course don’t eat the canned version any more, the preservatives alone keep me away from that stuff. Not to mention that it is extremely difficult now a days to find organic corn, let alone corn that is not genetically modified. Fortunately I’m lucky enough to have a local farm in my area, where I can buy organic and non GMO fresh corn. If you have never tried making fresh creamed corn without cream, then you’re in for a treat! It’s just as delicious as creamed corn with cream. The key to making this creamed corn, is a shallow cut.

Prep time: 5 minutes
cook time: 12 minutes
Total time: 15 minutes

Ingredients
4 raw fresh corn cobs husks removed
1 tablespoon of butter (optional)
1/4 cup of water

Directions:
Place the corn inside of a sauce pan, it helps to cut the bottom end of the corn so that you have a flat surface to work with. Cut down the sides of the corn, again the key here is to cut shallow, you really only want to cut the tops of the corn kernels. Once you have cut down all sides, slide the knife back up the cob in the opposite direction.

Be careful of splatter here, it can get messy. Continue to run the knife back up the cob until the cob is dry and all the corn and milk has been removed.

Place the pan over medium low heat, add the butter if using, and allow it to cook for 3 minutes.

Add the water, note if your corn had a lot of moisture you do not need to add all of the water, add as much as you’d like, lower the heat to simmer, and cook covered for another 7-10minutes. Serve and enjoy!

What was your favorite childhood food or snack?

Follow and like me on Facebook: http://www.facebook.com/lazygirldinners

Strawberry ice cream with Chocolate Balsamic Fudge Sauce

Despite the fact that almanac says that Fall season has officially arrived, the weather here in Southern California continues to mimic Summer weather with temperatures in the 80’s. I decided to make ice cream, and since my daughter loves everything that involves strawberries, I decided to make strawberry ice cream. Since you could google any number of strawberry ice cream recipes, I wanted to make my recipe original and a little bit more sophisticated, so I came up with this balsamic chocolate sauce.  I absolutely love balsamic cream sauce, especially drizzled over strawberries. Talk about an easy dessert!  It absolutely doesn’t get better and easier than pre made balsamic creamdrizzled over fresh strawberries! If you don’t have a bottle of balsamic cream in your pantry definitely run out and get one, but first try this fudge sauce. The first time I tried to make this sauce, I burned the vinegar, so be forewarned that this isn’t one of those recipes, that you can put on the stove and walk away from. You really have to watch the vinegar, because it can go from perfectly fine to burnt in a matter of seconds. With that said this is pretty easy to make once you get past reducing the balsamic vinegar. I decided to use Organic corn syrup in this recipe. It’s not one of my favorite things to use, but I didn’t want a sauce that would get hard once it touched the cold ice cream. The corn syrup prevents it from doing so. If you want a crackling hard sauce then by all means leave out the corn syrup. The corn syrup that I is used is Organic, and it is not High Fructose corn syrup–big difference, so make sure you don’t get the latter, read the bottle!

Prep Time: 1 minute
Cook Time: 7-10 minutes
Total time: 11 minutes

Ingredients for Chocolate Balsamic Fudge sauce:
3 ounces of bittersweet dark chocolate (I used 60%)
1/2 cup of a good balsamic vinegar
2.5 Tablespoons of maple syrup or a sweetener of your choice
1 Tablespoon of butter
2 Tablespoons of organic corn syrup
Ingredients for ice cream:
1.5 cups of organic milk
2 cups of organic cream
1 teaspoon of vanilla extract
3/4 cup of maple syrup or sweetener of your choice
5 egg yolks

1 cup of chopped strawberries

Directions for sauce: 
Add the balsamic vinegar to a sauce pan, and bring to a boil. Once boiling lower the heat to simmer and cook until the vinegar thickens and reduces by half. Turn off the fire, add the chocolate corn syrup and butter and whisk until smooth. Serve with the strawberry ice cream, or just some fresh berries.
Directions for ice cream:
 In a sauce pan heat milk, vanilla extract, and 1 cup of cream and maple syrup to just below a boil– do not let boil! Turn off the fire, slowly add 1 cup of the hot mixture to the egg yolks whisking so that the eggs don’t scramble. Slowly whisk the egg mixture into the hot mixture still in the pan. Immediately add the remaining cream to the pan and turn the fire on to medium low. Stir the mixture
until it thickens and coats the back of the spoon. Turn off the fire, and pour the hot cream into a bowl to cool. Allow the mixture to cool to room temperature, then follow the directions for making ice cream according to your ice cream makers manufacturer.

Green beans with turmeric and mustard seeds

One of my husbands favorite veggies is green beans. I could serve him green beans every day for a year, and he would never get tired of them. The problem is that I would get tired of green beans, and I’d get tired very quickly.   This recipe is one of my favorite ways to eat green beans. It’s simple, it’s quick and very delicious!

Prep time: 5 minutes
Cook time: 15minutes
Total time: 20 minutes

Ingredients
1 lbs of fresh green beans, you can use frozen but make sure they’re defrosted
1 teaspoon of black mustard seeds
1/2 teaspoon of ground turmeric
4 tablespoon of olive oil
Sea salt to taste

Directions:
In a cast iron skillet heat the oil along with the mustard seeds and turmeric, when the seeds begin to pop add in the green beans, cook for 10-15 minutes, allowing the beans to brown some and loose most of the water in them. Add salt toss turn off fire, serve and enjoy!

What is your favorite green bean recipe? Follow and like me on Facebook: http://www.facebook.com/lazygirldinners

Dandelion Greens with Sautéed Mushrooms

Have you ever gone to the farmers market, and laid eyes on a vegetable and thought “that looks interesting let me try it?” We’ll that’s what happened to me this Sunday. I walked up to my favorite herb stand to get my usual arsenal of fresh herbs, and I stumbled upon some fresh dandelion greens. Sometimes I get so inspired by fresh veggies at the farmers market. I love trying new things. My love of trying new things can result in an amazing dish, as in this one, or a not so amazing dish. I had heard of dandelion greens before, but I had no clue how to cook them. So once the excitement of using this new leaf wore off, I was left to figure out what to do with these dandelion greens. I tasted the raw leaves…Big mistake! They are as my daughter would say “super duper, bitter.” They almost remind me of bitter gourd/melon.  But even these greens are not as bitter as bitter melon. I Googled them and found that dandelion leaves are actually weeds. You know those weeds that are growing in your vegetable garden? Yes those weeds, they’re edible…who knew? I decided I wanted to mellow out the bitterness, the best way to do that is to cook them. I got out some Crimini mushrooms, because mushrooms always make greens better, and some garlic and started my journey. I had no idea where I was going with this, but I can tell you that I ended up in taste bud heaven at the end of it all. Every element of this salad adds an additional flavor profile. This dish is filling, and gratifying on so many levels. I could eat it every day! If you can’t find dandelion greens, try substituting a hearty bitter green like beet greens, turnip greens or chard.

Here’s what you need:
1 bunch of organic Dandelion leaves, cut with bottom stems removed
10 ounces of Crimini Mushrooms sliced
2 Large cloves of garlic chopped finely
Handful of walnuts, toasted
1/2 cup of fresh cherry tomatoes sliced in half, I used fresh tomatoes from my garden
1/3 cup of goat cheese, or more if you are so inclined
1 teaspoon of butter
1 teaspoon of balsamic vinegar
Juice of 1/2 of a small lemon
2tablespoons of olive oil
Sea salt and pepper to taste

Directions:
Warm the olive oil and garlic in a sauté pan:

Once you can smell the garlic (20 seconds), add in the mushrooms:

Salt the mushrooms and allow to cook until just before the water from the mushrooms evaporates(5-7 minutes). Add in the tab of butter, and allow the mushrooms to brown and take on a bit of color. This step is important don’t skip it! Browning releases Unami flavor.

After the mushrooms have taken on some color add in the dandelion greens.

Sauté until wilted, then add in the balsamic vinegar and lemon juice:

Mix well, add in the tomatoes, toss for about a minute, turn off the fire:

Add in walnuts, and cheese, toss, season with salt and pepper and serve. This would also be good cold, but served warm this salad is super comforting and satisfying!

What have been some interesting farmers market finds for you?

Follow and Like me on Facebook: http://www.facebook.com/lazygirldinners.com

Tofu fried chicken–It tastes just like Chicken!!!

Tofu Fried Chicken

I am a southern girl through and through. My family is from Louisiana, and a Sunday dinner that did not involve fried chicken was not a Sunday dinner at our house. When I decided several years ago that I would switch to a more healthy diet, I eliminated fried chicken from my diet all together. The problem with that was that I really missed it! Enter this recipe for Tofu fried chicken. The saying, “it tastes just like chicken,” is spot on here! Not only does this tofu fried chicken taste just like chicken, but it smells just like fried chicken when you are cooking it too! Vegetarians, Vegan’s, and carnivores alike will love this! Your kiddies will love this tofu fried chicken too! Use cookie cutters to cut out fun shapes, and these become the perfect healthy alternative to fried chicken nuggets. I say fried chicken, but the truth is that this is a very shallow fry. You really only need enough oil to coat the bottom of your pan. After a lot of trial and error with this recipe, I learned that the best results come by freezing the tofu. The texture of the tofu becomes more meat like, and it is a lot easier to expel all of the excess water in the tofu after it has been frozen and defrosted. The more water the tofu has in it, the harder it is to get a crispy crust on the “fried chicken.” It is possible, but it takes much longer than I want to be in the kitchen. Freezing the tofu and defrosting it on the day you want to cook it saves you about 20 minutes of cooking time with this dish.  I slice the tofu before i freeze it, which makes it easier to press out the excess water. I also use nutritional yeast, which you can find at Whole Foods, a health food store, at this Link on Amazon, or at your local vitamin shop since it is a nutritional supplement. I also use Garlic Gomasio, which is simply sesame seeds, garlic powder, and sea salt in one bottle. If you have these ingredients separately then just use 2 teaspoons of sesame seeds, 1 teaspoon of garlic powder, and 1/4 teaspoon of sea salt, and you’ll have a home made Gomasio.

Pin It!

Pin It!


Ingredients:
1/4 cup of Garlic  Gomasio and 2 additional teaspoons set aside
1/4 cup of nutritional yeast add more if you need to
3-4 Tablespoons of a low sodium soy sauce
1 lbs of extra firm tofu (sliced, frozen in a ziplock bag and then defrosted)
4-5 Tablespoons of grape seed oil or another high temperature oil (canola, safflower) for frying.

Directions for expelling excess water from the tofu:
After the tofu is defrosted, drain the liquid from the bag. Then place each slice of tofu between paper towels and press out all of the remaining water. Be careful not to press too hard, the tofu breaks easily.

Directions:
Set up a work station, with a plate for each of the ingredients(except the oil). After you have removed the excess water from the tofu. Dredge the tofu slices through each plate, beginning with the soy sauce, then the nutritional yeast, and finally the Gomasio.

Be careful not to let the tofu soak in the soy sauce. You just want to coat both sides of the tofu with the soy sauce, don’t leave it to soak otherwise you’ll have one salty piece of fake chicken. Repeat this process until you’ve coated all the tofu.

In a skillet heat your oil. Add in the 2 teaspoons of Gomasio. once the seeds begin to pop add in your tofu. IMPORTANT: make sure that your oil is hot before you put your tofu in, otherwise you’ll have a grease laden piece of fake chicken.

Cook until both sides are brown and crispy, should only take 3-4 minutes. Place onto paper towels to remove excess oil, serve and enjoy!

Do you have any Tofu recipes? What’s your favorite tofu recipe?
Follow and like us on Facebook: http://www.facebook.com/lazygirldinners