Parchment paper meals

These last two weeks have been unbelievably busy for us. I’ve barely had time to think, let along blog and cook. In addition to that it has been extremely hot here, too hot to cook. Turning on my oven when my house is already 100 degrees in the shade is not my idea of fun. Luckily I have a countertop convection oven. I use it all the time, especially for hot days and quick meals like this one. Our staff Nutritionist Justice De La Torre is the queen of these Parchment paper meals. She sent me over a picture of one of her meals and so I had to try it out for myself. You can put any type of fish in this that you’d like! I have done this with fresh sardines, salmon, and tilapia with great success! You literally put every thing in, fold the parchment and bake for 10-12 minutes and dinner is done. This is perfect for a quick cook meal on a hot day.

Prep Time: 5 minutes
Cook Time :10minutes
Total time: 15 minutes

Ingredients:
2 tilapia fillets
1-2 tablespoons of Olive oil
3-4 Onion rings per piece of fish
2-3 slices of Bell pepper per piece of fish
3 cloves of garlic sliced
Lemon or lime slices

Directions:
Place the fish on top of parchment paper, drizzle with oil and season with sea salt.

Top with onion, garlic, bell pepper and lemon or lime slices. Fold the parchment into an envelope, Bake on 425 F for 10-12 minutes.

 Serve with a nice green salad, or throw some squash in like Justice did and you have a complete meal.

What do you make for dinner when it’s too hot to cook?

Like me on Facebook: http://www.facebook.com/lazygirldinners

Graham Crackers

Cinnamon Graham Crackers

Going into the store now a days is quite a test of wills between me and my daughter. She is always asking to have the box of cookies/crackers/treats with the picture of Elmo on it.  I find myself trying to avoid that aisle all together, but the marketers have this kind of stuff all figured out–smart bastards– they put those products on the same aisle as the children’s vitamins and hygene products, so it’s almost unavoidable! Luckily for now my daughter has a short attention span, so I find that if I just let her play with the box while we are in the store, and give her an apple just before we leave the store, I can get out of the store without buying the box of treats, which she probably won’t eat anyway. It’s tough but us moms have skills too you smart alec marketers! Have you ever read the ingredients on some of these snacks? If you have then you probably know that they’re full of things that are hard to spell, and that probably aren’t good for you.  I wanted to buy my daughter some healthy graham crackers to go along with some marshmallows that I made. But I read the ingredients on a box at the store, and not one of the boxes contained actual graham flour. Weird, considering the crackers are named for the use of that very flour.  So I bought some graham flour, and set out to make my own.  You can find graham flour at Whole foods, or on Amazon. It’s pretty inexpensive, about $3 for enough flour to make at least 10 batches of these crackers. If you consider that 1 box of graham crackers is $4 then you know you’re saving! You can play around with the use of the second flour in this recipe, as I did.  I made these with all purpose, coconut, and spelt flour.  I can tell you that the difference in taste is hard to decipher.  The coconut flour definitely took some fidgeting with, because it absorbs so much liquid, so I had to add much more water to that batch. But whatever flour you decide to use, just know that the final product will still be delicious.

Makes 75-100 mini crackers and 24 large crackers
Time: 25 minutes

Ingredients:
3/4 cup of graham flour
1/4 cup plus 2 tablespoons of spelt or all purpose flour
1/4 cup of coconut sugar, or maple sugar, or organic cane sugar
1/2 teaspoon of baking powder
1/2 teaspoon of baking soda
1/4 teaspoon of sea salt
1/2 teaspoon of ground cinnamon
4 tablespoons of  chilled butter, cut and cubed
3 tablespoons of water
1 tablespoon of molasses
1/2 teaspoon of vanilla extract
Directions:
Preheat oven to 375 degrees. Place all of the dry ingredients into your food processor and pulse to combine. Add in the butter and pulse until mixture resembles corse corn meal.

Add in the wet ingredients and process until dough becomes a ball.

Roll dough out between to pieces of parchment paper until dough is about 1/8 inch thick.

Remove top layer of parchment and cut out shapes or use a pastry flute or knife to cut out 2.5 inch squares.

Remove any excess dough and set aside so that you can roll it again. Place the parchment paper with the cut out crackers onto a cookie sheet, and bake for 15 minutes, turning them mid way, bake until they are golden brown and the edges are firm. Be careful to check on these often they burn easily. Repeat this process with any remaining dough. Let the crackers cool on a cookie rack, and then enjoy!

Okay give me your best grocery shopping with little ones tips, I really need them!!

Follow and like me on Facebook : http://www.facebook.com/lazygirldinners

Homemade Marshmallows

Home made Marshmallows

Becoming a parent has afforded me the benefit of seeing the world anew.  I love watching my daughter get such pleasure from the smallest of things. Interacting with her reminds me of all the fun I had as a kid, and all the things that brought me pleasure; like having cookouts, going to the beach with my family, eating ice cream, candy, s’mores and toasted marshmallows. I want her to have all of those same pleasures, but without all the additives, and sugar. This is every moms wish I suppose. Some of us just give in and buy the box of cookies, and others like myself let the guilt eat us and try to offer our children other alternatives. Last week I was feeling very nostalgic and I wanted to let my daughter have a s’more. I could have bought store bought marshmallows, and graham crackers, but both are super easy to make, at home. So I decided to give them both a go, (recipe for the graham crackers coming soon).  This recipe for marshmallows is actually pretty good for you.  I used an organic grass-fed gelatin, which is composed of the amino acids, glycine and proline. These amino acids are great for over all immune health, and they are required for proper skin, hair, and nail growth. They also aid in digestion. These marshmallows contain no refined sugar. I used maple sugar, but you could use, agave, honey, coconut sugar, all are great options. Even if you use white table sugar, these will still be preservative free and very, very good! If you are like me and love marshmallow fluff, then dig into the finished product right away! It’s super gooey and delicious! If messy isn’t your thing, then wait and let them set.

Makes
45 marshmallows
Time:
25-30 minutes

Ingredients:
1 and 1/4 Tablespoons of unflavored grass-fed gelatin
1 cup of maple sugar
1/2 cup of cold  water divided
1 Teaspoon of vanilla extract
1/8 teaspoon of sea salt

Equipment
A stand mixer or hand mixer

Directions:
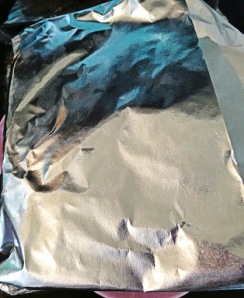
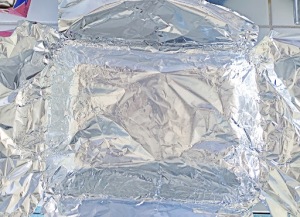
Line a 13 by 9 inch baking pan with foil:

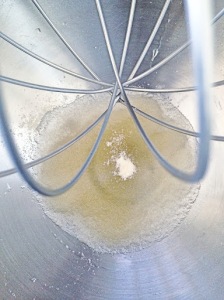
Pour 1/4 cup of the water into mixer bowl, sprinkle the gelatin over the water and let sit until gelatin becomes very firm about 15 minutes:

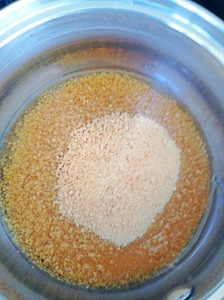
Meanwhile,  add sugar, the remaining water and salt to a pot over medium heat. Bring to a boil and cook gently swirling the pan until the sugar has dissolved completely and the temperature reaches 240 degrees, about 6-8 minutes:

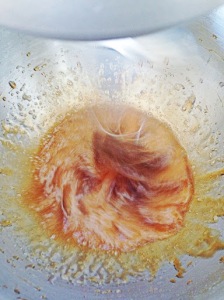
Turn the mixer on low  and slowly add the hot sugar mixture to the gelatin:

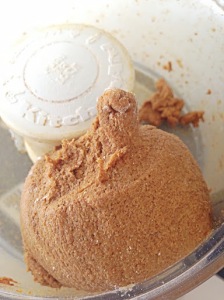
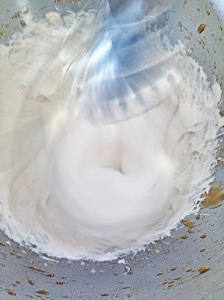
Once the sugar mixture is added, turn the mixer on high. Beat until firm peaks form, and the mixture is very thick about 10-12 minutes:

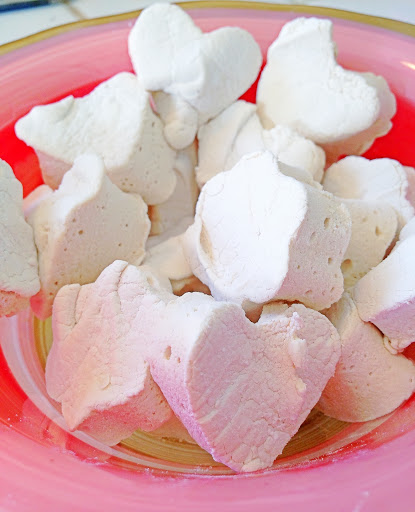
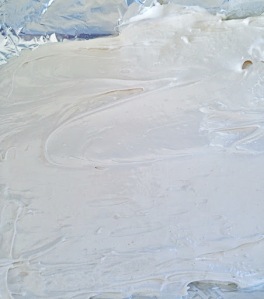
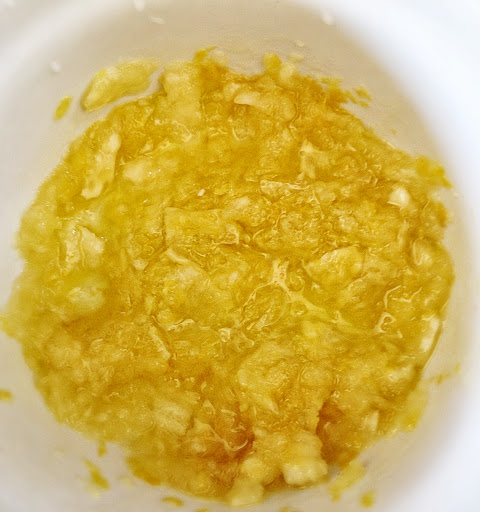
Pour out into a foil lined pan. Smooth out, and enjoy immediately, or cover and allow to set at room temperature over night.

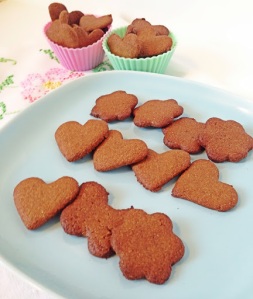
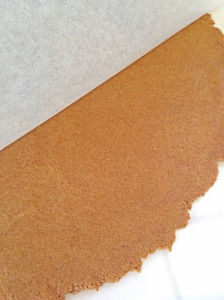
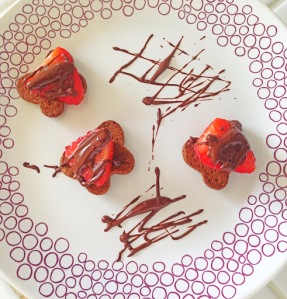
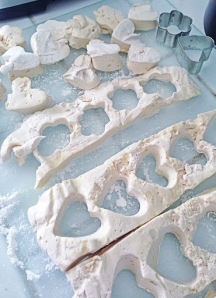
When you are ready, you can cut out cute shapes like I did, or just squares.  I lightly dusted a cutting board with some cornstarch, and turned the marshmallow slab out onto the cutting board.  Then I spayed my cookie cutters with coconut oil, and made these lovely shapes:

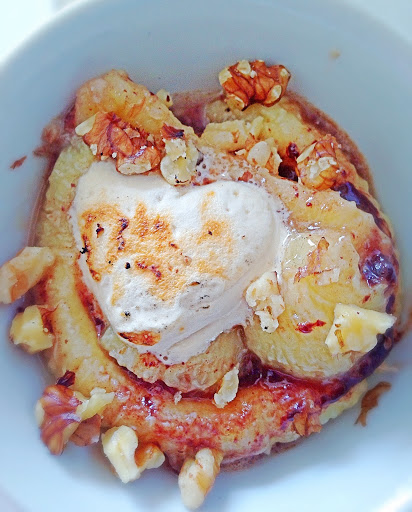
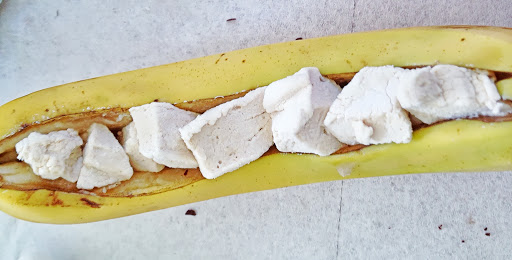
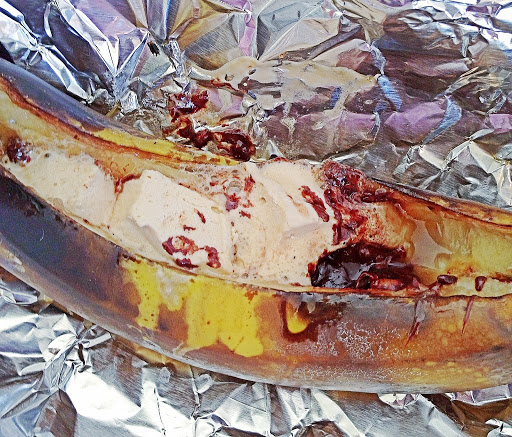
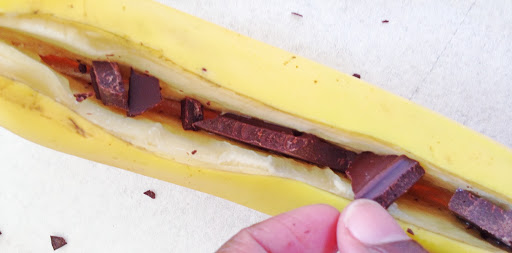
These go great with graham crackers and chocolate, or in my recipe for Banana Marshmallow Split!

Do tell, what are some of your favorite childhood treats? Do you still eat them?

How to roast chicken-Steps to making the perfect roast chicken everytime!

Lemon and Garlic Roast Chicken
Pin It!

Pin It!


Roasted chicken is universal. Almost every culture has some version of roasted chicken in their culinary history. However, as universal as roast chicken is, many still have a hard time making it. Just yesterday someone I follow posted a before and after picture of a roast chicken on Instagram. The bird was pasty before it went in the oven, and the bird was still pasty after it came out of the oven. I felt bad for this Instagramer because I’ve been there. The truth is that roasting a bird perfectly begins with steps that are made long before the bird goes in the oven. If you master these steps, I guarantee you that your roast chickens will come out of the oven, perfectly marinated, juicy and with a skin that is crackling and golden brown.

Step 1. Pick the right chicken! Organic, non GMO, and air chilled is the way to go! Why? Because conventional chickens are stored in salt water to plump them up before you buy them. A water logged chicken can taste good, but it will likely be harder to get a crispy crust on a water logged chicken, than one that is not water logged. Note: Read the label on the chicken, most chickens in the supermarket have  up to 4% retained water because they are dropped in a 34 degree chlorinated water bath before they are sold. Air chilled chickens are not exposed to water, so getting a crisp skin on an air chilled chicken is easier.

Step 2.  Brining! Most of you are probably thinking, “but you just said not to buy a water logged chicken, now you’re telling me to brine it?!” I said it, and I meant it!  There are other ways to brine without water.
Salt brining. This will change your life! Salt brining literally is what it sounds like, you thoroughly salt the chicken, put it in a Zip-Loc and let it sit over night. Salt does two things, it retains moisture and it pulls out moisture. This is a wonderful thing for a small bird like a chicken, because it doesn’t take longer than an hour to cook, so the amount of moisture it looses because of the salt brine is not significant enough for it to dry out. But it pulls out just enough moisture on the surface of the bird to make the skin crisp. At the same time it breaks down the protein, which means moist, tender, and well seasoned chicken!

Step 3. The skin needs to be rubbed with oil, not butter. Although butter tastes great, it contains 16-18% water and 80% fat. Water is an enemy to getting perfectly crispy skin on a roast chicken. If you want to use butter to flavor your chicken, then by all means do so. Just make sure to put the butter where it will do the most good..under the skin in the breast bone. If you want crisp brown skin, use oil, it does not contain water, it is 100% fat, so it will result in a chicken that is so beautifully brown, you may not want to cut it…note I said may not, after you get a whiff of the this delicious chicken all bets are off.

Step 4. Bake on a high temperature from the start. Most people reverse bake roast chickens, meaning they bake at a lower temperature for a longer period of time so the chicken doesn’t dry out, and then blast it at the end on a higher temp in hopes of browning the skin.  Seems plausible enough but results are often not consistent. Take my advice, bake your chicken on 450 degrees farenheight for 45 minutes to 1 hour, your chicken will come out perfect every time.

Recipe for brine
1.5 tablespoons of Sea salt or kosher salt for every 1 pound bird.

Sprinkle the salt all over the bird, place in a large bag and let sit over night. When your ready to cook it, add the oil and any herb you want–rub with a little garlic, bake it for 45 minutes to one hour, and Wah-La perfectly roasted chicken!

Roasted Chicken with Lemon and Garlic

Lemon and Garlic Roast Chicken

I love to roast chicken whole.  It is the epitomy of lazy cooking in my opinion, however, the payoff is amazing! You marinate the chicken, stick it in the oven for an hour, and you’re done.  I’ve mastered the art of roast chicken.  My roast chicken is famous among my friends and family. Brining is the secret to perfectly roasted chicken, but I’ll save that for a another post.  For now I’ll just give you a recipe for perfectly roasted chicken.

Here’s what you need:
Ingredients
1 Whole Organic non-GMO Chicken
4 cloves of garlic, pasted
The juice of 1 lemon
The zest of 1 lemon
Sea salt
Black pepper
2 Tablespoons of olive oil

Servings: 4-6

Directions:
In a small bowl add the pasted garlic, lemon zest and oil.

 Rub the the olive oil  mixture all over the Chicken, and season it generously with sea salt and pepper.

Place the chicken in a 450F degree oven and bake for 45 minutes to an hour. Remove once the chicken has cooked through and the skin is crispy and golden brown. Pour the the lemon juice over the chicken, let rest for 10 minutes and serve.

Do you have any tips for roasting chicken? 
Follow and Like me on Facebook: http://www.facebook.com/lazygirldinners

Banana Marshmallow Split!

Banana Marshmallow Split

I wasn’t going to post this on the blog, just because this is so easy to make, it barely needs directions. I made this dessert after making a fresh batch of marshmallows, I’ll post the recipe for those soon. This is a super yummy single serve dessert that isn’t involved at all. But it’s so yummy that you’ll probably want to make it all the time. Sometimes I add peanut butter to this, or almond butter and sliced almonds. You can even add sliced strawberries if you want to make it fancy.

Ingredients:
1 Banana split down the middle
1-2 squares of a good quality chocolate (chopped into small pieces) ( I used 60% organic fair trade bittersweet chocolate)
4-6 miniature marshmallows
2-3 walnuts crushed

Equipment needed:
Foil

Serves: 1

Directions:

 Place the chocolate and marshmallows inside the slit banana:

Cover with foil. Bake in a 400F degree oven for 5 minutes:

Remove the banana peel. Place in a serving bowl, top with crushed walnuts and enjoy!

Share your favorite single serving dessert recipes? I’d love to try some new ones;-)

Pineapple fruit roll-ups

Pineapple Fruit Roll-Ups

Dried pineapple is one of my favorite low fat snacks. It’s sweet, tangy, and addicting. Like a potato chip you can’t eat just one. My daughter shares my love of dried pineapple, but dried pineapple rings are a bit harder for her to chew on her own. These fruit roll-ups are super easy for her to eat, and at the same time healthy. The added bonus of making these fruit roll-ups yourself, is that they do not contain any added sugar, additives, or preservatives, unlike the fruit leather you buy in the grocery store. This pineapple fruit roll-up is 100 percent fruit and nothing else, so they definitely are a snack that you can feel okay about giving your little ones. Start with a ripe pineapple and let your oven or dehydrator do the rest!

Here’s what you need:
1 ripe pineapple, skin removed and core disposed of. Note if you have a high powered blender like a Vitamix, you can leave the core in.

Equipment:
Blender
Parchment paper

Place pineapple in the blender, and blend until smooth:

Pour out onto parchment paper and smooth out evenly:


Place in oven on 135 degrees Fahrenheit, or the lowest setting on your oven. Let bake for 4-6 hours.

Remove from parchment paper,


 Roll, and enjoy!! If you like these try my recipe for Strawberry Fruit Roll-Up or my recipe for Tropical Punch Fruit Roll-Ups! Both are great low-fat, and low calorie snack options.

Lemon Herb Cauliflower "rice"

Lemon Cauliflower Herb “Rice” It Paleo, Gluten free, and Low-carb

As adventurous as my daughter is when it comes to food, she still struggles with textures. A meal for her can be made, or broken, if something is not the right texture for her. I’m constantly trying to introduce her to new foods, but at the same time give them to her in a way that she will except. Many foods that I give her end up on the floor if I get it wrong. I read somewhere that people on a low carb diet substitute cauliflower for grains and potatoes. I myself have had cauliflower mash and loved it. I decided to try to do a cauliflower rice to go along with a roast chicken I was making for dinner. It turned out to be a hit with her, and my husband loved it too. I added lemon and cilantro, but just like any rice, you can add what ever flavorings suit your fancy. This is both Cauliflower rice is Paleo, Gluten free, and low carb.

Here’s what you need:
1 large cauliflower head, stems removed
1/4 cup of finely chopped onion
Zest of a lemon
 Juice of half a large lemon
1 Tablespoon of olive oil
Sea salt to taste
Tablespoon of chopped cilantro

Equipment needed:
Food processor

Directions:

Add the cauliflower florets to you’re food processor and pulse until the cauliflower looks like this:

Heat the olive oil in a sauté pan, add the onion and cook until translucent.

Add in the cauliflower and lemon juice and zest, mix well.

Cover the pan and let cook for 3 minutes. Uncover the pan and cook an additional 2-3 minutes, stirring to prevent sticking, but allowing a little browning. Turn fire off, and add the chopped cilantro and serve. I didn’t add the cilantro to her portion, again, textures.

Follow and like me on Facebook: http://www.facebook.com/lazygirldinners

Dandelion Greens with Sautéed Mushrooms

Have you ever gone to the farmers market, and laid eyes on a vegetable and thought “that looks interesting let me try it?” We’ll that’s what happened to me this Sunday. I walked up to my favorite herb stand to get my usual arsenal of fresh herbs, and I stumbled upon some fresh dandelion greens. Sometimes I get so inspired by fresh veggies at the farmers market. I love trying new things. My love of trying new things can result in an amazing dish, as in this one, or a not so amazing dish. I had heard of dandelion greens before, but I had no clue how to cook them. So once the excitement of using this new leaf wore off, I was left to figure out what to do with these dandelion greens. I tasted the raw leaves…Big mistake! They are as my daughter would say “super duper, bitter.” They almost remind me of bitter gourd/melon.  But even these greens are not as bitter as bitter melon. I Googled them and found that dandelion leaves are actually weeds. You know those weeds that are growing in your vegetable garden? Yes those weeds, they’re edible…who knew? I decided I wanted to mellow out the bitterness, the best way to do that is to cook them. I got out some Crimini mushrooms, because mushrooms always make greens better, and some garlic and started my journey. I had no idea where I was going with this, but I can tell you that I ended up in taste bud heaven at the end of it all. Every element of this salad adds an additional flavor profile. This dish is filling, and gratifying on so many levels. I could eat it every day! If you can’t find dandelion greens, try substituting a hearty bitter green like beet greens, turnip greens or chard.

Here’s what you need:
1 bunch of organic Dandelion leaves, cut with bottom stems removed
10 ounces of Crimini Mushrooms sliced
2 Large cloves of garlic chopped finely
Handful of walnuts, toasted
1/2 cup of fresh cherry tomatoes sliced in half, I used fresh tomatoes from my garden
1/3 cup of goat cheese, or more if you are so inclined
1 teaspoon of butter
1 teaspoon of balsamic vinegar
Juice of 1/2 of a small lemon
2tablespoons of olive oil
Sea salt and pepper to taste

Directions:
Warm the olive oil and garlic in a sauté pan:

Once you can smell the garlic (20 seconds), add in the mushrooms:

Salt the mushrooms and allow to cook until just before the water from the mushrooms evaporates(5-7 minutes). Add in the tab of butter, and allow the mushrooms to brown and take on a bit of color. This step is important don’t skip it! Browning releases Unami flavor.

After the mushrooms have taken on some color add in the dandelion greens.

Sauté until wilted, then add in the balsamic vinegar and lemon juice:

Mix well, add in the tomatoes, toss for about a minute, turn off the fire:

Add in walnuts, and cheese, toss, season with salt and pepper and serve. This would also be good cold, but served warm this salad is super comforting and satisfying!

What have been some interesting farmers market finds for you?

Follow and Like me on Facebook: http://www.facebook.com/lazygirldinners.com

Gluten free Fried Chicken

I don’t fry chicken very often maybe once or twice a year. Fried chicken really isn’t something I want to make a main stay in my family’s daily diet, if you know what I mean. If I have a craving for fried chicken I usually make my “Tofu fried chicken”.  However, anyone who’s ever had fried chicken, (is there anyone who hasn’t?), knows how delicious and addicting real fried chicken can be. When we travel outside the United Staes, it’s always interesting to see the sheer number of fast food fried chicken restaurants there are. Besides McDonalds, KFC and Churches chicken seem to have a solid hold on the worlds fast food dollars, and they seem to be everywhere! Is there a healthy way to fry chicken, um…probably not! But there are ways to make fried chicken healthier. Baking fried chicken, is one option, but then again that’s not really “fried chicken.” Removing the skin is another option, but I have to admit it’s one of my favorite parts of fried chicken, a crispy skin is everything! This particular recipe has no skin, it’s gluten free, and Paleo because I use coconut flour, and it’s super duper yummy. Frying it in coconut oil adds another delicious flavor profile, trust me when I say that you want to try this recipe. It is beyond delicious!  My daughter isn’t a big meat eater, but one bite of one of these golden nuggets and she was a chicken convert. She kept asking for, more, and more, and “more of that chi-ken.”

Here’s what you need:
1lb of boneless skinless chicken thighs, cut into 2 inch chunks
Sea salt to taste
Black pepper to taste
1/2 cup of Coconut flour
1/2 cup of coconut oil

Directions:
Heat coconut oil in a cast iron skillet over medium high heat. Add coconut flour to a small bowl. Season chicken with sea salt and black pepper:

Dredge the chicken in the coconut flour:

Add Chicken to the hot coconut oil. Cook for about 10-15 minutes, flipping the chicken half way through, to brown on both sides:


Once chicken is cooked through, Remove from the oil and place on paper towels to absorb any extra oil, then enjoy!

Have you ever fried chicken in something other than vegetable or canola oil? How did it turn out?
Like my Facebook page: http://www.facebook.com/lazygirldinners