Orange Creamsicles

How to make Homemade Orange Creamsicles–How to make Half and Half bars

Watch my How to Video above, there is a cameo appearance by my daughter Page

Pin It!

Pin It!


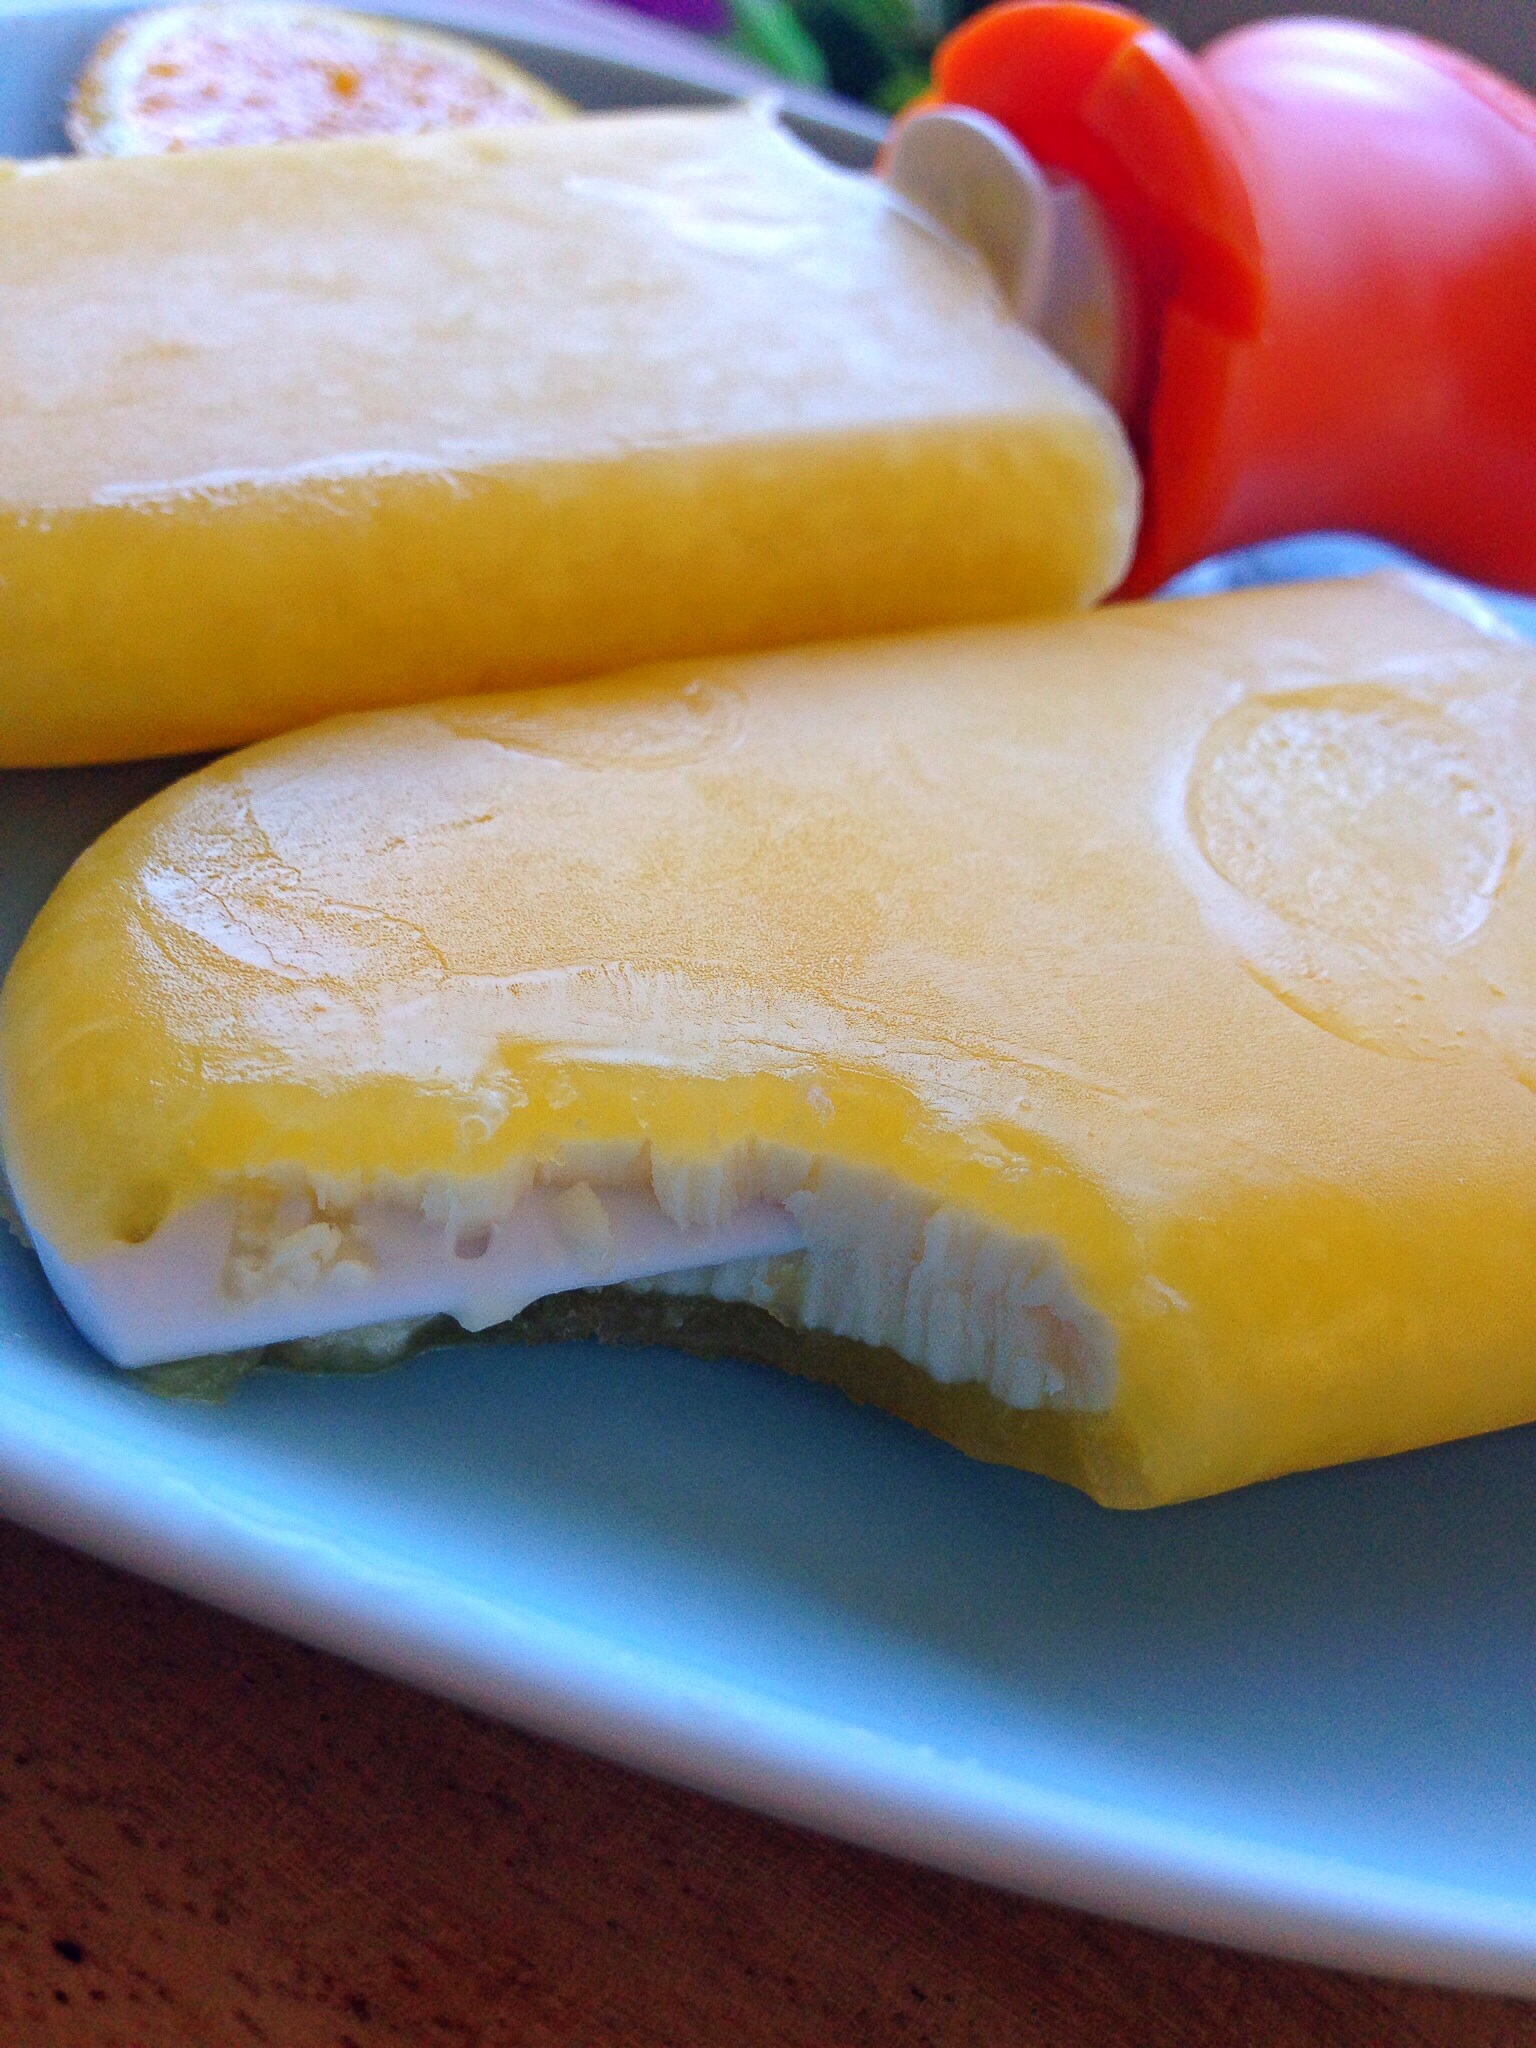
Another favorite frozen treat of mine when I was a little girl was orange creamsicles. We used to call them half and half bars, because that’s exactly what they were, half juice pop and half cream center.  Whatever you call them, I think we can all agree that they are super delicious. Unfortunately creamsicles are not made the way they used to be made, they have a ton of ingredients in the boxed versions in the store, none of which contain real juice or cream. This recipe takes care of that.  I used freshly squeezed orange juice for these, but if you can find some fresh juice in the store that does not have added sugar and preservatives, then go for it.  If you decide to squeeze the juice yourself, just make sure that the oranges that you’re using are very sweet, that way you don’t have to add sugar to sweeten the juice.  If heavy cream isn’t your thing (my vegan friends) don’t fret, I’ve done these with coconut cream, and they are just as yummy if not more.  Lastly, I purchased the Zoku Quick Pop Maker to make these, it’s the only way to get a true half and half bar, with that creamy center filling, but if you don’t want to spend the $25 (for a single), $38( for the duo), or $50 (for the triple) pop maker, you can still make these, but you’ll have to blend the mixture, or just pour half juice and half cream into regular molds, ( I used Zoku Classic pop molds), you’ll get a verticle half and half bar–still delicious.

Prep time: 10 minutes
Ingredients:
1 cup of freshly squeezed organic orange juice
1 cup of heavy cream or coconut cream
1/2 teaspoon of vanilla extract
2 tablespoons of maple syrup
Directions: Add the cream, vanilla extract and maple syrup to a cup, mix well and set aside.  If using classic pop molds, place all ingredients in a blender and blend until well combined.  Divide mixture evenly among molds and freeze for 6-8 hours or until frozen solid.
If you are using the Quick pop maker, Pour the orange juice into the molds and allow to set for 2-3 minutes.  At the 3 minute mark siphon out the remaining unfrozen juice with a straw or a unused infant aspirator–I purchased one just for this.  Zoku sells a tool kit for $20 which includes a siphon tool, but the aspirator is $3 and does the job equally as well.  After you have removed all of the juice, pour cream into the molds, and allow to set for another 4-5 minutes, then follow the directions for removing the pops.
Orange Creamsicle

Orange Creamsicle

image 
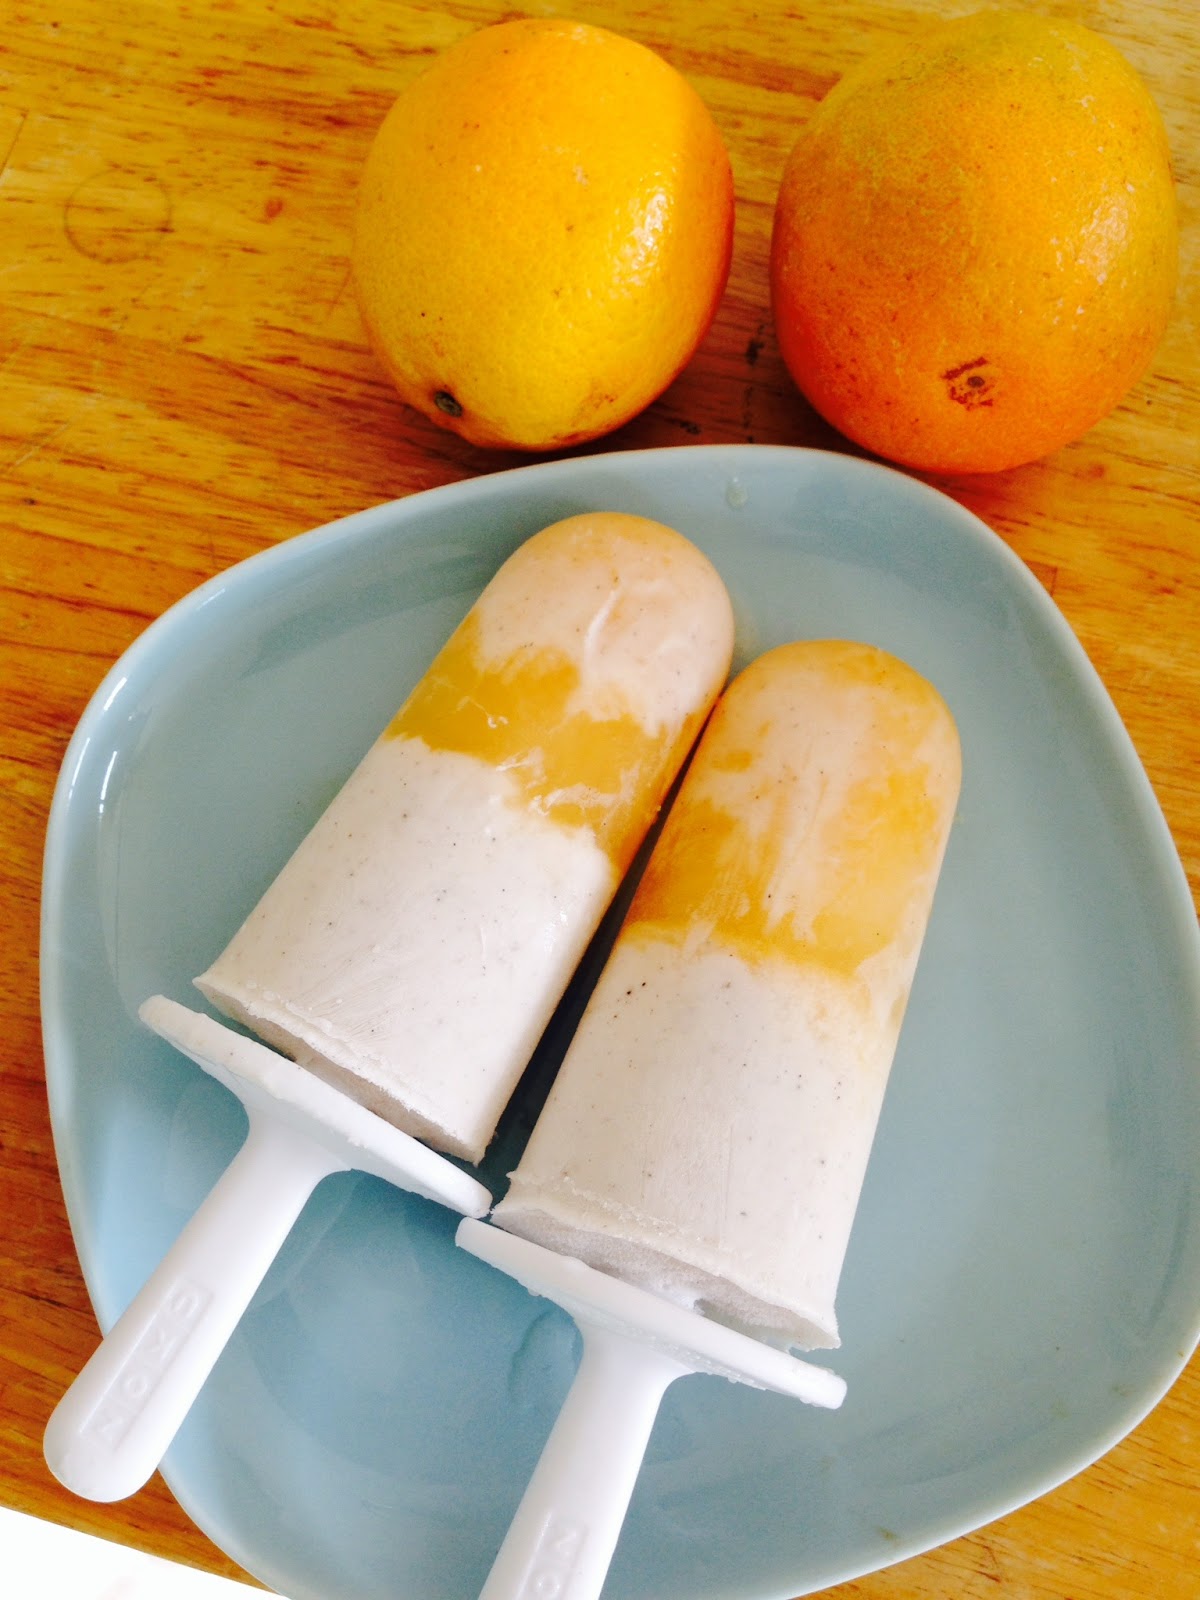
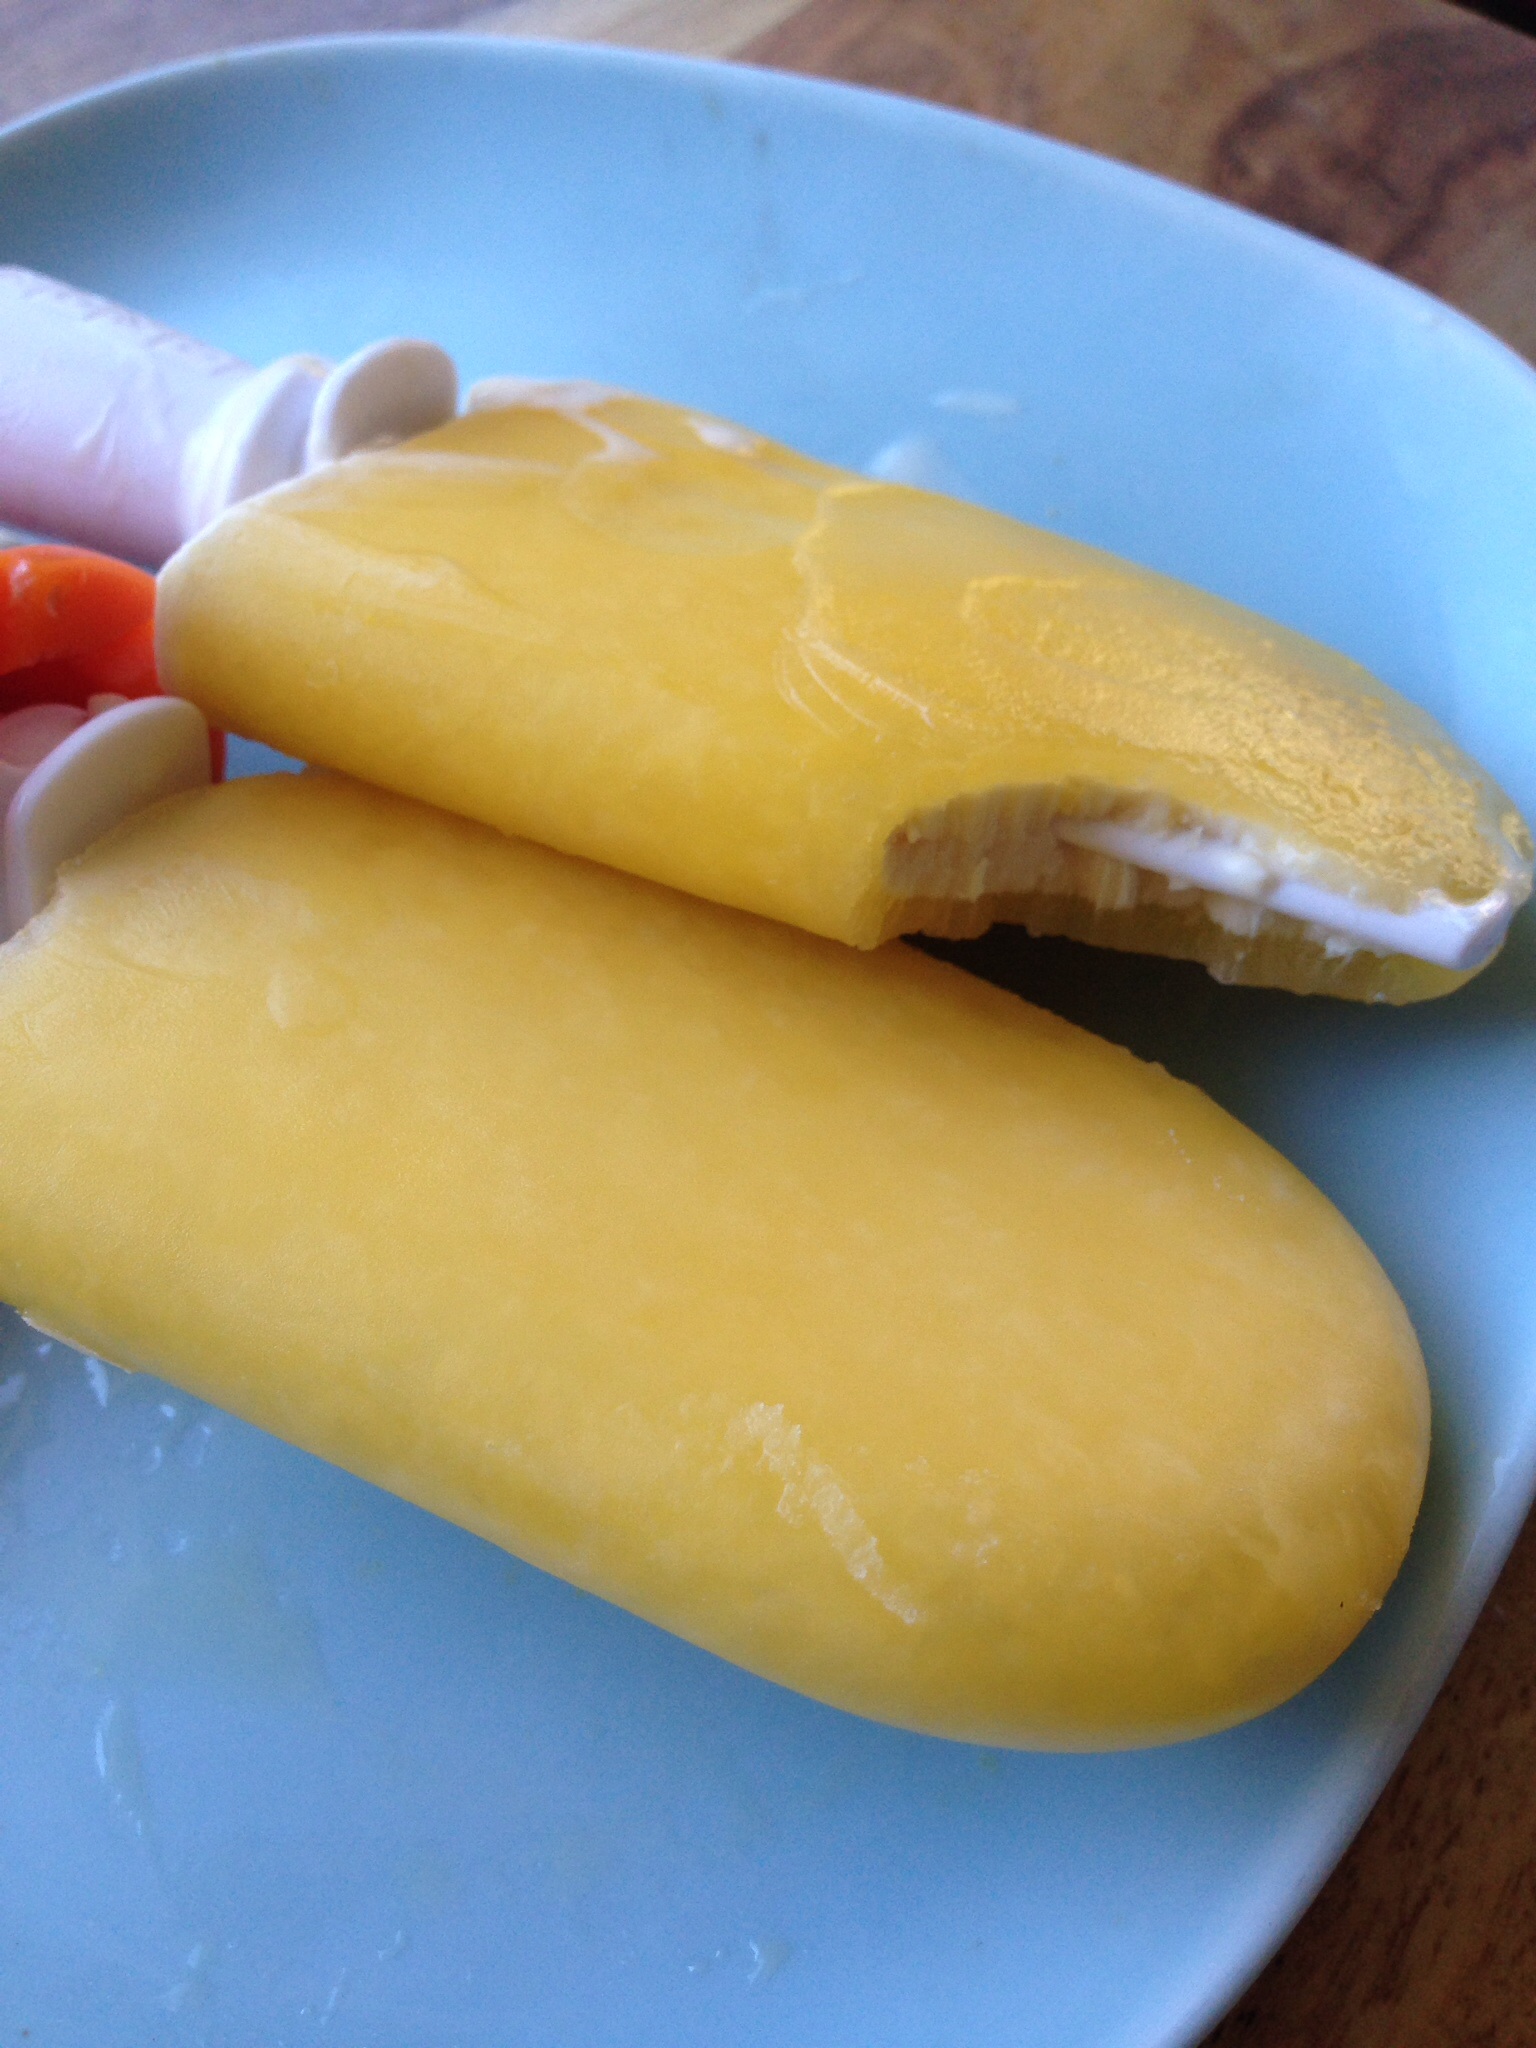
If you aren’t going to eat the pops right away, you can store them in sandwich size zip lock bags and place them in the freezer until you’re ready to eat them.  These never last longer than a few hours in our house, so I can’t say how long you could store them that way. These are the Orange and Coconut Creamsicles that I made using the classic Zoku popsicle molds:  

Chicken Enchilada’s with Salsa Verde

Chicken Enchiladas with Salsa Verde

Chicken Enchiladas with Salsa Verde


Chicken enchilada’s are so easy to make. You can throw almost anything in enchiladas and not mess them up and they’re done in less than 30 minutes. A friend gave me some homemade salsa verde, and the moment I tasted it, I knew that it would make these enchiladas sing!  For the chicken in these I just threw a chopped onion and 1 pound of chicken thighs in my pressure cooker with enough water to cover, and cooked the chicken for 20 minutes–easy peasy.  But if you have leftover chicken you can use that.

Logo Pinterest-01

Pin it!


Prep time: 10 minutes

Cook time: 15-20 minutes

Total time: 30 minutes

Ingredients:

1 lb of cooked chicken (shredded)

2 cups of cheddar cheese (grated)

2 cups of salsa verde

1/2 cup of black olives, sliced

10-12 corn tortilla’s

Directions: Pre-heat the oven to 375F. Lightly greese a 9×11 baking dish, then line the bottom of  the baking dish with corn tortillas.  Top the tortillas with the shredded chicken, top the chicken with salsa verde, top the salsa verde with cheese, and  finally add a layer of  black olives.  Cover the olives with one more layer of corn tortillas, add a  layer of salsa verde, a layer of cheese and the last of the olives. image Place in the oven for 15-20 minutes, or until the cheese has melted, remove from the oven, serve and enjoy! image

Marinated Mushroom Steaks

Marinated Mushroom Steaks

Marinated Mushroom Steaks


I make an entire meatless meal at least once a week.  Going vegetarian, or vegan, even once a week is great for your health, excellent for your pocket book, and a very environmentally friendly thing to do.  One of my favorite and I mean FAVORITE vegetarian meals is faux steak, with beans, rice, salsa, and plantains.  It’s simple–yes! But so delicious, and it reminds me of the delicious dinners I had while in Puerto Rico.  I switch out the steaks for marinated, grilled mushrooms, and the result is perfection!


Logo Pinterest-01

Pin it!


Prep time: 30 minutes

Cook time: 7-10 minutes


Ingredients:

2 large Portabello mushrooms, undersides and stem removed

1/2 teaspoon of worcestershire sauce (optional)

1 large garlic clove sliced thinly

1 tablespoons of olive oil

1 tablespoon of white wine vinegar

sea salt and black pepper to taste


Directions: Mix together all the ingredients for the marinade in a small bowl.  Pour over Mushrooms and let marinade for 30 minutes.


Grill on a hot grill for 3-4 minutes on each side, remove from grill and serve!

Marinated Mushroom Steaks

Marinated Mushroom Steaks

Sauteed Beet Greens with Garlic and Feta Cheese

Sautéed Beet Greens With Garlic and Feta Cheese

Sautéed Beet Greens With Garlic and Feta Cheese


I planted a garden about four months ago, the first thing to sprout from my garden were these lovely beet greens stalks. They were so beautiful and perfectly green that I found myself fighting the urge to pick them too soon.   For the longest time I had no idea that I could actually eat the tops of the beets, which means many, many, beet greens have been thrown in the trash by me without a thought. When it finally hit me that these beautiful greens were actually edible and that I could cook and eat them, I wondered why it had taken me so long to do so!  My husband is not a fan of beets at all. However, he is an ultra fan of the stalks on this vegetable.  I can’t blame him, the greens produced from the beets are delicious and tender, and when cooked, they are reminiscent of tender spinach.

Pin It!

Pin It!


Prep time: 5 minutes

Cook time: 10 minutes

Total time: 15 minutes


Ingredients:

5 cups of beet greens chopped

2 large garlic clove (sliced thinly)

1 teaspoon of balsamic vinegar

1/4 cup of crumbled feta cheese

2 tablespoons of olive oil

sea salt to taste

Directions:  Add the oil and garlic to a saute pan over medium heat.  Cook until you smell the garlic, about 20 seconds.


image

Add in the beet green and saute until they begin to wilt.

image

Add in the balsamic, and cook for another 3-4 minutes.  Transfer the greens to a bowl, top with feta cheese, and enjoy!

image

Roasted Broccoli and Garlic

Roasted Broccoli and Garlic

Roasted Broccoli and Garlic


Trying to get my daughter to eat and love broccoli has not been easy.  This whole food texture thing she has is more trouble than I initially thought.  I mistakenly thought that since she loves roasted cauliflower then roasted broccoli would be a no-brainer—apparently not so with her.  Despite her refusal, this roasted broccoli and garlic dish has become a new favorite for my husband and I.  We both love it! Not only do we love it, but I served it to some friends, and they loved it too!  I’m just going to have to keep trying with my daughter, she has not been won over by a love of broccoli–yet!

Pin It!

Pin It!


Prep time: 5 minutes

Cook time: 15 minutes

Total time: 20 minutes


Ingredients:

2.5 cups of broccoli sliced

3 large cloves of garlic sliced thinly

Coconut oil spray or 3 tablespoons of olive oil

Sea salt and black pepper to taste


Directions: Pre-heat oven to 400F degrees. Line a sheet pan with foil and spray it with coconut oil. Add broccoli, and sprinkle with sliced garlic.  Season with sea salt and black pepper then spray the broccoli generously with coconut oil spray.  If using olive oil, add broccoli to a bowl with olive oil and toss until broccoli is coated, then add it to the sheet pan, sprinkle sliced garlic, season with sea salt and black pepper.

image

Place in the oven and cook for 10-15 minutes or until broccoli starts to brown a bit.  Remove from oven, serve and enjoy.

image

How to make Condensed Milk–Condensed Coconut Milk


How to make Condensed Coconut Milk

How to make Condensed Coconut Milk


It’s not often that a recipe that I concoct requires the use of condensed milk.  Condensed milk is definitely one of those products that has a very specific use.  When I was a little girl I remember looking in my grandmother’s refrigerator and always seeing a can of the Eagle brand condensed milk.  Given that the same can was always in her refrigerator, I don’t think she had many recipes that required it’s use either.  I’m not exactly sure what is in the super sweet concoction sold in the can now, but when  I was making up the recipe for my Coconut chocolate bars, I decided that I needed to prepare my own. I’ve done this with almost every kind of milk, cows, coconut, and almond.  All come out perfectly.  If you are going to do this, then I suggest doing so when you have a few hours to spend at home.  Doing this over low heat, allows you more freedom to do other things while it cooks.  If you want to speed up the process, you can use higher heat, but that will require much more from you in terms of stirring and keeping a watchful eye.

Pin It!

Pin It!


Prep time: none

Cook time: 2 hours

Total time: 2 hours

Ingredients :

2.5 cups of coconut milk (or milk)

3/4 cup of maple sugar (can use whatever sugar you’d like)

1 teaspoon of vanilla extract

2 tablespoons of butter (optional)

Directions: Add milk, and sugar to a sauce pan and simmer over low heat for 1.5-2 hours, or until the milk is reduced by half.

image

Once the milk has reduced(condensed) whisk in butter and vanilla extract. Pour into a container and let cool.

image

It will thicken on it’s own as it cools. Allow the milk to cool completely before adding it to a recipe.

image

image

Strawberry Apple Fruit-roll ups


Strawberry Apple Fruit Roll-Ups

Strawberry Apple Fruit Roll-Ups

Now that summer has arrived we are constantly on the go.  Which means that we spend much more time in the car.  My daughter does surprisingly well on car rides, however, she does better if I am armed with plenty of games to fill her time, and of course snacks don’t hurt.  She is extremely fond of apple strings–apples that I run through my vegetable spiralizer on the spaghetti attachment, however they oxidize so quickly after making them, I like to save those for home snacks.  Enter fruit roll-ups, she loves them and they are extremely travel friendly.  If you follow this blog, then you know I have several recipes for fruit rolls ups my tropical punch fruit roll-ups are my absolute favorite, but the pineapple, or strawberry fruit roll ups are equally as delicious!


Pin It!

Pin It!


Ingredients:

10 ounces of strawberries stems removed

2 medium sized apples, cores removed

Directions: Place the strawberries and apples in a blender and blend until smooth.

image

Pour the mixture out onto a parchment lined sheet and smooth into a thin layer.

image

image

Place in a dehydrator on 134 for 4-6 hours, or in a oven on the lowest setting for 4-6 hours.

image

Fruit roll-ups are done when you can peel them off of the parchment without them sticking.

image

How to make Cherry Lemonade–Made with Real Cherries

Pin It!

Pin It!


Lemonade is as American–especially Southern American–as cherry pie–see my upcoming blog about that–and I’d be remiss if I didn’t share one of my favorite summertime drinks–Cherry Lemonade. Cherry season is almost at an end here, so I thought I’d give the last of my cherries a brilliant send off, by highlighting them in two recipes. If it’s too late in the season and you can’t find a fresh cherry anywhere–then use frozen cherries–skip thawing them, and blend them frozen with the lemon and the sugar. Doing so will allow you to omit the use of ice cubes.

Ingredients:
1 cup of fresh cherries (pits and stems removed)
1 cup of fresh lemon juice
1/2 cup of maple sugar (can sub other sugars, and if you like your lemonade on the sweet side use more sugar)
3 cups of water
ice for chilling

Directions: To a blender add the cherries, lemon juice, and sugar and blend until well combined. Add this mixture to a pitcher, with the water and some ice, mix well, serve and enjoy.

image

D.I.Y. How to make Powdered Sugar–How to make Powdered Maple, Coconut, Date, and Palm Sugar

How to make you own powdered sugar–Yes even Powdered Maple, Coconut, Date, Palm, Agave, or Honey crystal Sugars

Pin It! Pin It!


How many times have you been in the middle of baking, and found that you were lacking one vital ingredient–Powdered Sugar. If you’re anything like me, the last thing you want to do is run out and buy a bag of powdered sugar. If you’re really like me, you probably prefer to use a less processed form of sugar, like maple sugar, coconut sugar, date sugar, or palm sugar but have failed to ever find a powdered version of either of those sugars in your local grocery store. Well now you will never have that problem again–unless of course you don’t have any form of granulated sugar in the house at all, then this can’t help you. But if you do have granulated sugar, then this DIY tutorial will help. All you need is sugar and a spice or coffee grinder –any type of granulated sugar will work–even Maple sugar, Coconut sugar, Date sugar, Palm sugar, Agave sugar, or honey crystal sugar. Watch this video and I’ll show you how. Then use the sugar to make my recipe for Flourless Chocolate Meringue Cookies

White Bean Salad with Lemon Cumin Vinaigrette


White Bean Salad With Lemon Cumin Dressing

White Bean Salad With Lemon Cumin Dressing

This salad represents all that this blog is about.  It’s lazy in every sense of the word lazy and it’s fresh and vibrantly flavorful.  I was talking to a girl friend  of mine the other day about food and little ones.  She was in need of some advice about healthy choices for her little one. We went through the list of what she currently feeds her little one.  On her list was a simple salad of canned white beans drizzled with lemon juice and olive oil.  I thought it sounded delish, and I set out to make my own version of that salad.  I make a lentil salad that is similar to this, but I think this one is much better.  Pair this salad with a crusty piece of sourdough rubbed with a little garlic and grass-fed butter and you’ve got a rustic and delicious meal,which didn’t require you to turn on the stove.  Lazy–yes, absolutely! But it tastes anything but lazy–that counts right?;-)

Pin It!

Pin It!


Ingredients:

15 ounce can of Organic White beans (drained and rinsed)

1/2 cup of feta cheese crumbled

1/2 cup of organic rainbow radish diced

1/2 cup of cherry tomatoes quartered

1/2  cup persian cucumbers diced

1/2 cup of red bell pepper diced

1 Tablespoon of fresh organic Thyme leaves

Sea salt and black pepper to taste


Vinaigrette

5 Tablespoons of fresh lemon juice

3 Tablespoons of olive oil

1/2 teaspoon of cumin

1 medium clove of garlic finely chopped

Sea salt to taste

Directions: Add all of the ingredients except for the sea salt to a large bowl and toss well.

image

Add all the ingredients for the vinaigrette to a mason jar cover and shake until well combined.  If you don’t have a mason jar, just whisk together all the ingredients for the vinaigrette in a bowl, and set aside. Salt the salad ingredients just before serving, this will prevent the tomatoes and cucumbers from becoming soggy, toss, then drizzle with a generous amount of the vinaigrette, toss  again to combine, serve and enjoy!