Roasted Garlic-How to Roast Garlic

How to Roast Garlic

How to Roast Garlic

Can you image cooking without garlic? I can’t! I love it! Garlic lends so much flavor to a savory dish, it’s hard to imagine not having it to use. I love garlic in every state, raw, blanched, powdered, and roasted.  Each has it’s own unique flavor. Roasted garlic is so delicious, and there are so many uses for it. I add roasted garlic to a plain tomato sauce to instantly take it from bland to fantastic! I add roasted garlic to one of my favorite roasted eggplant dishes. I spread roasted garlic on a good piece of crusty bread and dip it into a balsamic, red pepper, and olive oil vinaigrette, and of course, I add roasted garlic to mashed potatoes, or my cauliflower potato mash! There are a plethora of uses for roasted garlic, (like using it for my Roasted Garlic and Lemon Chicken recipe), once you learn how to roast garlic, you will wonder why you’ve been cooking without it!

Pin It!

Pin It!


Prep time: 2 minutes

Cook time:30-45 minutes

Ingredients:

1 large bulb of garlic

1 teaspoon of olive oil

sea salt and black pepper to taste (optional)

1 sheet of foil–must be big enough to fully enclose the garlic

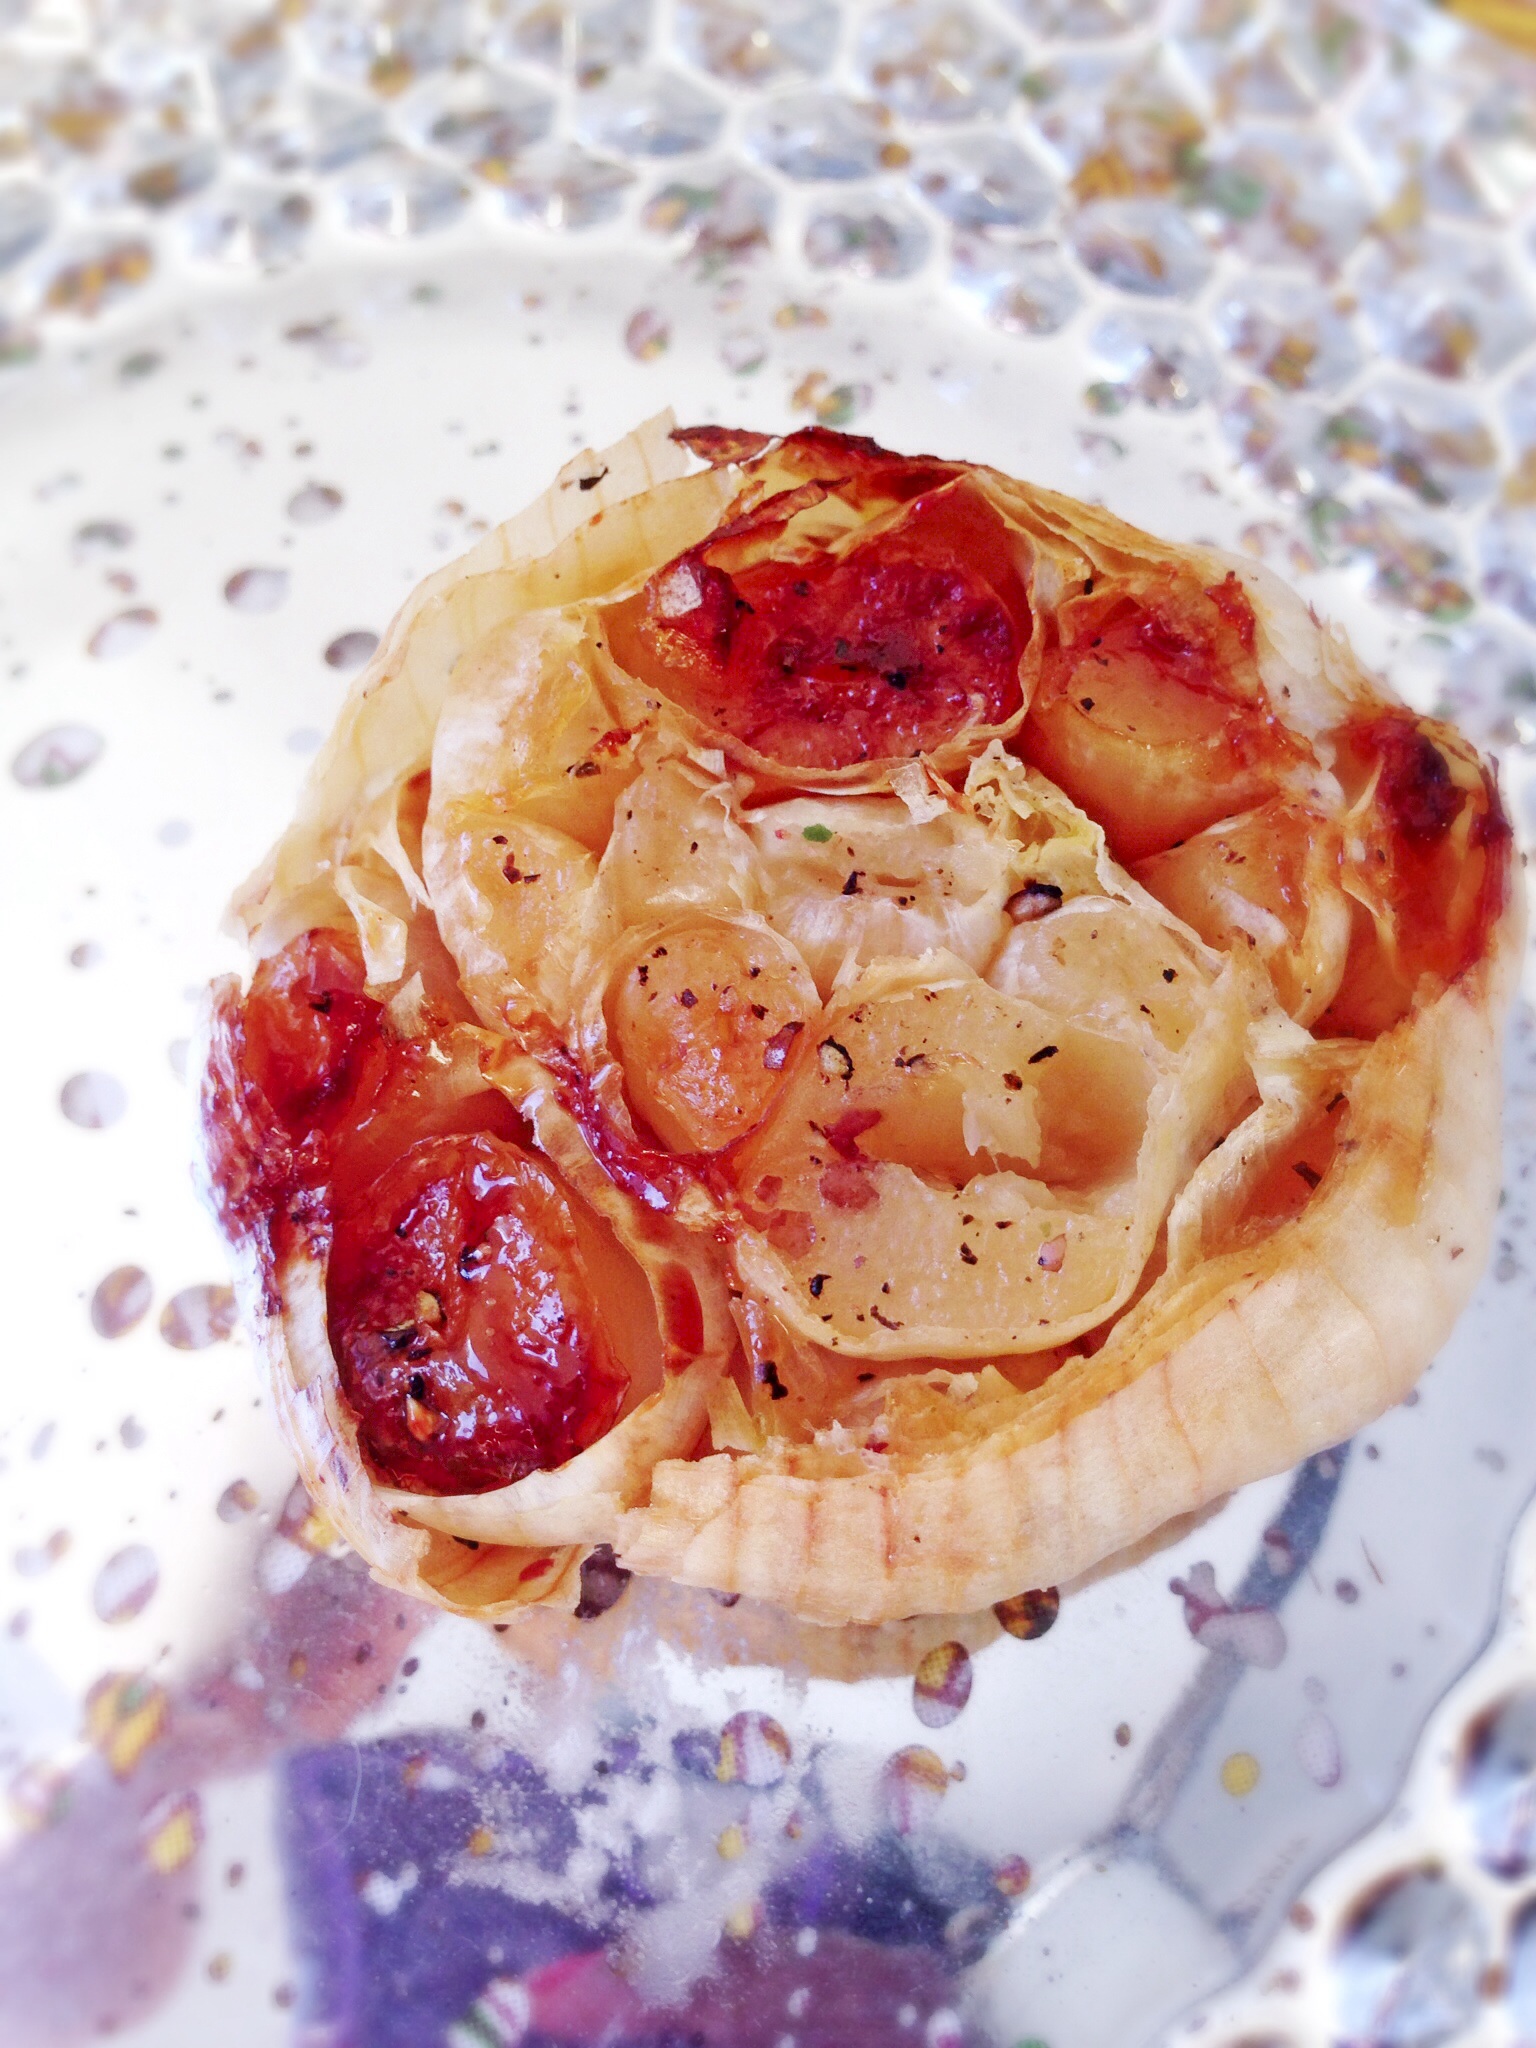
Directions: Pre heat the oven to 400F. With a knife slice the top off of the garlic. Place the garlic inside of the foil, pour the oil over the top of the garlic, making sure to cover all exposed garlic. add sea salt and black pepper if using:

image

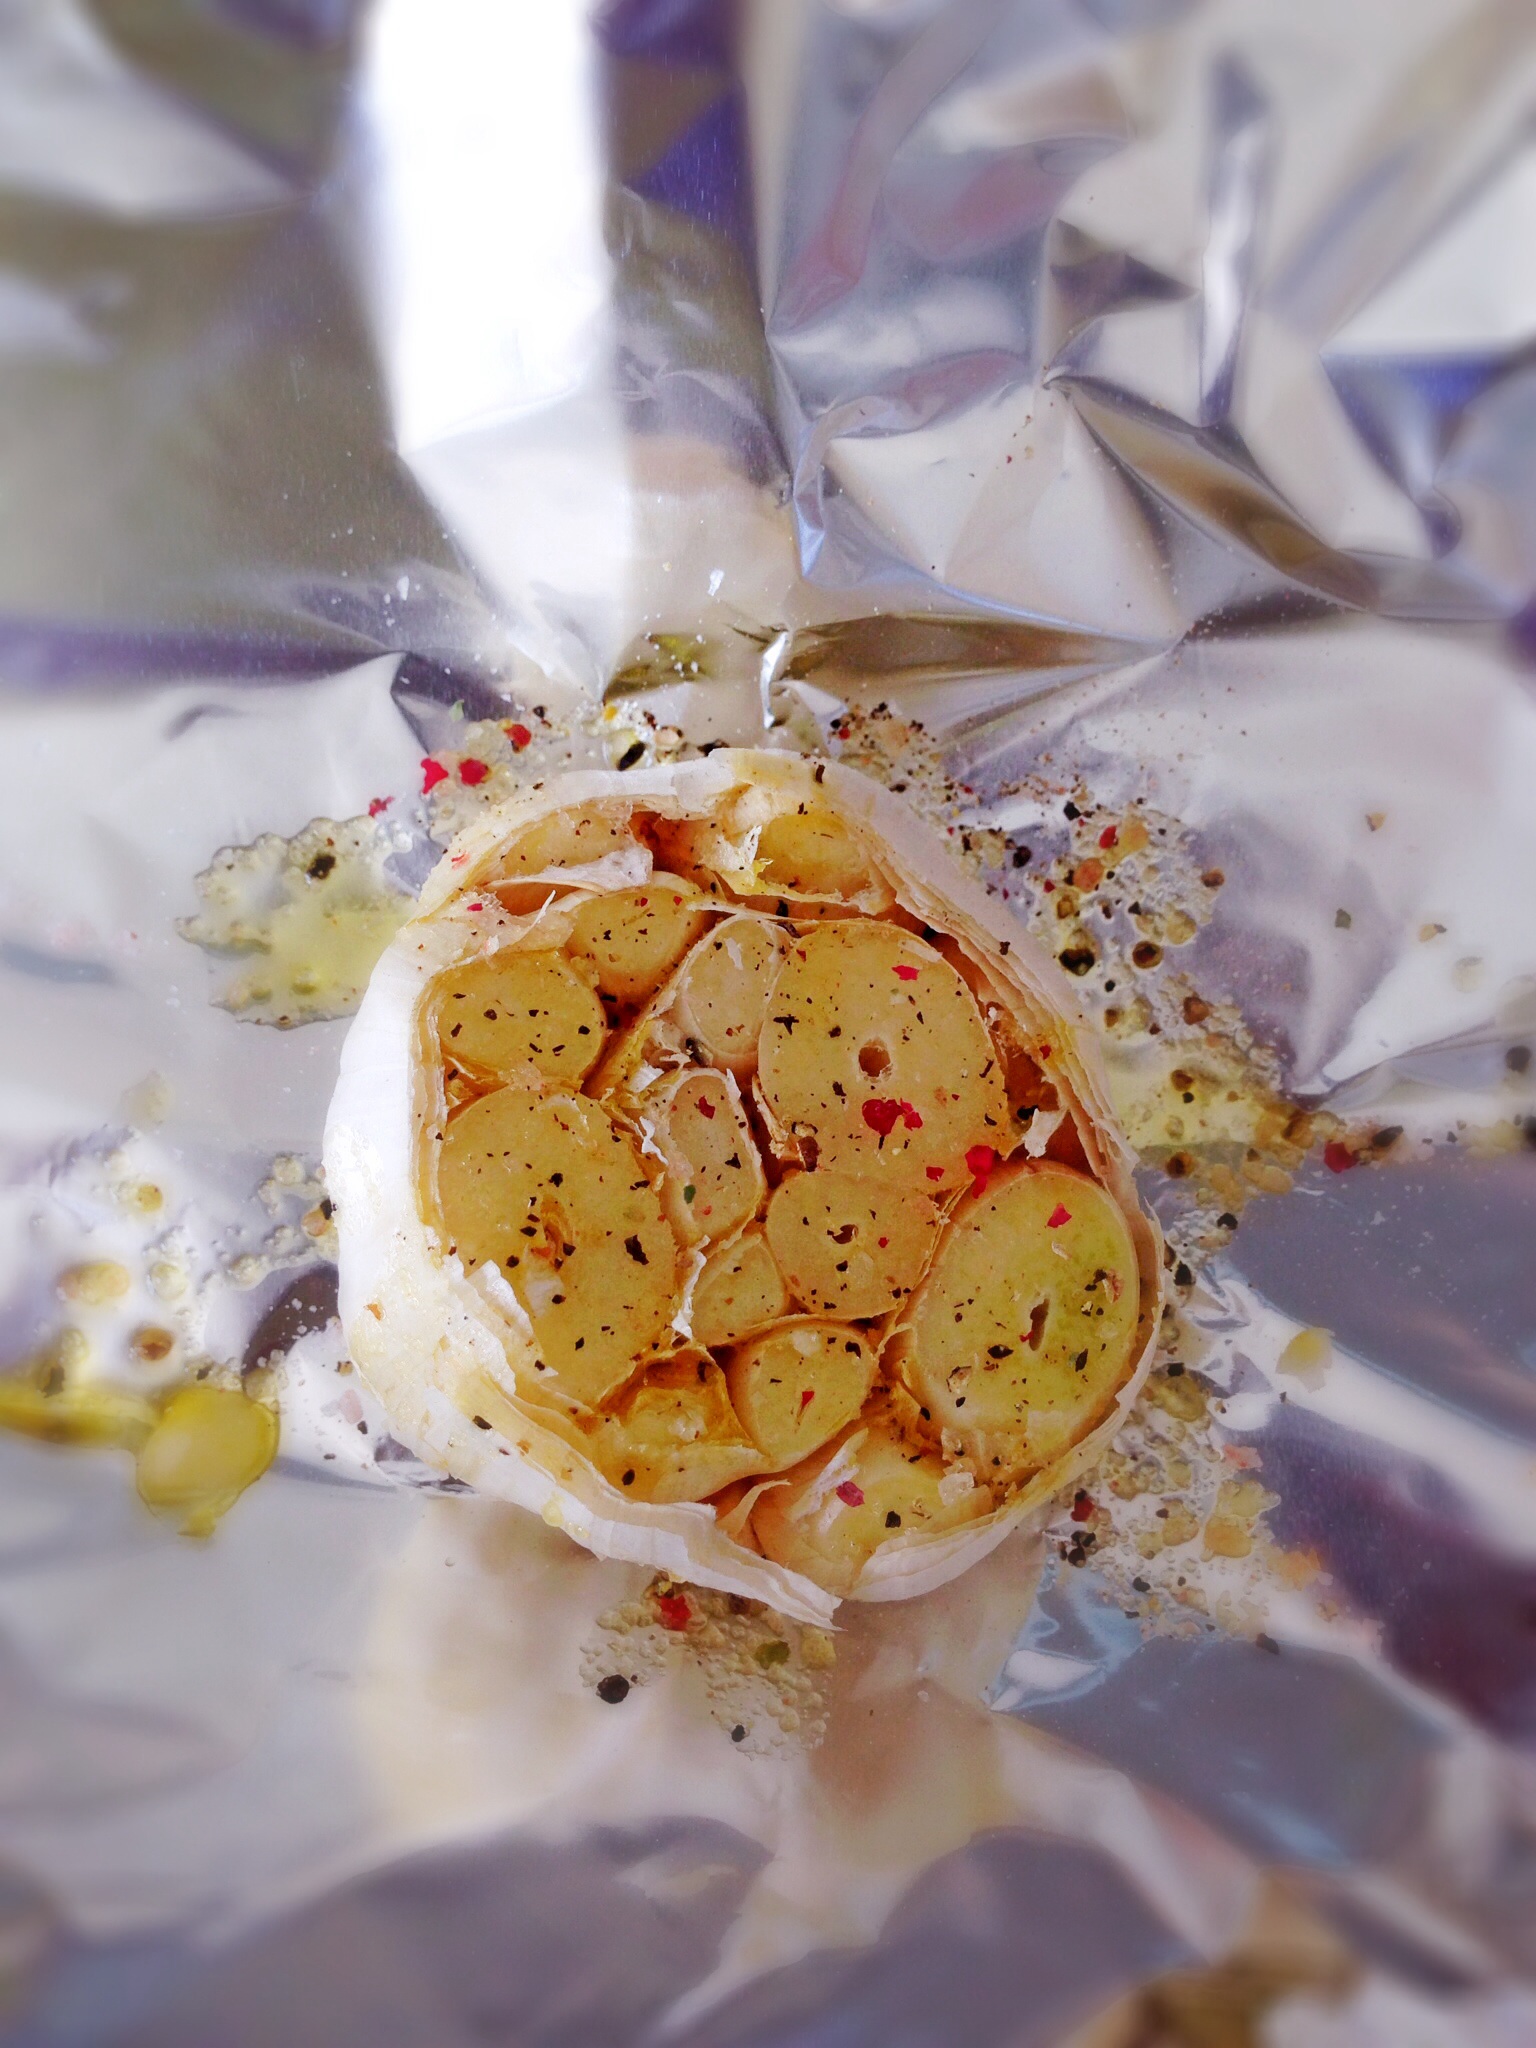
Fold all sides of the foil, making sure that the garlic is fully enclosed. Place the garlic bulb in your oven:

image

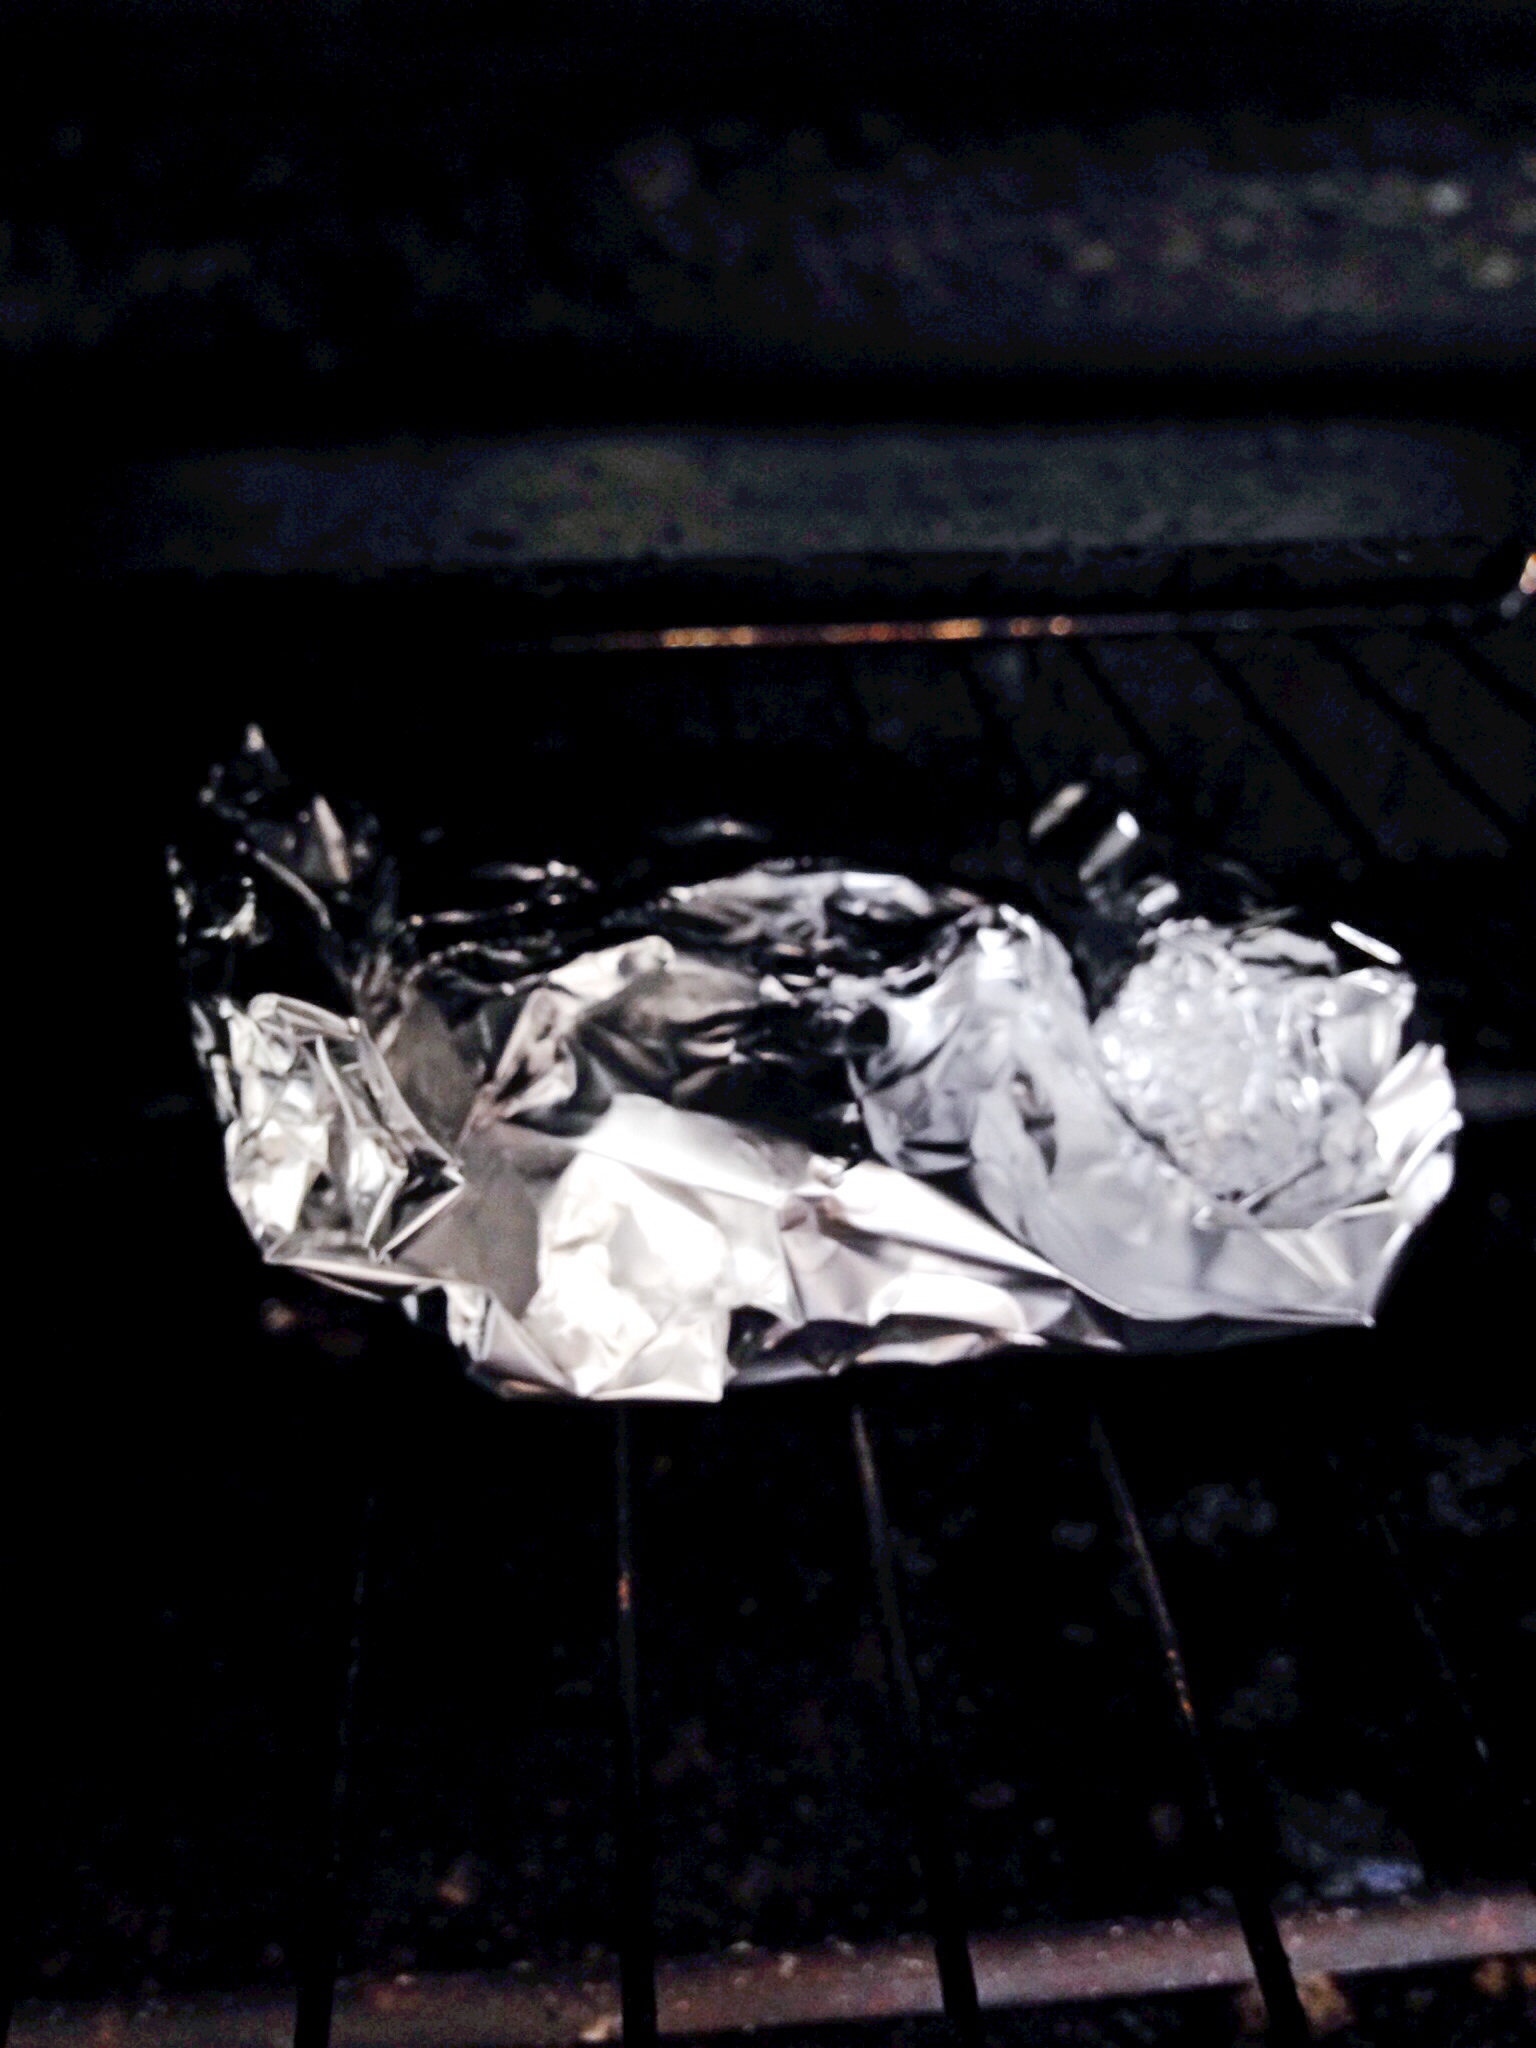
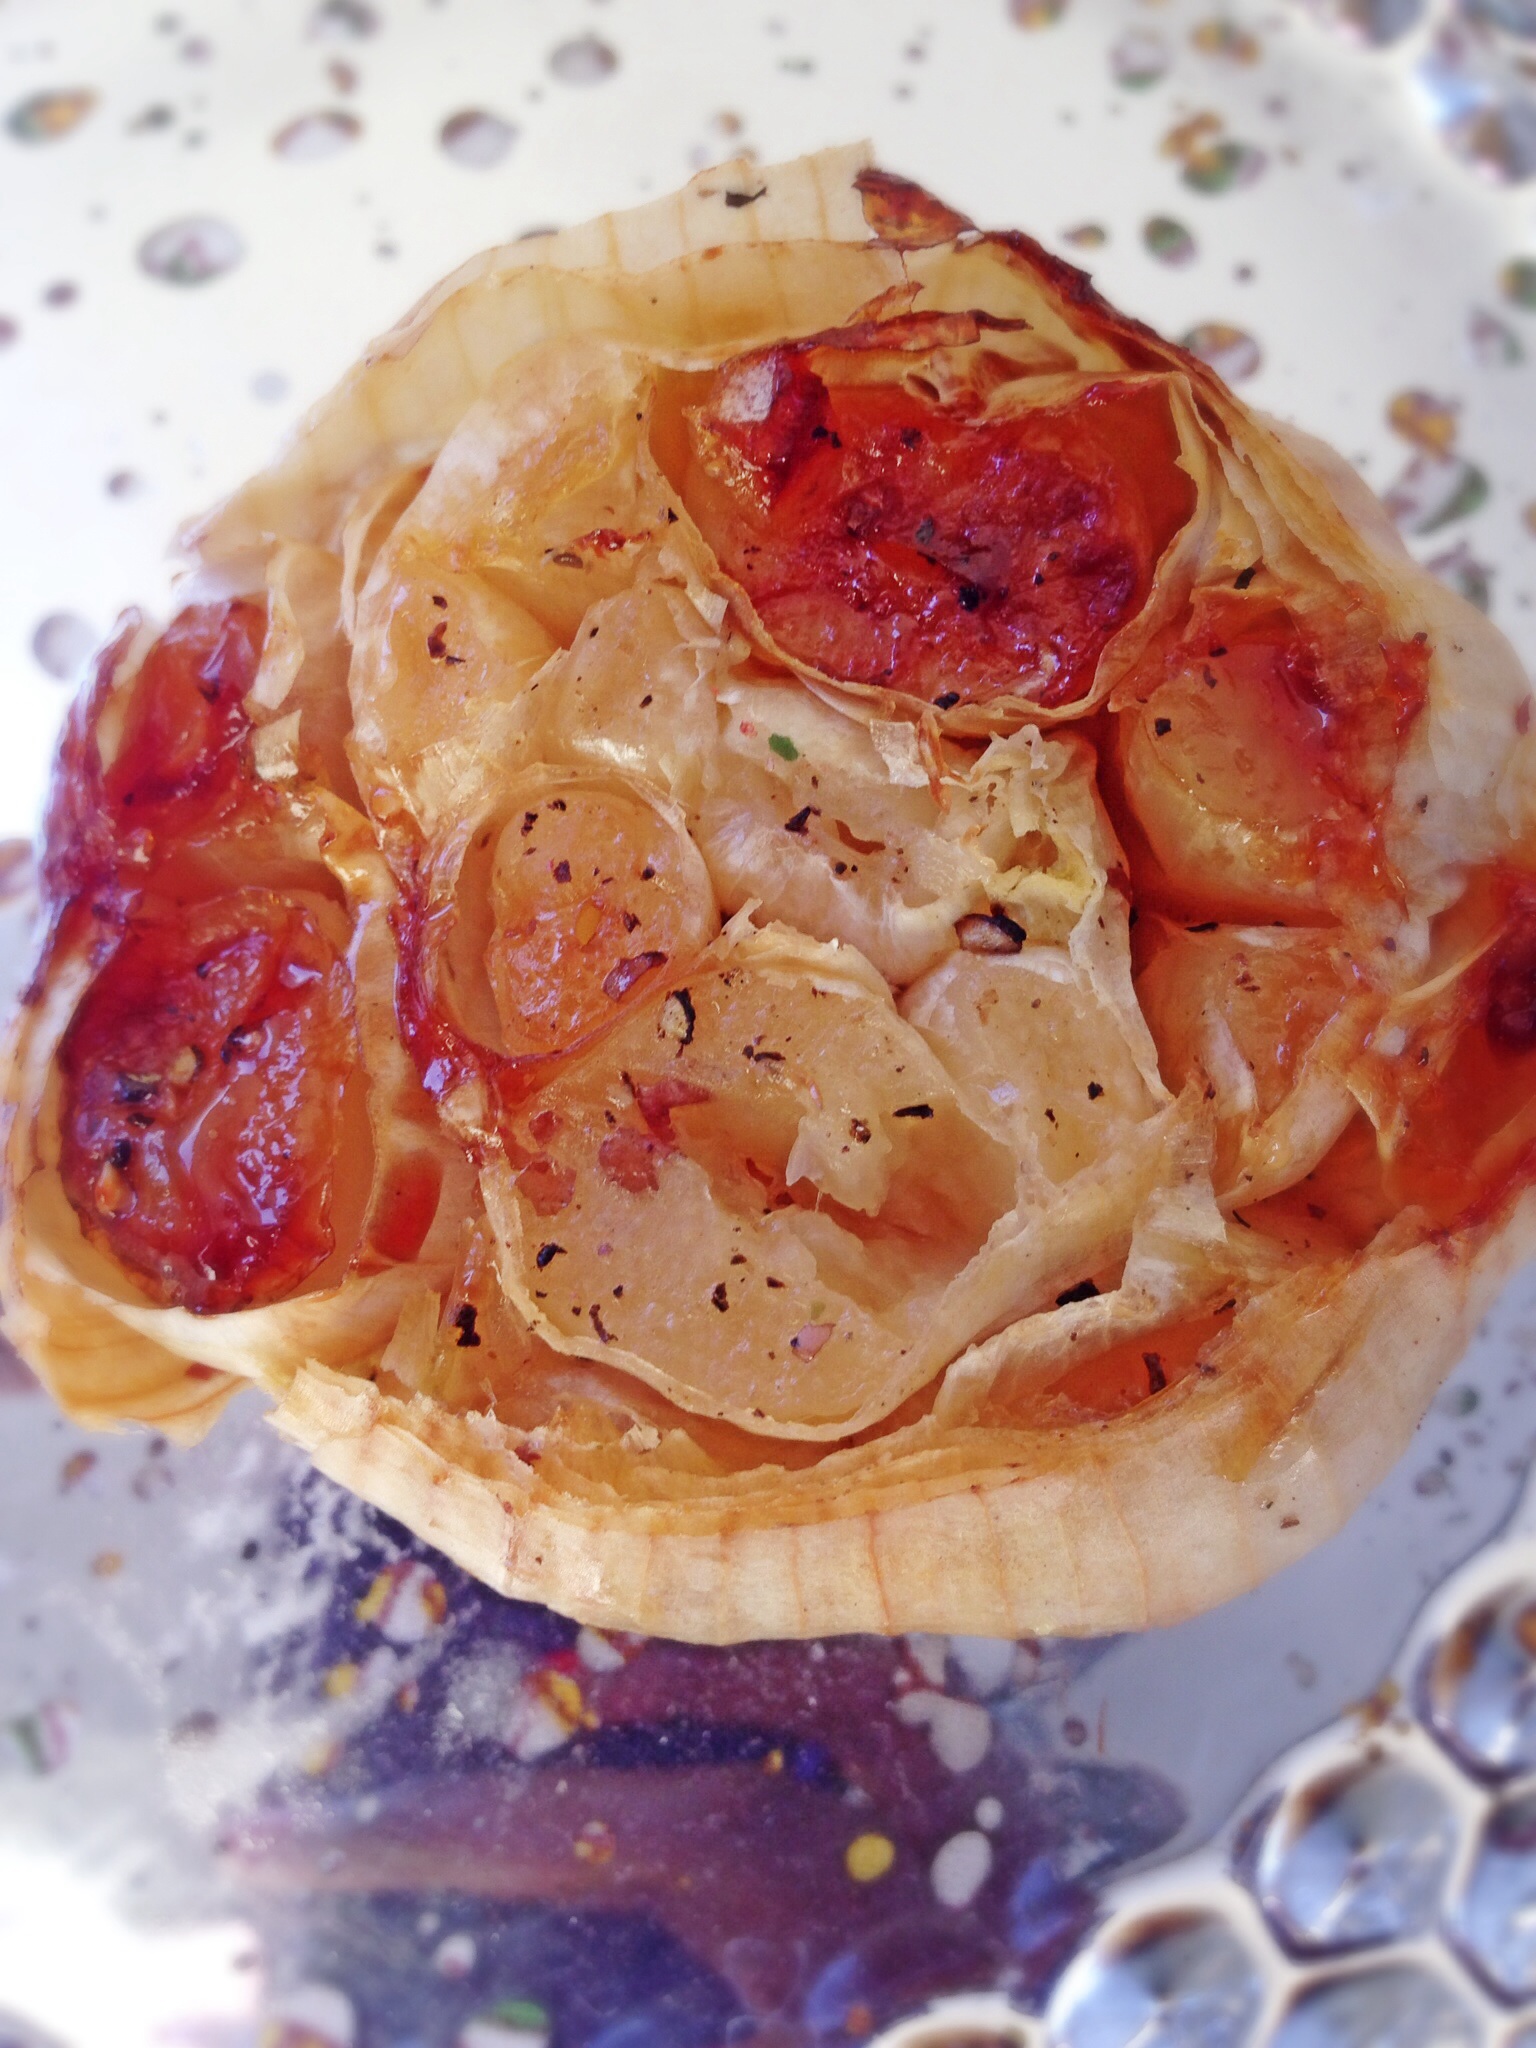
Cook  for 45 minutes, or until garlic is beautifully golden brown:

image

Allow to cool for 10-15 minutes, then remove by squeezing, or by removing each individual clove of garlic with a pairing knife, and enjoy!

Flourless Peanut Butter and Chocolate Meringue Cookies


Flourless Peanut Butter Meringue Cookies

Flourless Peanut Butter Meringue Cookies

If there was ever a food match that was made in heaven, it is peanut butter and chocolate! One of my favorite lazy treats is to dip a dark chocolate bar into peanut butter.  So the other day when I was craving a sweet, I thought what a great idea it would be to make a delicious peanut butter cookie that was both moist and light.  Sort of like my Starbucks Inspired Flourless Chocolate Cookie ,or, (cue the light bulb over my head), how about exactly like my Flourless Chocolate Cookie! But instead of adding melted chocolate to the meringue, I’d add melted/warmed peanut butter—and so this cookie was born! It’s light, moist, gooey, and crisp in all of the right places! A miracle really, considering the fact that we all know that I am not the most proficient baker. I was fully expecting that this would turn out to be another disastrous baking episode for me. I’m so glad that I was wrong, and that this turned out to be all that I wanted and more!

Pin It!

Pin It!


Prep time: 10 minutes

Cook time: 10-12 minutes

Total time: 20 minutes

Makes 8 cookies

Ingredients:

2 egg whites
6 Tablespoons of creamy peanut butter warmed
1/8 teaspoon of cream of tartar
3/4  cup of powdered sugar (I used maple sugar,see how to powder any type of sugar here)
1 teaspoon of vanilla extract
1/2 cup of chocolate chips (optional)

1/8 teaspoon of sea salt

Directions:  Pre-heat the oven to 375F. Over low heat warm the peanut butter, until it begins to thin a bit, and takes on a glossy shine—about 5 minutes, set aside.

image

Add the two egg whites to a bowl and beat on low until bubbles form, add the cream of tartar and beat on high, add in the sugar one tablespoon at a time and beat until peaks are stiff and fluffy—you can turn the bowl upside down with out the mixture running.

imageimage

Pour in the melted peanut butter and fold it into the egg white fluff–be gentle– fold until the white streaks disappear.

image

image

Fold in the chocolate chips,

image

then spoon the cookie mixture onto a parchment/silpat lined cookie sheet.

image

Let them cool for 10 minutes, then move them to a cookie rack to continue cooling 5-7 minutes. Serve and enjoy!

image


image

Ground Chicken and Cabbage Curry

Ground Chicken and Cabbage Curry

Ground Chicken and Cabbage Curry

Do you ever pull out something for dinner and then have no clue what you’re going to make with it? I do…all the time! Most of the time it works out, but working out on some days can be relative. Success for me is getting a nutritious meal on the table on most days. This Chicken and Cabbage curry recipe  almost didn’t come together. I pulled out the ground chicken, but all I had to go with it was the cabbage. I didn’t have any fresh onion, no fresh garlic, none of the ingredients one needs to make something taste good. My fridge was empty because I had put off grocery shopping, and now I had to pay the price. I turned to my cupboards for help. I had a bevy of ground dried spices, curry, onion powder, ground ginger and garlic.  From those dried spices, this meal was born, and let me tell you what a delicious meal it was! It is one of my husbands favorite meals. I’ve made this with fresh onion and garlic, but the dried spices give this much better flavor.

Pin It!

Pin It!


Prep time: 5 minutes

Cook time: 20 minutes

total time: 25 minutes

Ingredients:

1 lb of ground chicken

1 tablespoon of onion powder

1 teaspoon of garlic powder

2 tablespoons of curry powder

1 teaspoon of ground ginger powder

2-3 tablespoons of  olive oil, or ghee

1 small head of cabbage, chopped roughly

4 tablespoons of freshly chopped cilantro

Directions:

Heat olive oil in a pan add dried spices and  heat for 20 seconds or just until spices become fragrant. Add in ground meat and brown. Once meat has cooked, add in the cabbage, and cook for about 5-7 minutes or until cabbage wilts a bit.

image

Remove from heat, top with cilantro and serve as is, or over a bowl of brown basmati rice and enjoy!

image

Grilled Pork Chops with Spicy Mustard Salsa

Grilled Pork Chops With Spicy Brown Mustard Salsa

Grilled Pork Chops With Spicy Brown Mustard Salsa

One of my favorite restaurants to eat at, when we are in Los Angeles, is Cafe Brazil. It’s a small restaurant, with seating for less than 50 people but the food is fantastic. If you’ve ever watched any dating show, then you’ve probably seen this restaurant several times, dating show’s love to film dates there. It holds a special place in my heart because it was one of the first restaurant’s  that my husband I would frequent when we were dating.  His mom lived in LA so we’d go up for a visit, and then grab lunch or dinner before heading back, sometimes with mom in tow.  The food there is pretty straightforward as far as food goes, meat, beans and rice, fresh tropical juices.  Simple as can be, but the food doesn’t have to be fancy to taste good.  One of my favorite entree’s there is grilled pork chops with beans and rice, and a simple tomato and onion salsa, to which they add fresh parsley and a spicy brown mustard vinaigrette! So what’s a girl to do when a craving for Cafe Brazil strikes? Get in the car and drive there, or make it herself! I obviously chose the latter!


Pin It!

Pin It!


Prep time: 5-7 minutes

Cook time: 10-15 minutes

Total time: 25-30 minutes

Ingredients:

Ingredients:

Salsa:

1/2 cup tomatoes chopped

2 tablespoons of finely chopped onion

2 tablespoons of parsley

sea salt to taste
Vinaigrette
1 teaspoon spicy mustard
2 teaspoons lemon juice
1 teaspoon red wine vinegar
3teaspoons olive oil
1/4 teaspoon garlic powder
Sea salt to taste

Pork chops
2 thick pork chops

1 teaspoon garlic powder,

1 teaspoon onion powder,

1 teaspoon paprika,

1 teaspoon cumin powder

1/8 teaspoon chili powder

sea salt to taste

Directions: Combine the ingredients for the mustard vinaigrette and set aside.

image

Combine the ingredients for the salsa, top with the vinaigrette and set aside.

image

Combine the seasoning for the pork chops, then rub generously into pork chops

image

Grill chops for 5-7 minutes on each side, or until cooked through–do not over cook, pork chops dry out quickly.  Once chops are done, top with spicy salsa and enjoy!

image


Coconut Cream Banana Pudding

Coconut Cream Banana Pudding

Coconut Cream Banana Pudding


I love dessert, but I’m one of those rare people who can consume just a few bites and be completely satisfied with a dessert.  I don’t like to make whole cakes, pies, or a complete pan of any type of dessert unless I’m taking it to a party.  At home it will just get thrown in the trash.  I’m a single serving dessert kind of gal.  One serving desserts make me happy, their super delicious, quick and easy to make, and always satisfying without the guilt and temptation to eat more. This Banana Coconut Cream dessert is exactly that.  It’s light, takes minutes to make, and is gone just as quickly.  The key to this dessert is refrigeration. Unlike whole milk cream, you don’t need to whip coconut cream for it to set into pillow like mountains, just put it into the refrigerator and  The coconut cream will set up nicely. If you want to make this for an after dinner snack, put the cream into the refrigerator at least an hour before you want to make this.  The best part of this dessert–besides the fact that it’s out of this world delicious–is that it only requires four ingredients, and you don’t have to cook any of them!


Pin It!

Pin It!


Prep time: 5 minutes

Cook time: none

Makes 2 servings

Ingredients:

1 cup of coconut cream

1 teaspoon of vanilla extract

2 tablespoons of maple syrup–can sub agave

2 bananas( one smashed with a fork, the other sliced)

5  ginger snaps roughly crumbled (can sub with graham crackers, or granola, or vanilla wafers, or nuts)


Directions: Smash banana, with a fork and set aside.  To a small bowl add the coconut cream, vanilla extract, and maple syrup, mix well, cover and refrigerate  until coconut cream has set–meaning it’s firm like a custard.  Once set, remove from the refrigerator, and fold in the mashed banana. If you’re short on time, you can fold the mashed banana into the cream when you add the vanilla and the sweetener.  Check out the video below  to see exactly how I put it together.  If you like this dessert then you’ll love my Banana Marshmallow Split, it’s also a single serving dessert, super easy and delicious!

Click on the link to see how I put this dessert together: https://www.youtube.com/edit?video_id=6LHcyfEoQg8

While you’re at it  click here to subscribe to my channel.

image

Eggplant Fries

Eggplant Fries

Eggplant Fries

One of my husbands absolute favorite vegetables is eggplant. If I made it every night for dinner for three years straight that would not be enough for him. He loves it! The problem with his love for eggplant is not that I don’t love it, because I do. It’s that it’s hard for me to find organic eggplants.  Short of me growing our own private stag of organic eggplants, which I have tried, and failed at, I just have not been able to appease his love for this vegetable. Whenever, our Whole Foods has organic eggplants a buy them, no matter what they cost. Fortunately for me, my husband will eat eggplant anyway I prepare it.  Page on the other hand is just getting acquainted with eggplant, so preparation for her is a much less forgiving thing.  She loved these eggplant fries which made my heart happy. The key to cooking eggplant in any kind of oil, is to bring your oil up to temperature before adding the eggplant. If you add the eggplant to the oil before the oil is hot enough, you will get an oil logged disgusting piece of eggplant. Eggplant is like a sponge in that way, it soaks up the oil, so make sure your oil is nice and hot before you add the eggplant.

Pin It!

Pin It!


Prep time: 5 minutes

Cook time: 10 minutes

Ingredients: 1 medium sized eggplant, julienned but keep them thick

1/2 teaspoon of turmeric

sea salt to taste

4-5 tablespoons of safflower oil ( can substitute with grape seed, or another high heat oil)

Directions: Add the eggplant, turmeric and sea salt to a bowl and toss well, and set aside. image Heat the oil in a cast iron pan, once the oil is hot, add in the eggplant, make sure not to over crowd the pan. image Brown the eggplant on all sides, then transfer to a paper towel lined plate. image Season with more sea salt if necessary, then Serve and enjoy!

Brown Chicken Stock- Modernist Cuisine inspired

Modernist Cuisine Brown Chicken Stock

Modernist Cuisine Brown Chicken Stock

I recently purchased the six set Modernist Cuisine book set. It is a beautifully constructed work of art, but more importantly, it is the cook book to end all cook books. If you want to learn the how’s, and why’s of cooking, from a deeply scientific perspective, then you have to get this books set. I’ve certainly learned a lot about cooking from reading it. This chicken stock is one of the most flavorful stocks that I have ever made. There are not many stock recipes that call for the use of ground meat, but this one does and of course there is a very scientific reason for that, let me explain. It starts with extraction. The smaller the ingredients are, the easier it is to extract flavor from those ingredients. dicing  or slicing stock ingredients more finely increases the surface area of food dramatically and doing so also reduces the cook time. So using ground meat allows you to get more chicken flavor out of the chicken and into your stock. Seems logical enough, right? This recipe also calls for the use of a pressure cooker. By now you all know that I’m a big fan of using pressure cookers, especially to make stocks. Pressure cookers, save time, and at the same time increase and condense flavors, they are great tools, and if you don’t have one you are missing out. I strayed a bit from the exact recipe in Modernist Cuisine, so if you want that recipe exactly as they wrote it click here.

Pin It!

Pin It!


Prep time: 10 minutes

Cook time: 2.5 hours

Ingredients: 1lb of ground dark meat chicken

3 small chicken legs

1 cup of thinly sliced carrots

1 cup of thinly sliced celery

1 large onion sliced thinly

2 large cloves of garlic thinly sliced

7 cups of cold water

4 sprigs of parsley or thyme

Sea salt and black pepper to taste

1 tablespoon of safflower oil

Directions:

Heat oil in the base of the pressure cooker, add in chicken legs and brown on all sides. image Remove to a plate and set aside. Add ground meat to the pot and brown,remove to a plate and set aside. Add onion, carrots, celery, and garlic to the pot and cook until soft. image Return browned meat to the pot, add parsley, image Add cold water, image Place the lid on the pressure cooker, lock it and bring the cooker to full pressure without venting–you should not see steam coming out of the top, if you do, the pressure cooker is over-pressurized, lower the heat, and cook for 2 hours undisturbed. At the 2 hour mark remove from heat and depressurize your cooker based upon manufacturers instructions. Allow the stock to cool, then pour the stock through a sieve. Let cool further, then skim off the fat, before pouring into an airtight container and storing it. You can freeze this, if you are not planning to use it right away. Now, what do you do with all of the meat that’s left.  The book says that if you have done your job correctly, and extracted every ounce of flavor from this meat, then to toss it. My dogs whines and dopey eyes persuaded me in a different direction;-)

Homemade Chicken Stock -Using Leftover Roast Chicken Carcass


Homemade Chicken Stock

Homemade Chicken Stock

Store bought stock is great, it involves no work, other than opening a box, and pouring it into your pot. What’s not to love about that? As great as the store bought chicken stock is, it lacks the depth of flavor you get when you make a homemade stock.  Although you gain flavor from making a stock at home, it does take time, even if you use a pressure cooker. If you are going to make this chicken stock, then do it when you have a few hours to lay around the house. Although this isn’t something you need to check very often, it does require time to simmer. This particular chicken stock is one of my favorite methods of making chicken stock, mainly because I get to make use of something that would normally get thrown out–the left over carcass of a roasted chicken. You read that correctly, this chicken stock is made using the carcass of a roast chicken.  I normally add the chicken carcass, and the bones from the thigh and leg bones, I just pick the meat off of them and add them to the pot.  If you’d like a more potent chicken flavor you can add a few raw legs into the pot as well, but I find that it’s not necessary, if you simmer this stock long enough it will be full of flavor. Tomorrow I will show you another way to make chicken stock, which I learned from Modernist Cuisine, stay tuned.

Pin It!

Pin It!


Prep time: 10 minutes

Cook time: 3-4 hours

Ingredients: 1 Roast Chicken carcass

1 cup of organic carrots diced

1 cup of organic celery diced

1 large brown onion diced

4 sprigs of organic thyme

2 large cloves of garlic sliced

7 cups of cold water

1 Tablespoon of olive oil

Sea salt and black pepper to taste

Directions:  Add the oil to a stock pan or pressure cooker, add in garlic and onion, and cook until onions turn translucent about 5-7 minutes.  Add in carrots and celery, and cook for another 5 minutes. image   Add in the carcass of the chicken and any additional bones that you have saved, add in the thyme image Add in the cold water, image   Bring stock up to a boil, reduce heat to low, cover and simmer for 3-4 hours.  When I cook this on the stove I check it every 45 minutes. After about 3.5 hours on the stove this stock, should be nice and flavorful, but the longer you cook it, the more concentrated it becomes and thus more flavorful. After the flavor is where you want it, turn off the fire, allow to cool to room temp, you can remove the fat that has formed on top of the stock at this point, then strain the stock through a sieve.  If you are doing this in a pressure cooker, which I recommend, after adding the water to the pot, close the pot, lock the lid and bring up to pressure, lower the heat once the pot has pressurized, and cook undisturbed for 2 hours. Turn off the heat, then depressurize your pot according to the manufacturers instructions, remove lid, and allow the stock to cool to room temperature.  Strain the stock through a sieve and freeze in an airtight container. This recipe makes about 4.5 cups of stock, I split it in half and freeze it. It makes it easier when I have a recipe that requires only 2 cups of stock. The remaining half cup of stock, I freeze in ice cube trays, and once frozen, I seal those in a ziplock type bag.  One ice cube of stock is about  tablespoon of stock, great to  make sauces with. image

Lemony Chicken Orzo Soup–It’s gluten free!

Lemon Orzo Chicken Soup

Lemon Orzo Chicken Soup

Last week I was out with my husband running errands and we were trying to decide on lunch.  He wanted something filling, and I wanted a really great salad.  As easy as salads are to make and obtain, very few match the salads that I make myself.  I knew it would not be easy to find a place to eat in which we would both leave happy.  After verbally running through a list of eateries, my husband saying no to some, me saying no to others, we both compromised and settled on Panera. I ordered my salad, and after some time mulling over the menu, my husband ordered a bowl of lemon orzo soup.  The ceasar salad  I ordered, was not as great as the  Ceasar salad I make at home, but I was expecting that. However, my husband really enjoyed his soup.  I didn’t taste the soup, but it looked really good, and since he enjoyed it, I decided I would try to make it at home for him.  He is such a big fan of soups in general. When I make soup, which is not often, he rants and raves, because to him, soups are a big treat. The key to any great soup is the broth.  I made some broth with the leftover carcass of a roast chicken that we had for dinner.  I will share that recipe and two other ways to make chicken broth with you later.  For this soup use the best organic chicken broth that you can find.  I used a gluten free orzo for this, you can leave it outfor a paleo version of this soup, or use a regular pasta orzo for an authentic Lemon chicken orzo soup.

Pin It!

Pin It!


Prep time: 5 minutes

Cook time: 45 minutes

Ingredients: 1lb boneless skinless chicken thighs or 4 cups of pre-cooked chicken cubed

1 cup of diced carrots (3 medium carrots)

1 cup of diced celery (4 celery stalks)

1 large onion diced

2 large cloves of garlic (finely chopped)

1 cup of spinach finely chopped

2-3 tablespoons of finely chopped cilantro

3-4 Tablespoons of Lemon juice less or more depending on your taste

6 cups of organic chicken broth

1/2 cup of orzo gluten free brand

Sea salt and black pepper to taste

2 tablespoon of olive oil


Directions: Season chicken with sea salt and black pepper and set aside. In a stock pot heat oil, add onion, carrot, celery and garlic. Saute until onions turn translucent, add chicken stock, and chicken. Bring to a boil, reduce heat and simmer until chicken is cooked through, about 15-20 minutes. image Add in orzo and cook until orzo is al dente (10 minutes), then stir in spinach, cilantro and lemon juice, turn off fire, serve and enjoy! image image

Strawberry Creamsicles


Strawberry Creamsicle Half and Half bar

Strawberry Creamsicle Half and Half bars

Strawberries and cream, what’s not to love about this combination?  When I was making Orange Creamsicles the other day I decided I’d make a few strawberry cream bars as well.  My daughter loves strawberries, and she loves ice cream, so I thought since it’s so hot out lately I’d give her the best of both worlds.  The verdict? She loved this creamsicle of course–who wouldn’t?  If you are doing this, my suggestion is to use very ripe, and very sweet berries, otherwise you’ll have to add sugar in some form to make these sweet.

Pin It!

Pin It!


Prep time: 5 minutes

Makes 2-3 strawberry creamsicles

Ingredients: 1 cup of pureed organic strawberries

1 cup of heavy cream or coconut cream

1/2 teaspoon of vanilla extract

2 tablespoons of maple syrup

Directions: Add the cream, vanilla extract and maple syrup to a cup, mix well and set aside.  If using classic pop molds, place all ingredients in a blender and blend until well combined.  Divide mixture evenly among molds and freeze for 6-8 hours or until frozen solid. If you are using the Zoku Quick pop maker, Pour the strawberry juice into the molds and allow to set for 2-3 minutes.  At the 2 minute mark siphon out the remaining unfrozen juice with a straw or a unused infant aspirator–I purchased one just for this.  Zoku sells a tool kit for $20 which includes a siphon tool, but the aspirator is $3 and does the job equally as well.  After you have removed all of the juice, pour cream into the molds, and allow to set for another 4-5 minutes, then follow the directions for removing the pops.  If you aren’t going to eat the pops right away, you can store them in sandwhich size zip lock bags and place them in the freezer until you’re ready to eat them.  These never last longer than a few hours in our house, so I can’t say how long you could store them that way.  If you like these, you’ll probably love my Orange creamsicle recipe too. image