DIY Yogurt–How to Make Yogurt

image


I have been wanting to make my own yogurt for a long while now. I have put off making it because I rarely buy milk, unless I want to make ice cream.  The truth is that we don’t drink milk, so there is rarely a need for it in our home.  I was in Whole Food’s the other day and went to pick up a jar of my favorite Bulgarian yogurt, when I thought–now is the time to make my own.  The process is super simple.  I did it with my Sous-vide machine, but you could do this in your slow cooker on low,  in a dehydrator set to 110F, or with just the light of your oven door.

Pin It!


Prep time: 5 minutes

Cook time: 5 minutes Plus 6 hours of non cook time

Ingredients:

4 cups of full fat organic milk

4 tablespoons of full fat organic yogurt–make sure the yogurt that you choose has active live cultures.

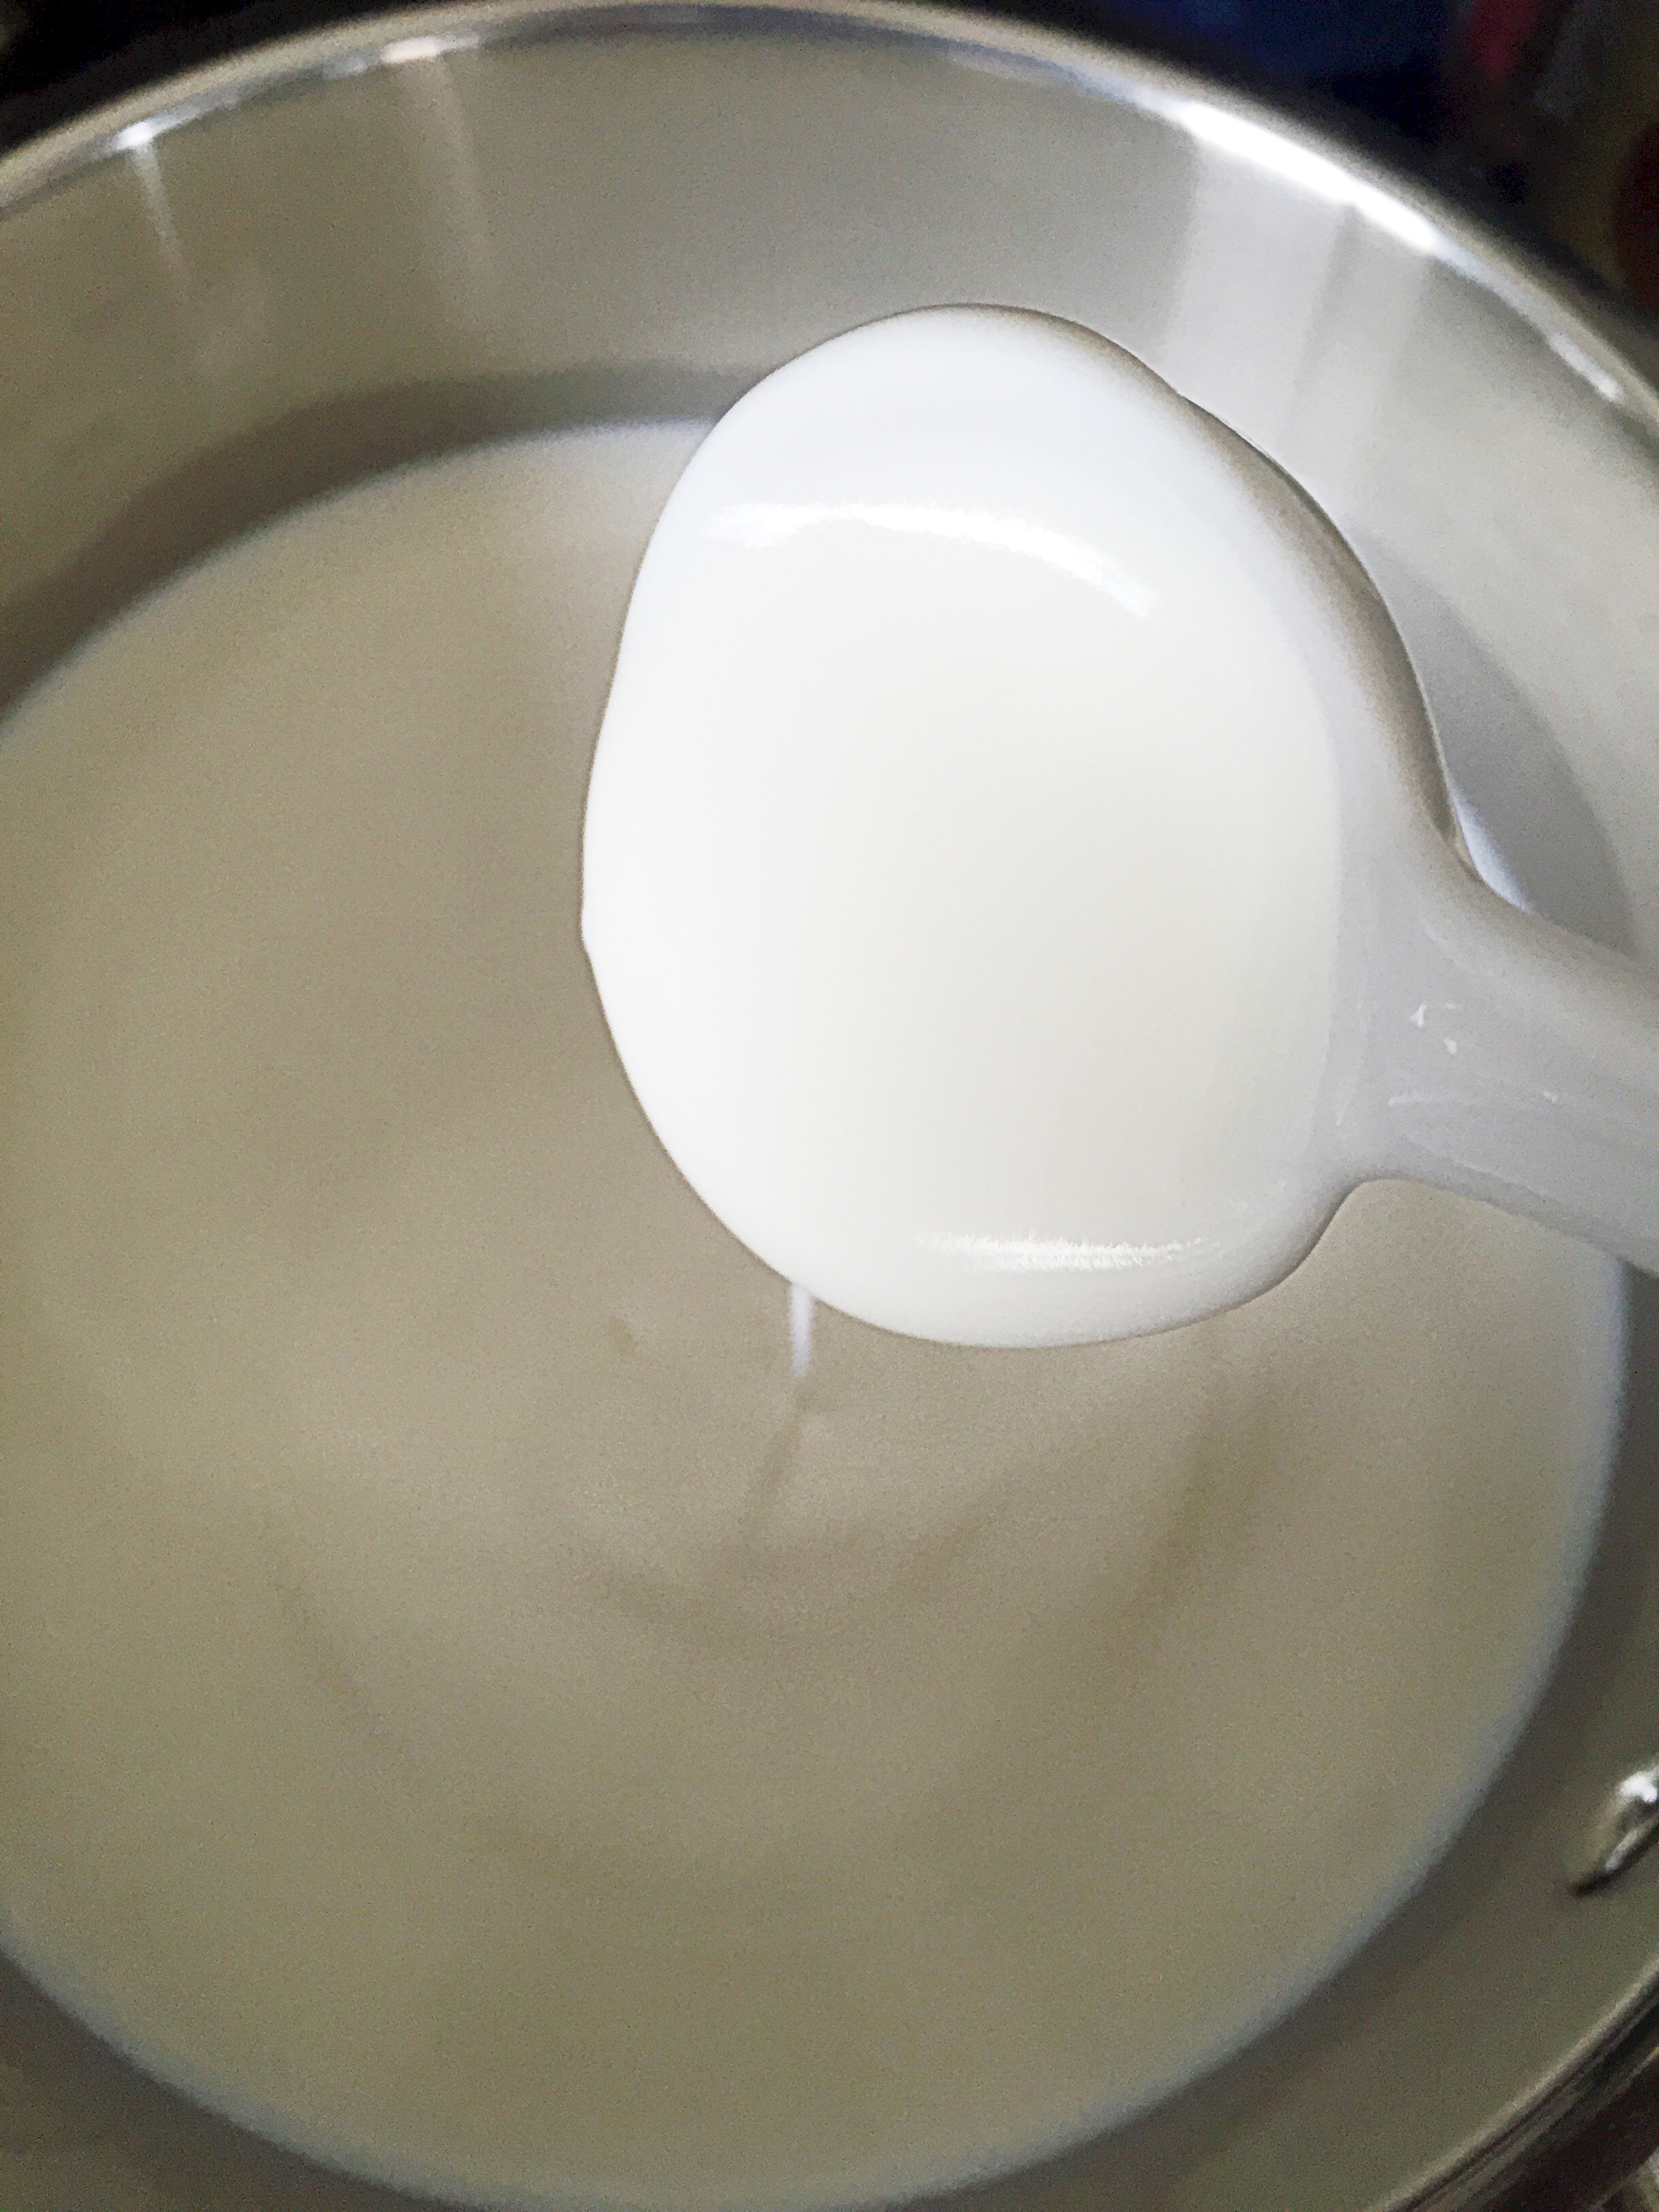
Directions: Heat the milk in a stainless steel sauce pan,

image


When the temperature reaches 110F turn off the fire and whisk in the yogurt.

image


Transfer the mixture to a glass jar,

image

Lightly cap it,

image

If you aren’t using a slow cooker or a immersion circulator, place the jar in the oven and turn on the oven light and allow to culture over night.  If using a slow cooker, fill the cooker with water, place the jar inside and set the cooker to low–or 110F.

If using a circulator, fill a pan with enough water to cover the sides of the jar, set the circulator to 110F and add the jar–let sit for 4-6 hour’s or until the yogurt thickens to the consistency of store bought yogurt–the longer you let the yogurt sit the more tart and thick it becomes–so if you find that you like the consistency and taste at 4 hours then remove it from the heat then–if you like it more tart then let it go for longer–even over night–it’s really up to you, and your preference.

image

Remove from circulator and refrigerate.  Once refrigerated, the yogurt will thicken a bit more, and the whey will separate from the yogurt, you can pour it off or mix it back into the yogurt.

image

The yogurt will keep for up to 2 weeks.  If you plan on making another batch you can use this yogurt as a starter.

image

imageHow easy was that?! I can’t believe I didn’t try this sooner!  The yogurt is delicious!

Follow and Like me on Facebook: http://www.facebook.com/lazygirldinners


Oven-Roasted Broccolini with Lemon-Garlic Parmesan


Oven Roasted Broccolini with Lemon-garlic Parmesan

Oven Roasted Broccolini with Lemon-garlic Parmesan


Going to the Farmer’s market on Sunday has become routine for my family.  My daughter gets excited about going and so do I.  I never know what my weekly meal plan will include until after I’ve forged my way through the market.  This week the pickings were slim.  I don’t know if was just extremely busy before we got to the farmer’s market, or if the farmer’s just didn’t have much to share.  Either way, I left with only two produce items–broccolini and strawberries.  Not my usual bountiful assortment.  I had no idea how I was going to prepare the broccolini, and decided just before cooking it, to roast it and top it with the lemon-garlic parmesan mixture.  The flavors sounded like they would pair well to me, so I took an chance, and I’m so glad I did.  Beside’s my Roasted Broccoli with Garlic–this is new favorite way to prepare broccoli. For my Paleo, Vegan, and Whole 30 friends leave out the cheese, this is still great without it–the lemon really makes this broccolini sing!

Pin It!


Prep time: 5 minutes

Cook time: 10-15 minutes

Ingredients:

1lb of organic broccolini (can sub broccoli)

1/2 cup of freshly grated parmesan cheese

1/2 teaspoon of lemon powder (can sub 1 teaspoon of lemon zest)

3 cloves of garlic, minced

2 Tablespoons of oil plus an additional 2 teaspoons

sea salt to taste

Directions: Pre-heat the oven to 450F.  To a small bowl add parmesan, garlic, and 2 teaspoons of oil,

image

mix well and set aside.

image

Line a bake sheet with foil, add the broccolini, 2 tablespoons of oil, and sea salt and toss well.

image

Place in the oven for 10 minutes.  At the 10 minute mark, remove the sheet pan from the oven, and top with the lemon-garlic parmesan mixture.

image

Return the pan to the oven and cook for an additional 3-5 minutes or until the parmesan browns, remove from oven, serve and enjoy!

image


If you like this recipe you might like my recipe for Roasted Brussel Sprouts with Parmesan, Lemon and red pepper flakes, or my recipe Parmesan Chicken with Roasted Romaine.

Follow and Like me on Facebook:  www.facebook.com/lazygirldinners


Curry Spiced Crab Cakes with Raita

Curry Crab Cakes

Curry Crab Cakes

We have been chugging along here, still trying to help Page adjust to being in school and away from me. Friday was hard, as soon as we pulled up to her school she began to cry. It was so hard to leave her, she was crying and begging me not to–this parenting gig is hard! Despite the hard drop off, she did much better through out the day, than she had the day before…baby steps.  In other more happy news, we got a new refrigerator! We settled on a Kenmore Elite LG Grab-N-Go and we could not be more happy. Our old refrigerator was 20 years old, so we could have gotten away with getting something much less expensive and it still would have been an upgrade for us.  The Grab-n-go feature is great, but what really sold me on this refrigerator was the airtight compartment it has. I’ve had a bundle of kale in the airtight compartment for 2 weeks, it is still as fresh, and crisp as the day I bought it.  It would have been trashed in my old refrigerator.   Now on to the crab cakes. I love crab cakes, and I love crab curry.  so why not combine the two? I topped these with raita,  but these are equally as delicious all on their own alone.

Pin It!

Prep time: 10 minutes

Cook time: 10 minutes

Ingredients:

8 ounces lump crab meat

1 egg

2-3 tablespoons coconut flour

1/4 teaspoon lime powder (or zest)

3 tablespoons of finely chopped cilantro

2 teaspoons of curry powder

1/4 cup of onion, finely chopped

1 large garlic clove minced

1 tablespoon of lime juice

2 tablespoons of oil, I used olive

2-3 Tablespoons of butter or ghee for frying crab cakes

Sea salt to taste

Recipe for Raita

1/2 cup of full fat organic yogurt

1/4 cup of chopped tomatoes

1/4 cup of chopped cucumber

3 tablespoons of finely chopped red onion

3 tablespoons of cilantro, finely chopped

sea salt to taste

Directions for raita :  Combine all ingredients in a bowl and refrigerate until ready to use.

Directions for crab cakes: Heat oil in a saute pan, add in onion garlic and curry seasoning, cook for 2-5 minutes or onions turn translucent.

image

Transfer onion curry mixture to a bowl to cool ( 5 minutes).

image

Add in crab meat, cilantro, egg, lime zest and coconut flour and combine well.

image

Once crab mixture has come together form patties for frying.  Heat the butter or ghee in a skillet, add crab patties and fry until golden brown on both sides, about 4 minutes on each side.

image

Remove from heat and enjoy!

imageIf you like this recipe you may like my other crab recipes:  crab cakes, crab fried rice,  steamed crab recipe or crab taco’s.

Green Bean Chicken

Green beans with Chicken

Green beans with Chicken

We are having a rough week here. Page is finding adjusting to school harder than any of us had hoped. She was fine initially, but has had a delayed reaction to being separated from me.  Yesterday was an especially hard day for us all.  She cried all day at school, and when I picked her up from school my heart just broke.  She looked like she had been crying all day, and the way she fell into my arms…let’s just say that I was reduced to one giant puddle! Needless to say, I never got around to posting my blog yesterday.

A few weeks ago we were out running the last of our Christmas errands, and stopped to eat a Chinese restaurant.  As we browsed the menu, I asked Page what she wanted to eat.  She quickly removed the menu from my hands, took a few seconds and said “I want the green beans mom!”  With her tiny finger she pointed to a picture of a plate of glimmering green beans and said ” I want this one!” Under normal circumstances I would ignore her, and get her what I think she might eat, but she was so confident in her choice that I ordered the green bean chicken for us to share. I’m so glad I did!  I don’t know who enjoyed the dish more, me or Page.  The beans were crisp and fresh, and Page devoured almost all of them!  The moment I tasted this dish, I knew that I had to try to recreate it at home.

Pin It!

Prep time: 10 minutes

Cook time: 15 minutes

Ingredients:

1 pound of fresh  organic green beans, ends trimmed

1 tablespoon of garlic paste

1 teaspoon of ginger paste

2 tablespoons of soy sauce

3 tablespoons of rice vinegar

1 chicken breast. cubed

sea salt to taste

Directions: Heat the oil, garlic and ginger paste in a saute pan just until the garlic and ginger become fragrant (about 30 seconds).

image

Season the chicken with sea salt and add it to the hot pan.  Toss well, and allow the chicken to cook through about (5-7 minutes).

image

Once chicken has cooked through, add in the soy sauce, rice vinegar and green beans.

image

Cook for an additional 5-7 minutes–the green beans should still be crisp, remove from heat, serve and enjoy!

image

Oven Roasted Sweet Potatoes with Rosemary

Oven Roasted Sweet Potatoes With Rosemary

Oven Roasted Sweet Potatoes With Rosemary


Do you like sweet potatoes?  I love them!  My husband–not so much!  Enter this recipe and he is a convert!  I just love a recipe that can convert someone, don’t you? The best part of this recipe? Three ingredients AND it’s super easy!

Pin It!


Prep time: 5 minutes

Cook time: 20 minutes

Ingredients:

3 cups of cubed organic sweet potato

1 tablespoon of fresh or dried rosemary

2 tablespoons of coconut or olive oil

sea salt to taste

Directions: Pre-heat your oven to 425F.  In a large bowl toss together the sweet potato cubes, rosemary, sea salt, and oil–making sure that all of the potatoes get coated in oil.

image

Add the potatoes to a foil lined bake sheet and cook in the oven for 15-20 minutes or until potatoes take on some color.  Remove from the oven, serve and enjoy!

image

How to make Bone Broth- with Chicken Feet

How to Make Bone Broth

How to Make Bone Broth


Now that the Holiday’s are over, I’m getting back to my normal routine.  We had such a busy holiday season that I’m not sure what my normal routine was. The last week I’ve spent both nursing a cold and searching for a new refrigerator.  Our current refrigerator is on it’s final leg, and before it gives out completely we need to replace it.  I was in Whole Foods the other day in search of some chicken backs in order to make stock to nurse my cold and my daughters and of course they were clean out.  The butcher was ready with an alternative–chicken feet! He said that they had just gotten a big shipment in, because people had been requesting them in order to make bone broth to fight off the flu and cold that is going around.  With no other options to available to make my broth, I left the store with 2 pounds of chicken feet.   I’ve actually only ever seen chicken feet on live chicken’s and occasionally in a silver tin when I go out with my girl friends to have dim sum.  I can’t say that in either instance that they’ve been an appetizing sight! This instance provided no exception!  It took me a while to even convince myself that I could handle cooking them.  However, I pushed through the ick factor and managed, to make a delicious bone broth for us to consume.  Not surprisingly making stock with chicken feet provides a nutrient rich broth.  Chicken feet have a lot of bones, and when cooked slowly or under pressure you’re able to extract most of the nutrients from those bones.  Also at $2.00/pound this is the most economical way to make broth that I’ve come across.

Pin It!


Prep time: 10 minutes

Cook time: 1.5-2 hours


Ingredients:

1 lb of organic chicken feet

1 cup of carrots diced

1 cup of celery diced

1 large onion diced

2 tablespoons of grape seed oil

7 cups of water

sea salt and black pepper to taste

Directions: Heat the oil over medium heat. Add in chicken feet and allow to brown (7-10 minutes).  Add in carrots, celery, and onion and allow to cook an additional 4 minutes.  Add in water and seal in pressure cooker for 1.5-2 hours.

IMG_5692 (1)

If you’re doing this stove stop, cook for a minimum of 2 hours on medium low heat, and add additional water as stock boils down.  After stock has cooked for 2 hours remove from heat, let cool for 10-15 minutes, then strain, removing all solids before transferring to an airtight container. This makes about 4-5 cups of stock.

How to make Bone Broth

How to make Bone Broth

So tell me, have you ever cooked or eaten chicken feet?  Although I’ve seen them while having Dim Sum with my friends, I have never tried them.  I just can’t bring myself to do it–at least not so far!